Our easy homemade pie crust, buttery, flaky, and best of all, EASY! We've broken down this basic pie crust recipe by step so even the most novice baker can handle it!Butter vs. Shortening
This is a debate that has gone on for YEARS! Which is better, butter or shortening? Butter definitely has shortening beat on flavor. But shortening adds that extra flaky factor. Something else to consider is that butter has more water in it than shortening so it actually helps your crust puff up and steam a bunch. So why are we fighting over the two? LET'S USE BOTH!
Why do the butter and shortening need to be cold? And why does the water need to be cold?
Cold Butter/Shortening: We want to keep our butter and shortening cold that it will coat our flour and create little pockets of fat. So that when we go to bake our crust in the oven the water we've added will steam in between these layers and create a nice flaky texture! It also helps coat our flour in fat, making it resist the water even more, which prevents it from forming gluten! Which is key to making our easy homemade pie crust.
Cold Water: There are two reasons we use ice water when making a pie crust, first off, it helps keep your butter and shortening cold, which as we explained above is very important! The second reason, it that when the water is cold the flour proteins won't be absorbed as easily and they will resist forming gluten. Why don't we want it forming gluten? So that our pie crust is extra tender of course!
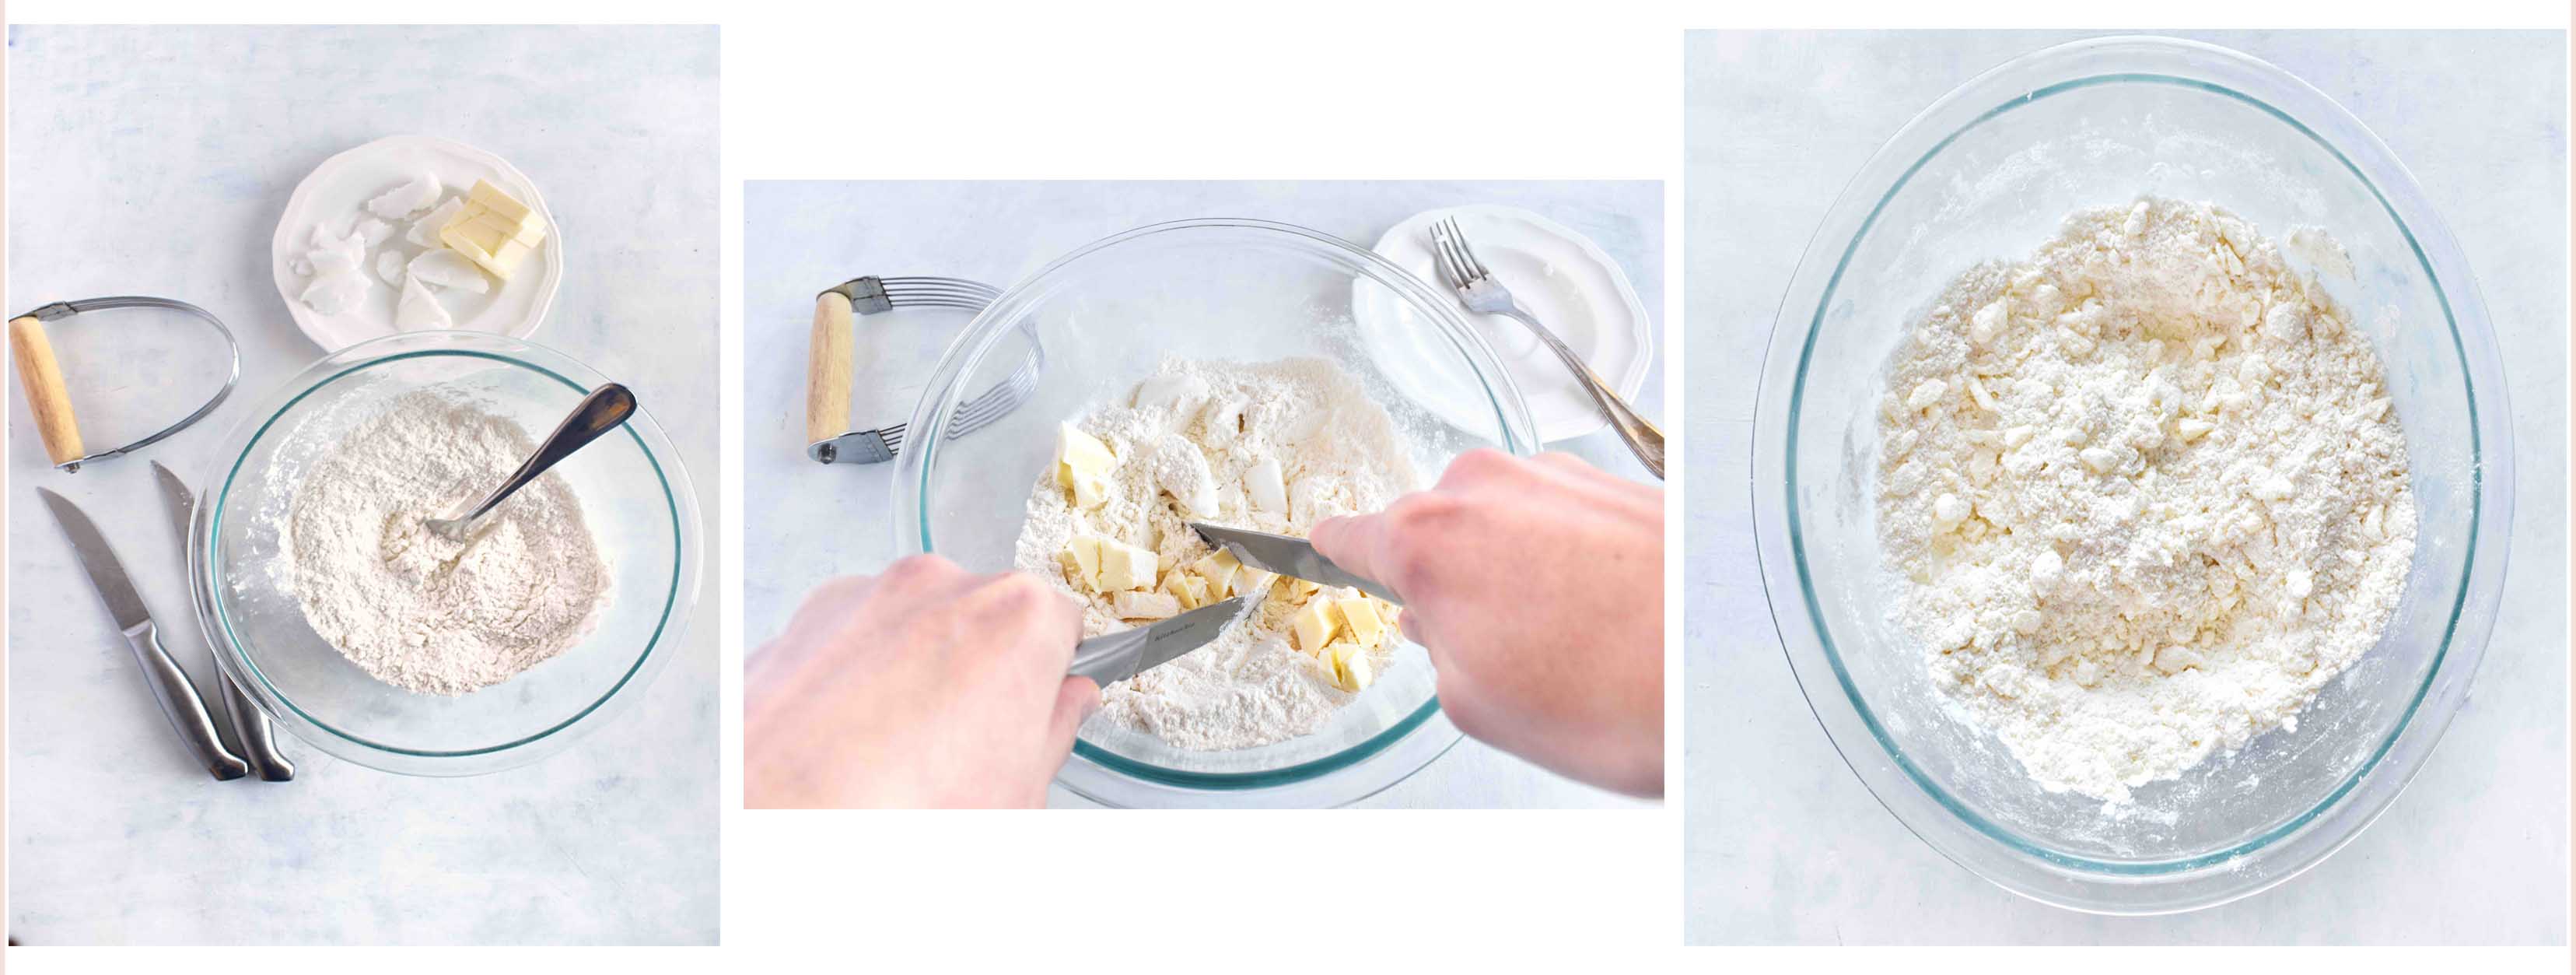
Cutting Your Butter and Shortening into your Flour
Start by mixing together your dry ingredients-flour, sugar, and salt. Then take two knives and cut your butter and shortening into your dry mixture. Your butter and shortening chunks should be no larger than a pea, and at this point your mixture will resemble breadcrumbs.
Different Methods of cutting your butter in
If you don't want to use two knives to cut in your butter and shortening your other option is to use a pastry blender like this:
Or you can use a food processor, which is definitely the quickest method and will give you an even butter/shortening distribution in your pie crust.
My favorite food processor is a Cuisinart, but any food processor should be able to handle this simple task!
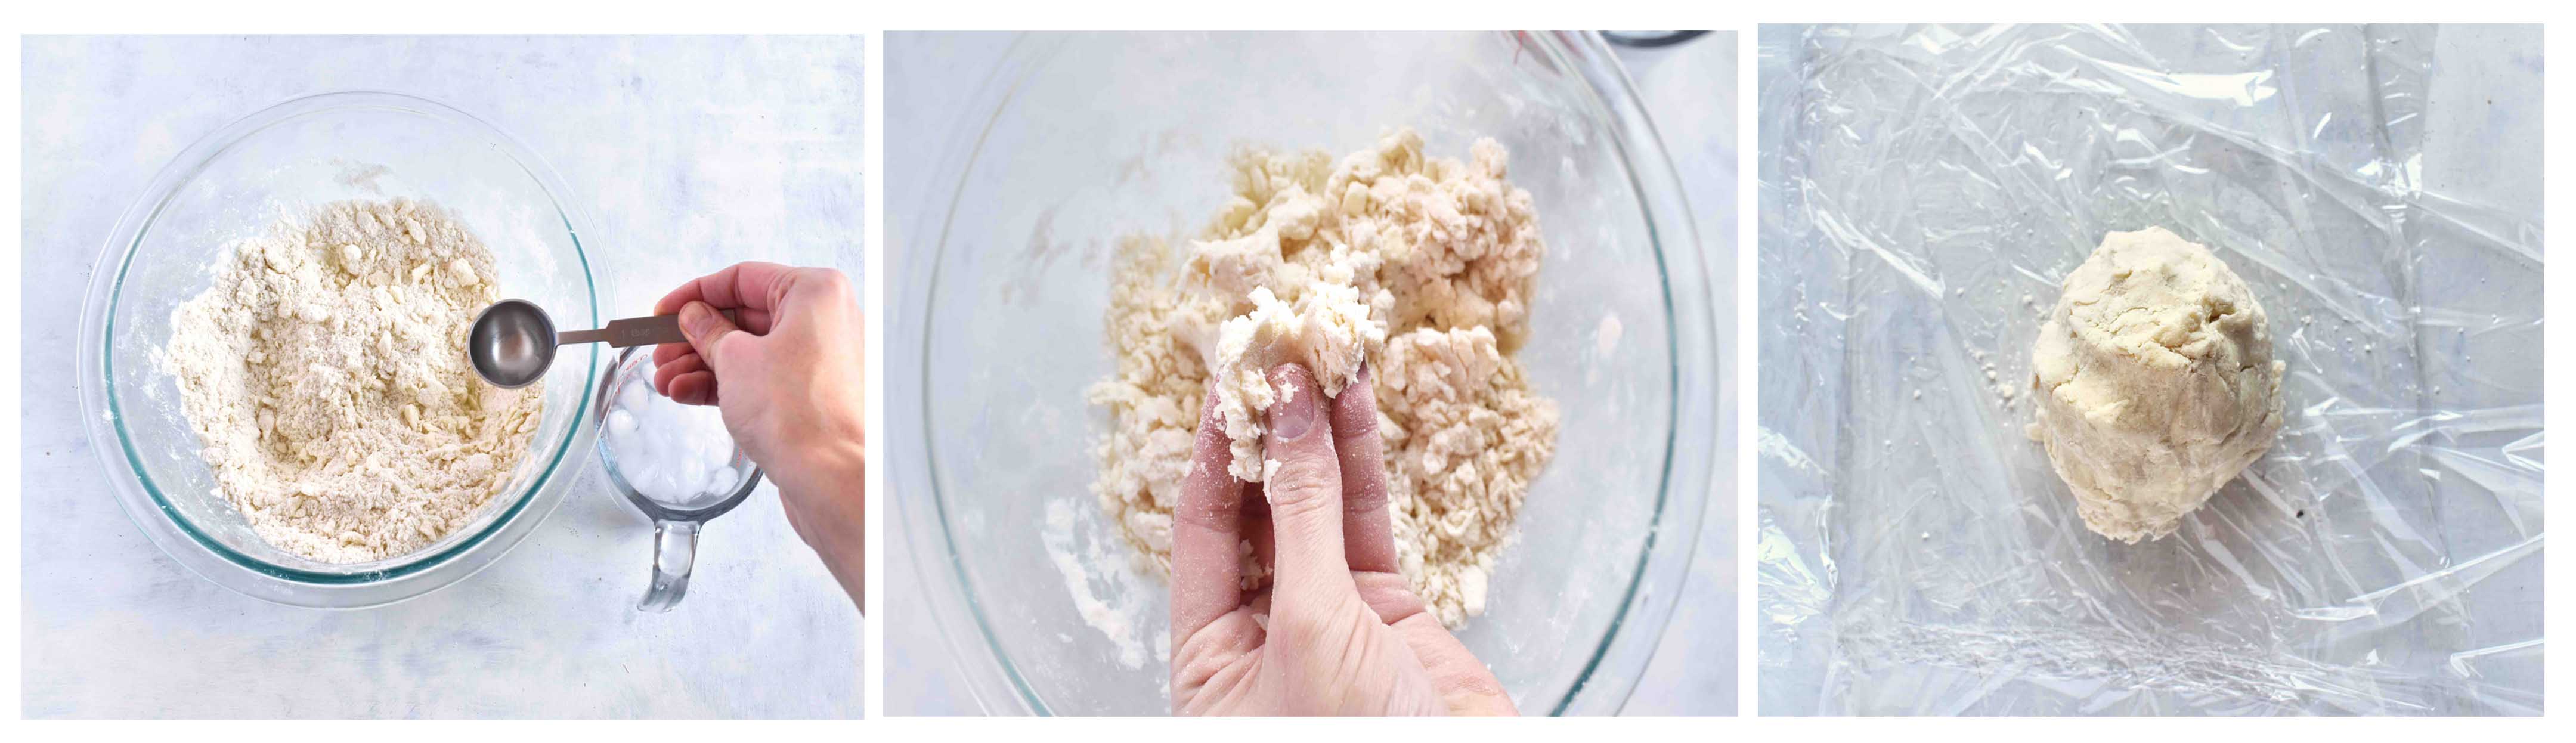
Add Ice Water
Add your ice cold water and stir together. You DO NOT want to overwork this dough. The mixture might still seem a little dry and crumble.
TEST IT: pinch the dough between your fingers, does it stick together?
- Yes-Perfect!
- No-add another tablespoon of water, mix, and test it again!
Form your dough into a ball quickly, you don't want the heat from your hands to warm up the butter and shortening! Wrap your dough in plastic wrap and refrigerate for at least 1 hour.
Freeze your homemade pie crust for the future!
You can always take your plastic wrapped pie crust and stick it in the freezer for a later date! You can freeze it for about 4 months, just make sure you thaw it until it's soft enough to roll out.
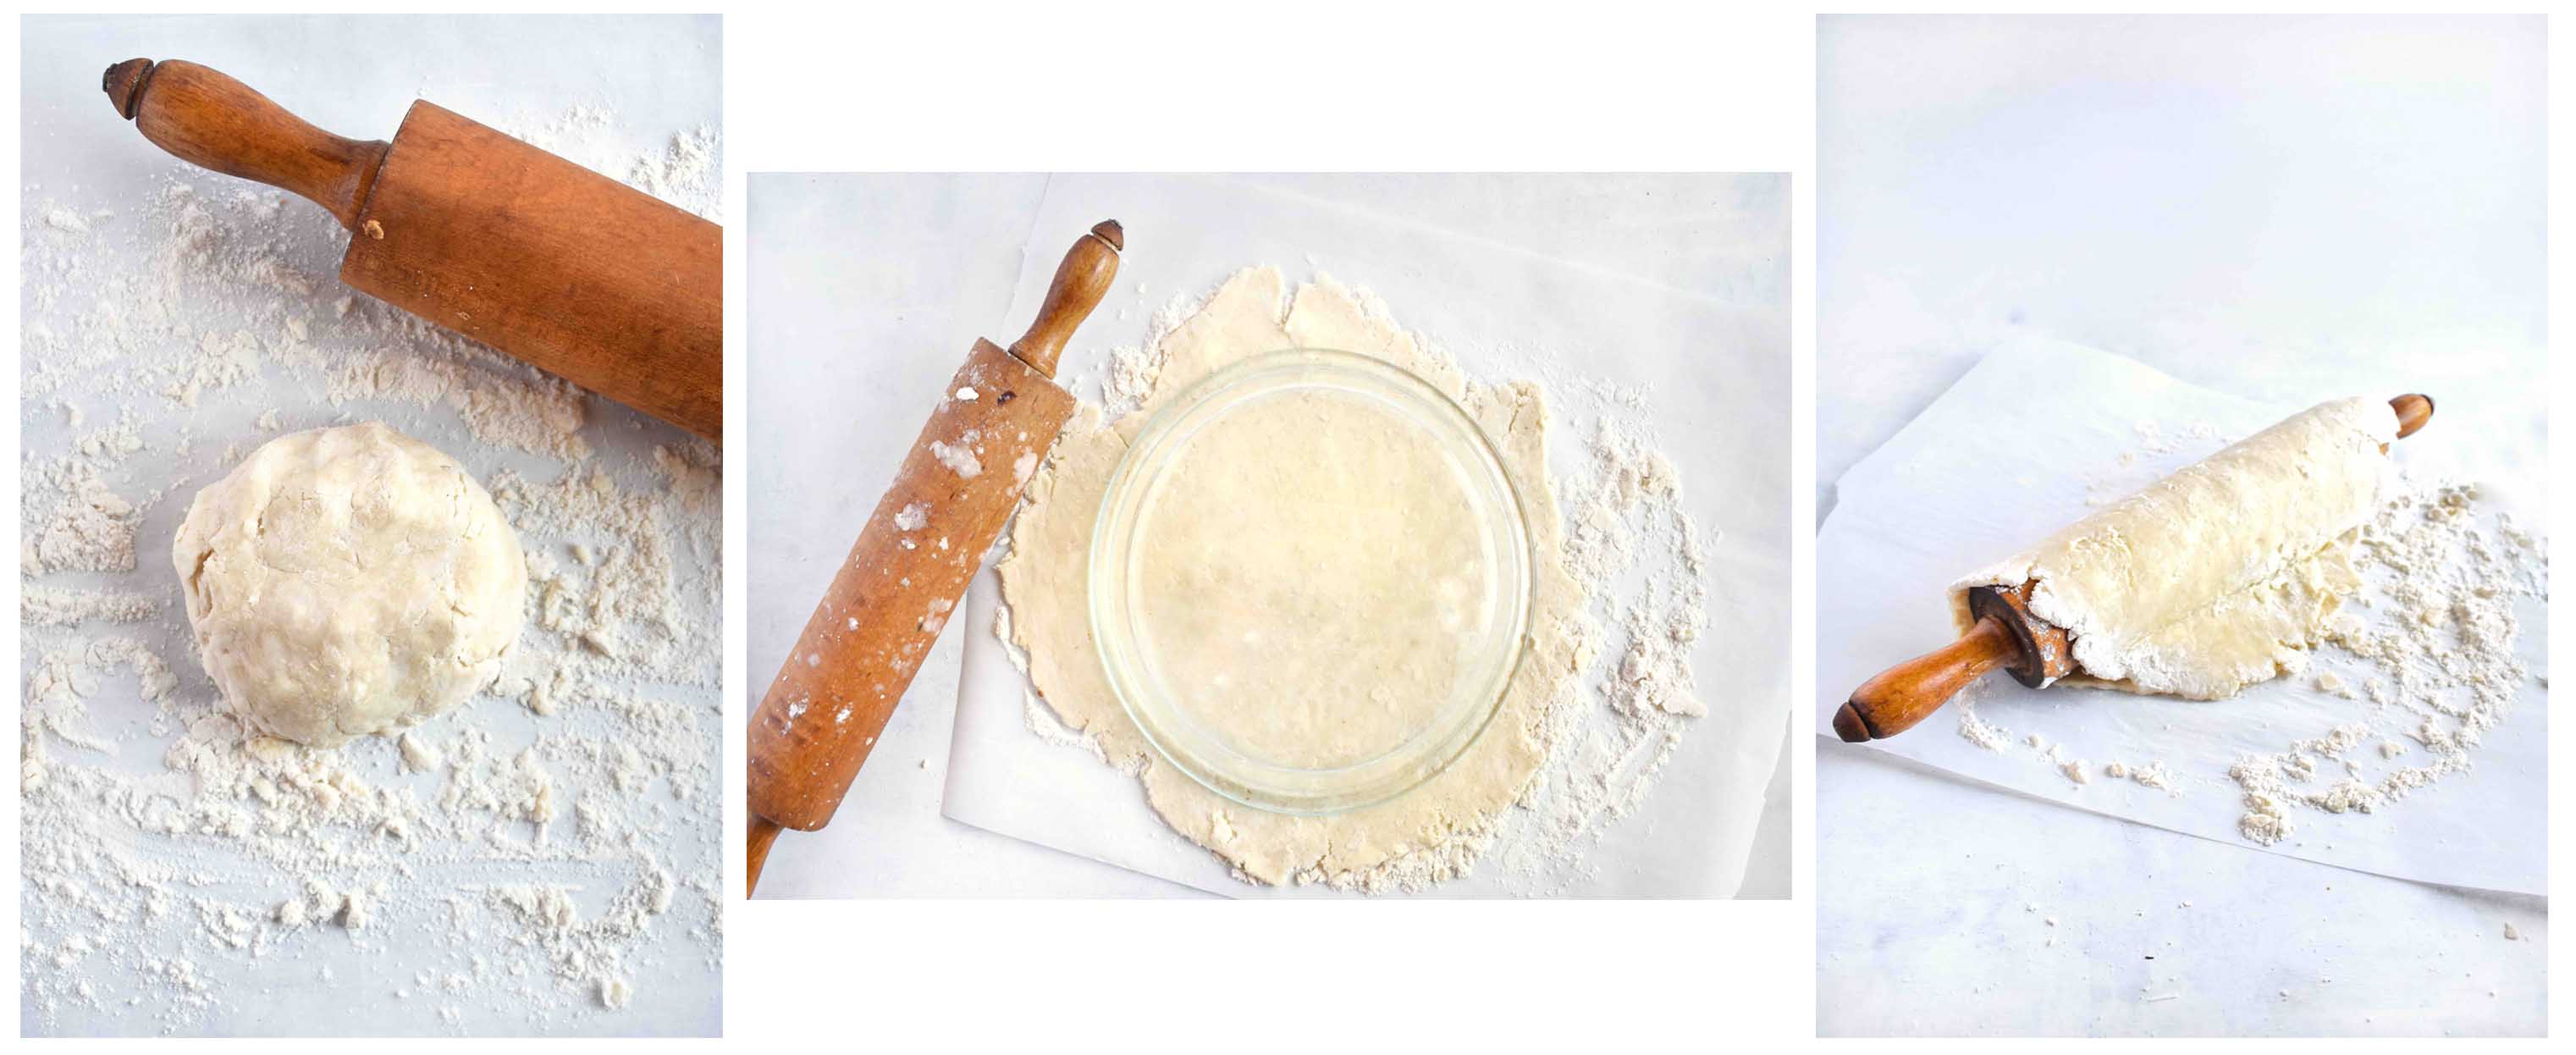
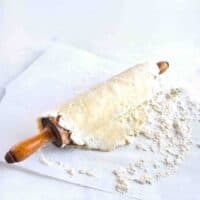
Roll out your pie crust!
Once your dough has chilled for 1 hour, place it on the counter for 5 minutes place it on a floured work surface. Take your rolling pin and alternate which ways your roll the dough, always starting in the center and rolling out.
You want your dough to be about ⅛" thick. You'll want your crust to be about 1" bigger than your pie dish, you can check this by turning your pie dish upside down over top to check the size.
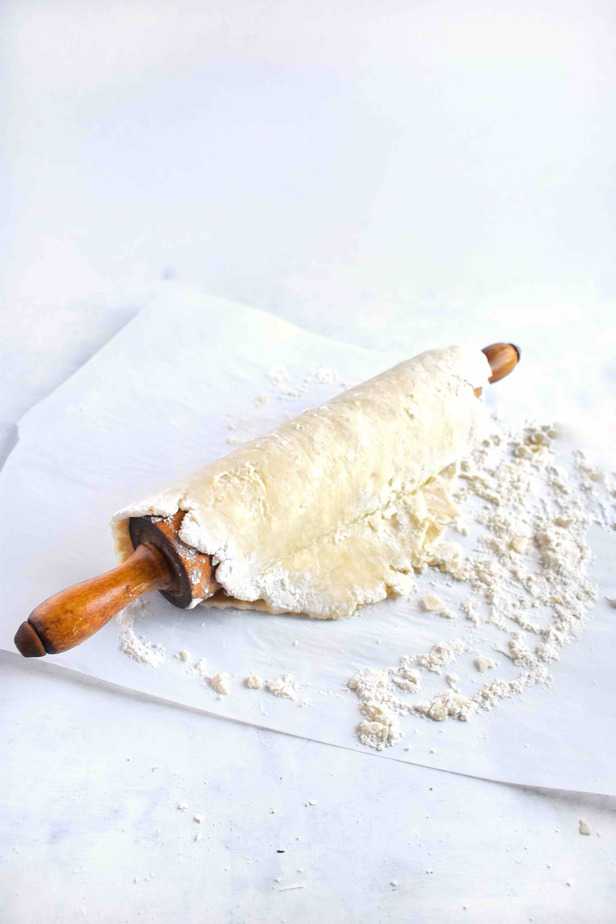
Once your crust is the right size, loosely drape it over your rolling pin and use it to aid you in lifting the pie crust into your pie dish.
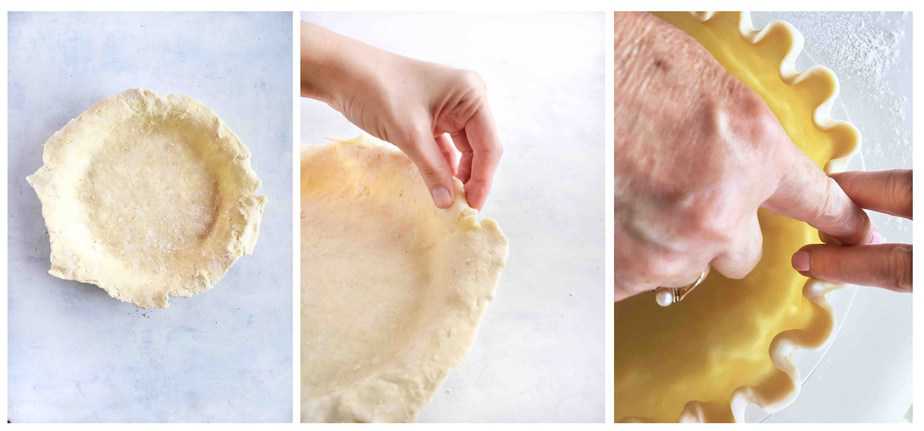
Give your homemade pie crust an edge
Depending on what finishing your want for your pie crust will determine how you want to trim your crust.
If you want a simple edge, you can trim to the size of the pie dish and use the fork tines to press down and add a decorative edge.
For a thick edge, trim your crust so that you have a ½" hanging over and then fold the excess under on itself.
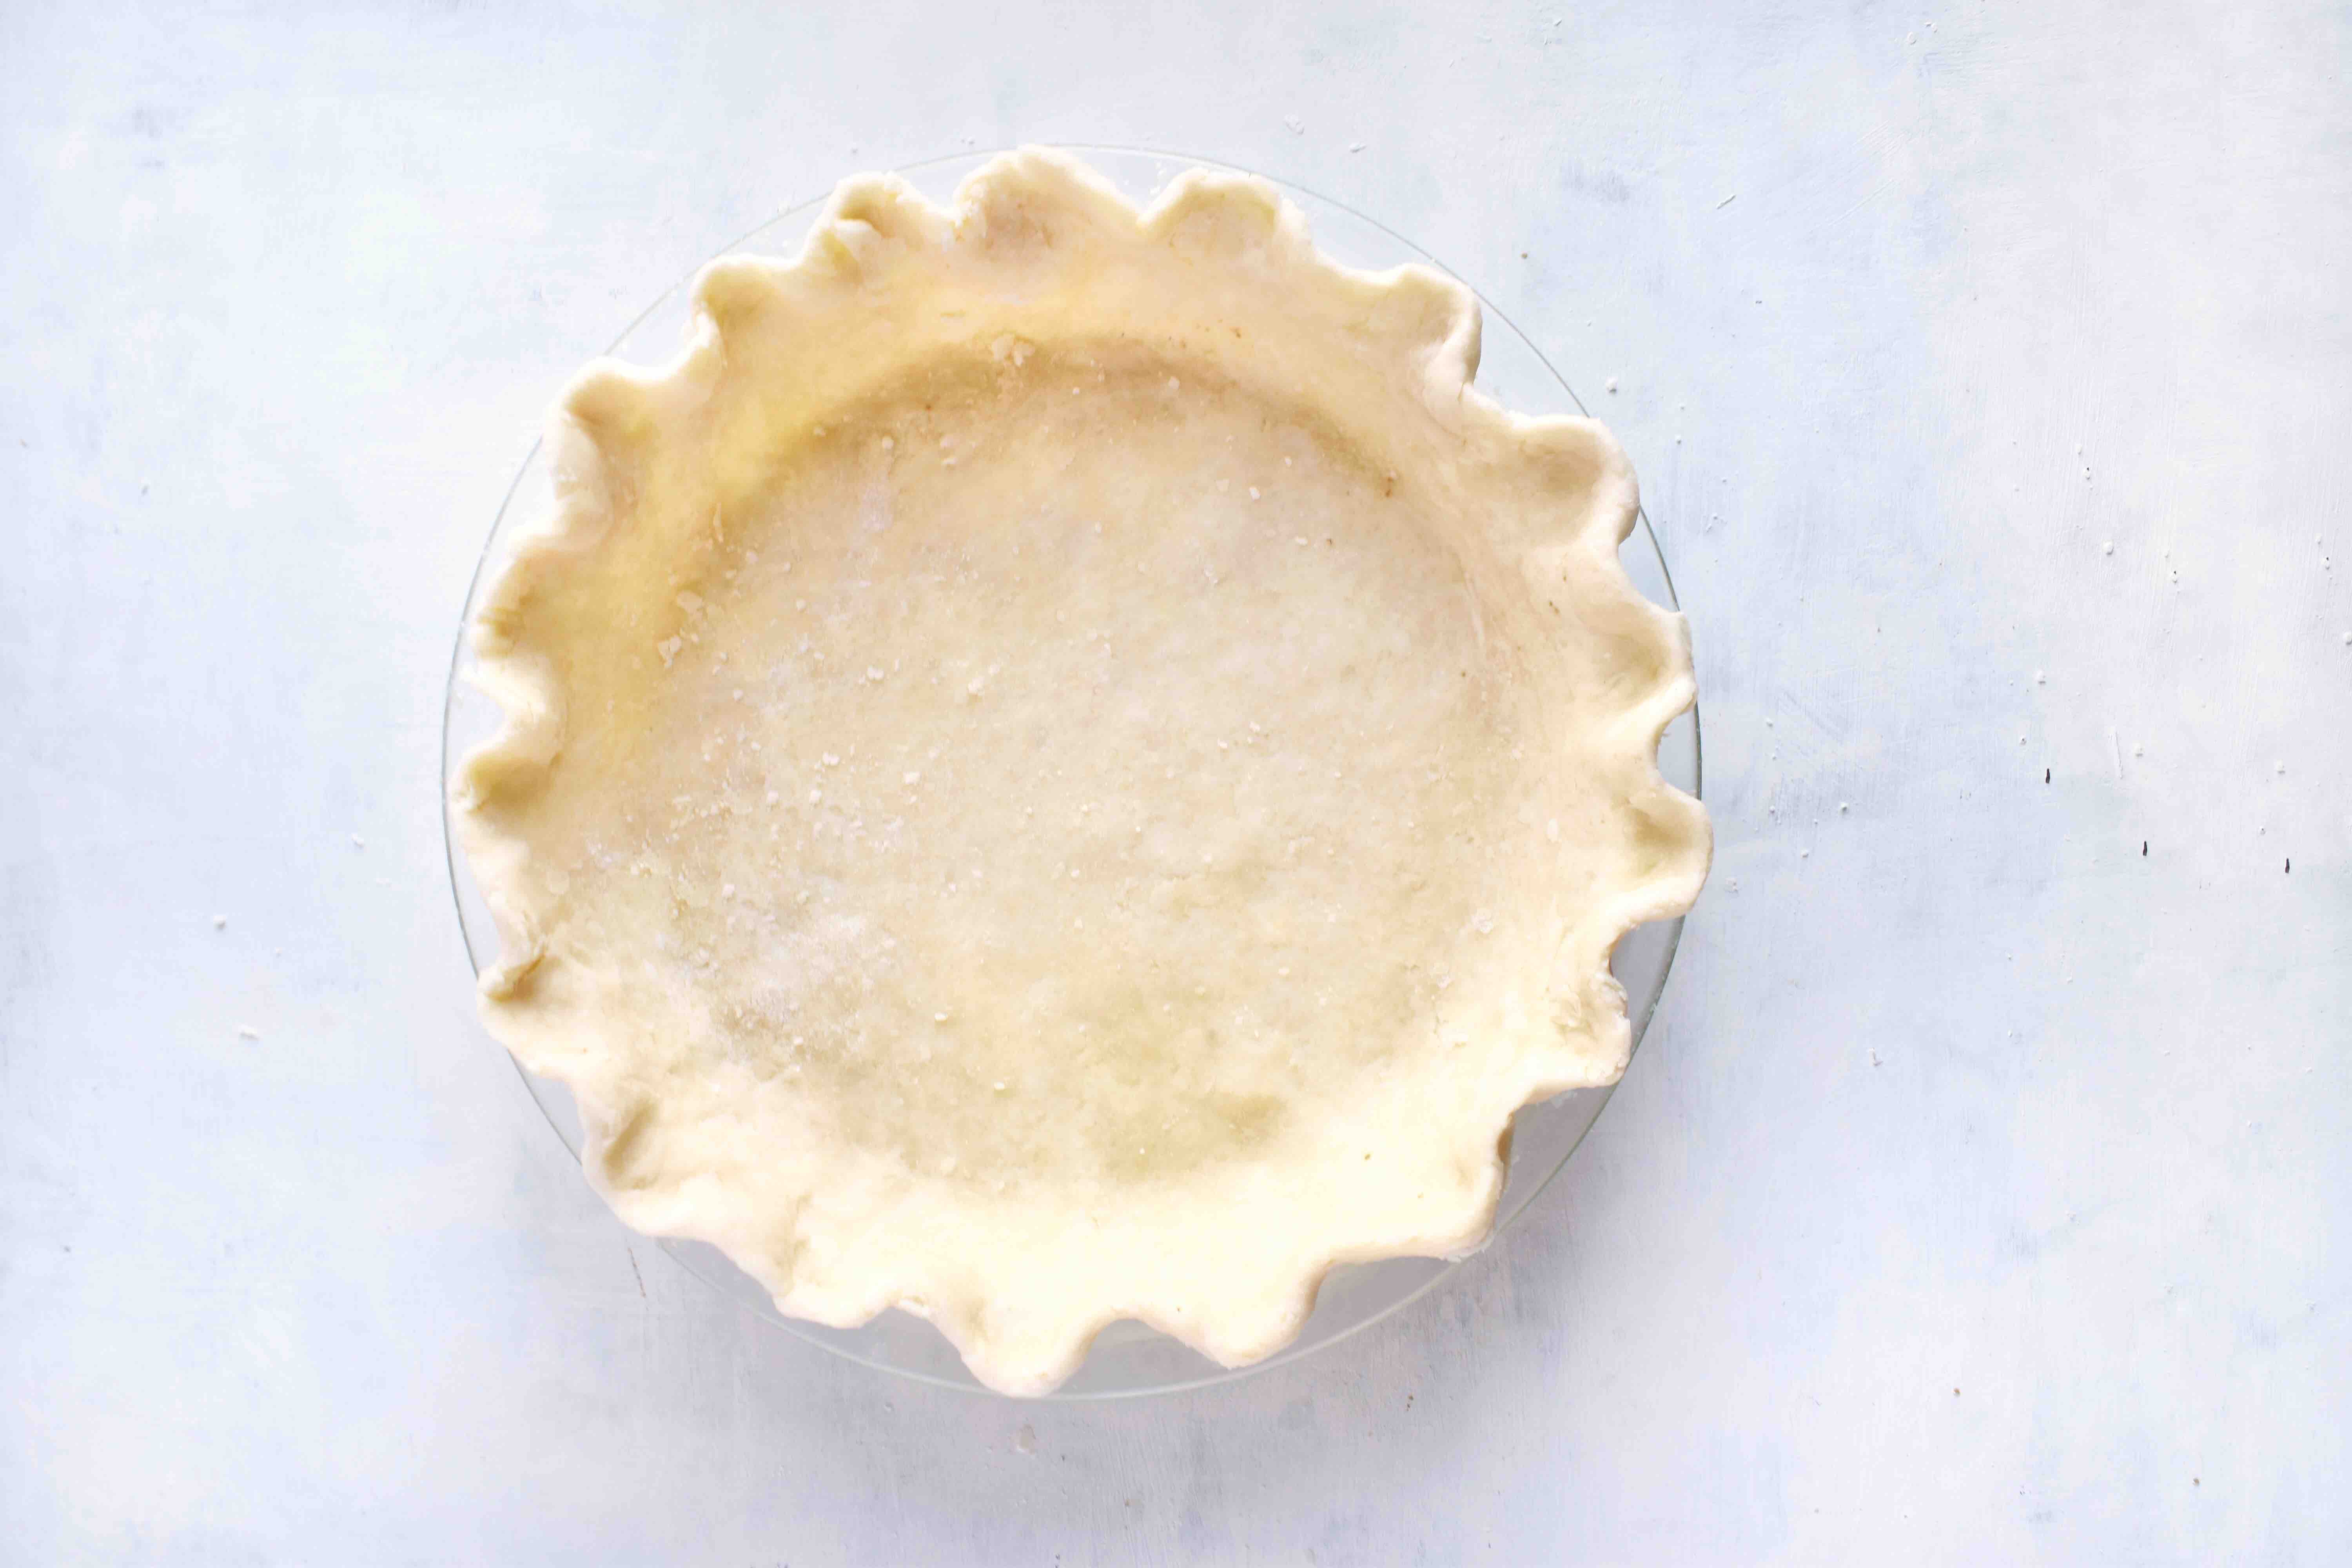
Now, if you'd like to add a fluted edge, like shown in the last picture, trim your crust so that you have a ½" hanging over the edge of the pie dish, fold the edges under, and then using your forefinger and thumb created the fluted edges
How to Blind Bake a Pie Crust
One technique that might be new to you, is blind baking. Blind baking is where you bake your crust without filling. You only want to use this technique if you are planning on putting in a filling that DOES NOT need to be baked, like a cream pie. So if you are planning on baking the filling in the pie crust, go ahead and skip this step.
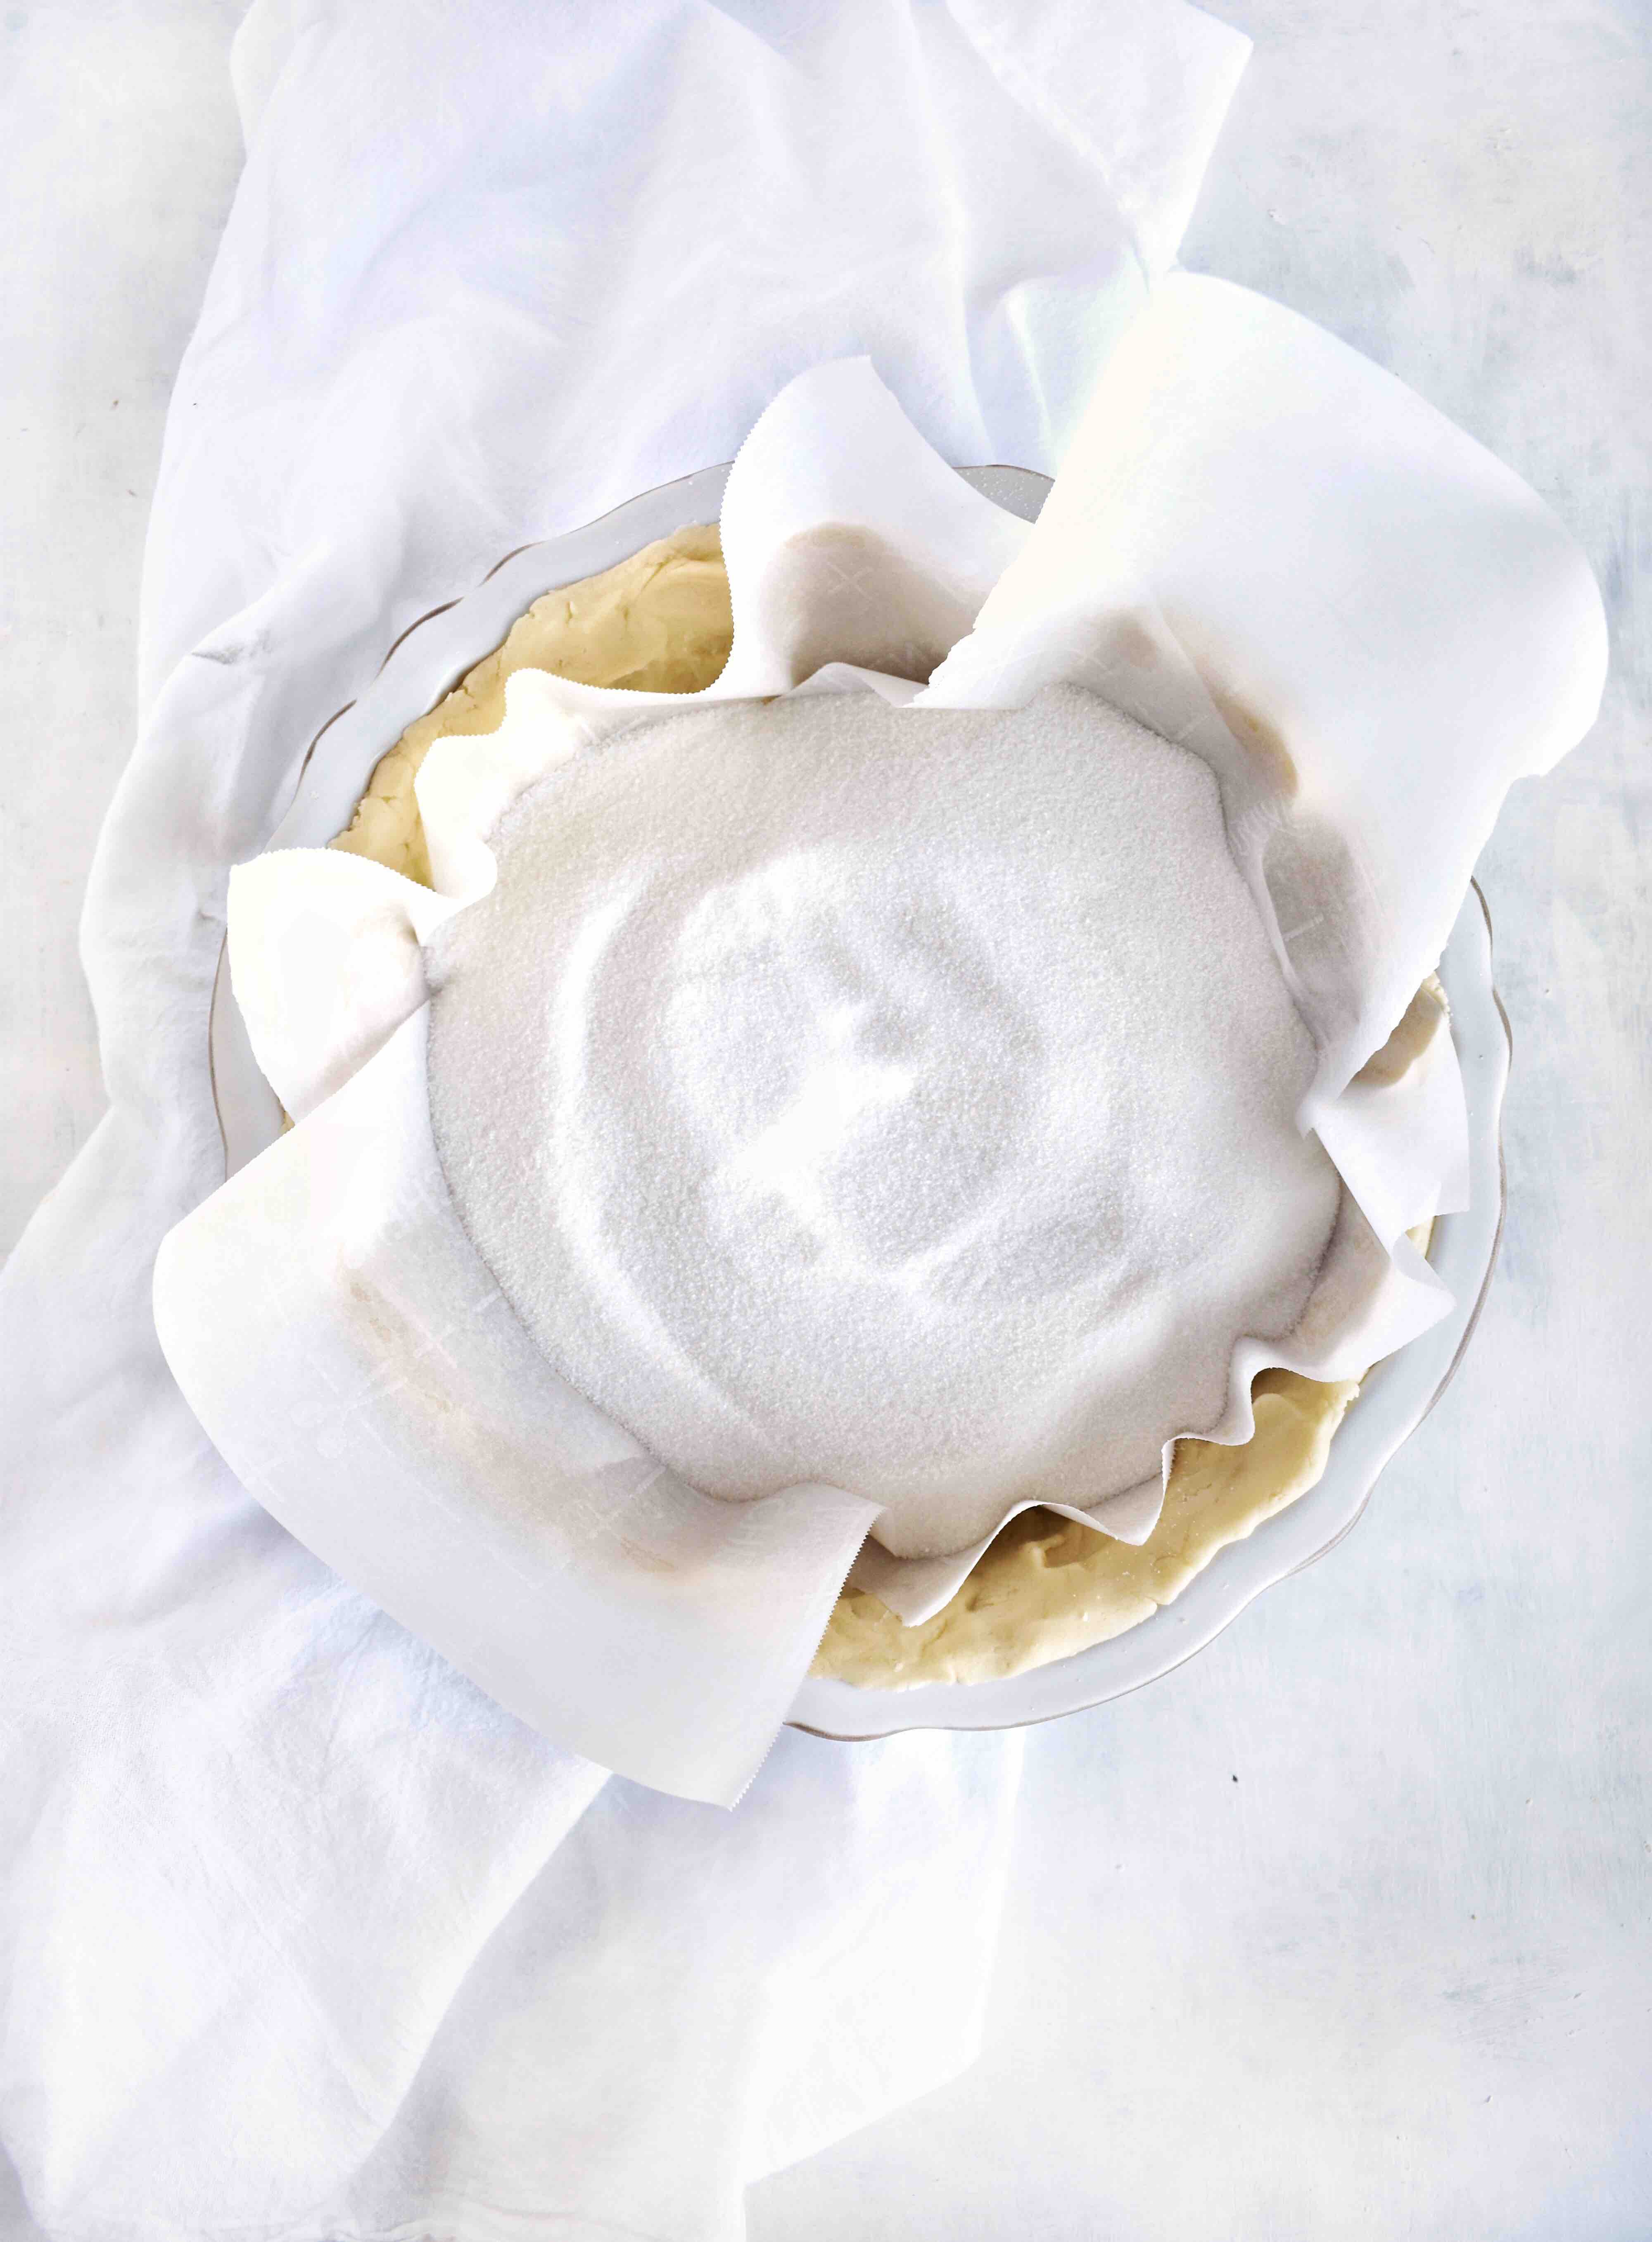
Weighing down your pie crust
One important step in blind baking is weighting down your crust. We don't want pie crust to lose its shape while it bakes so we are going to weight it down. There are a few different ways you can weigh down crust-pie weights, dry beans, or sugar.
The first thing you'll want to do is place a large piece of foil or parchment paper in your pie crust to act as a barrier between your crust and whatever you use to weigh it down. You'll then fill that foil or parchment paper with either pie weights, dry beans, or granulated sugar (NOT powdered sugar).
You can purchase pie weights like these one from Amazon and they can be used over and over again for years to come!
If you are not blind baking your crust, fill it with your pie filling of crust and continue with your pie's baking instructions.
Scroll down for some great recipes to test out this pie crust recipe with!
If you're wanting to try out some different types of pie crusts, check out these other recipes!
Enjoy!
Alyssa
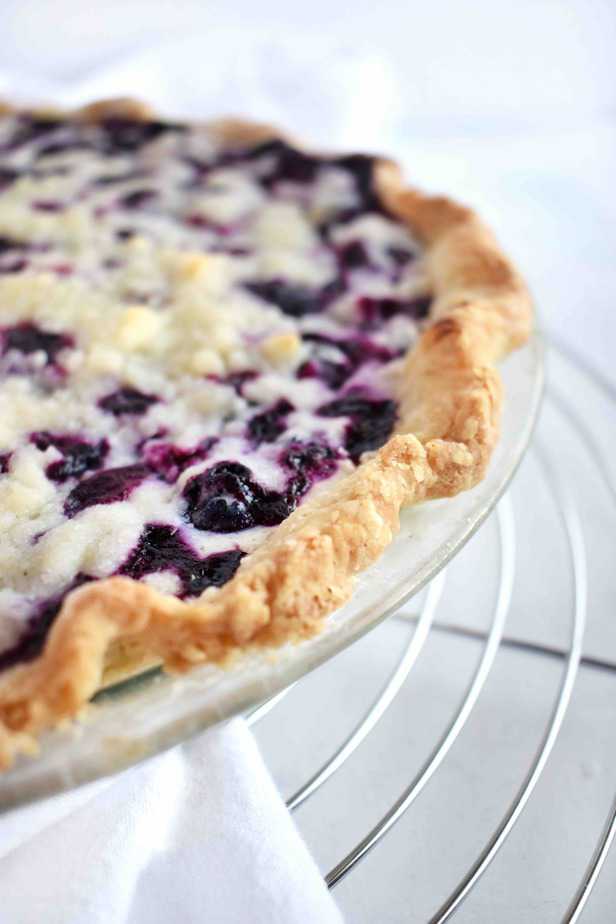
Test out this pie crust recipe on some of our favorite pies!
Don't forget to pin this recipe for later! You can also follow us on Pinterest here!
Tried this recipe and loved it? Comment and Rate it! Also send us a picture, WE WANT TO SEE!
Easy Homemade Pie Crust
Ingredients
- 1 ¼ cup flour measured correctly
- ¼ cup butter cold
- ¼ cup shortening cold
- 1 tablespoon sugar
- ½ teaspoon salt
- 4 tablespoons ice water
Instructions
- In a bowl mix together your flour, sugar, and salt. Then cut your cold butter and cold shortening into your dry mixture using either two knives, a pastry blender, or a food processor. Cut your butter and shortening in until you have a rugged mixture, it should resemble bread crumbs.
- Add your 4 tablespoons of water to your mixture,
stir together. The mixture will still be a little dry and crumbly. If you can pinch the dough together with your hands then the dough is ready! If it’s still too dry you can add another tablespoon of ice water. - Work the dough together with your hands, into a ball. It should come together quickly, don’t work it with your hands for long, you don’t want to warm the butter or shortening up.
- Wrap your dough with plastic wrap and refrigerate for at least 1 hour. If you are making this dough for the future, freeze it at this point.
- After you’ve chilled your dough, let your dough sit on the counter for 5 minutes before attempting to roll out. Flour your work surface, roll your dough out into a circle about ⅛” thick. You’ll want your circle to be about 1” bigger than the pie dish. Turn your pie dish upside down over top of your circle to check for the size.
- Use your rolling pin to help lift your pie crust
into the pie dish. - Depending on what finishing your want for your pie crust will determine how you want to trim your crust. If you want a simple edge, you can trim to the size of the pie dish and use the fork tines to press down and add a decorative edge. f you want a thick edge, trim your crust so that you have a ½” hanging over and then fold the excess under on itself. If you want a fluted edge, trim your crust so that you have a ½” hanging over the edge of the pie dish, fold the edges under, and then using your forefinger and thumb created the fluted edges
- Chill your pie crust for 30 minutes in the fridge or place it in the freezer for 10 minutes so that the pie crust will hold its shape in the oven.
- If you are pre-baking your pie crust, line your unbaked pie crust with foil or parchment paper and fill it with pie weights, dry beans or sugar. Bake at 400 degrees for 20-30 minutes. Cool completely before adding your filling.
- If you are not blind baking your crust, fill it with your pie filling of crust and continue with your pie’s baking instructions.
Nutrition
Share it on Instagram and tag us and tag #infinetasterecipes so we can see it!
Are you part of our Facebook Page? Follow along with what's new on In Fine Taste, share YOUR favorite recipes, ask questions, post pictures of what your making, and more! Like our page HERE
Or Try These Other Pie Recipes from some of our foodie friends!
Southern Sweet Potato Pie from Spoonful of Flavor
Pumpkin Pie from Shugary Sweets


Ashley says
We love this pie crust recipe! So easy and delicous.