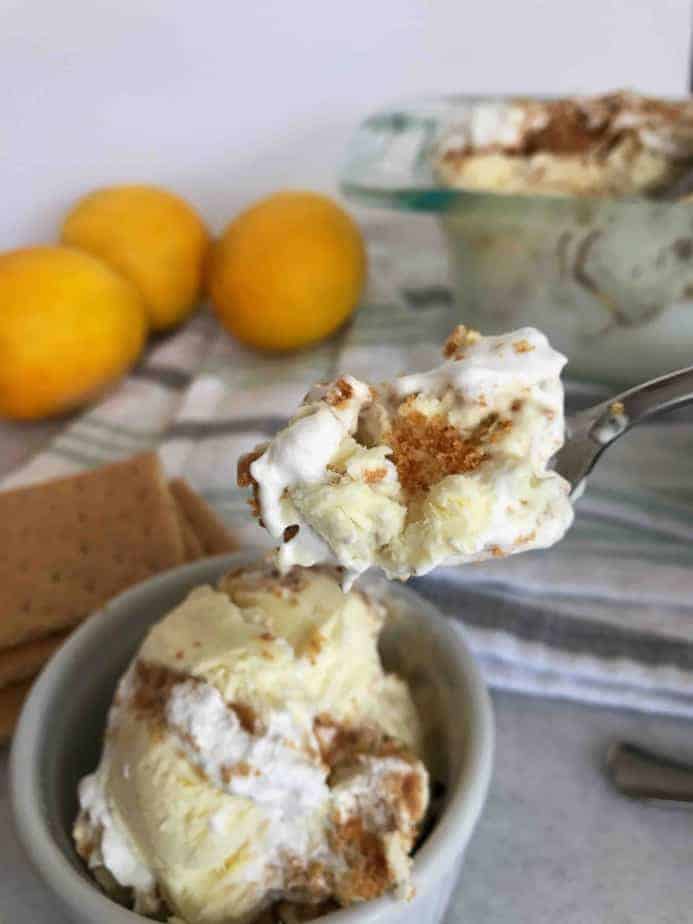
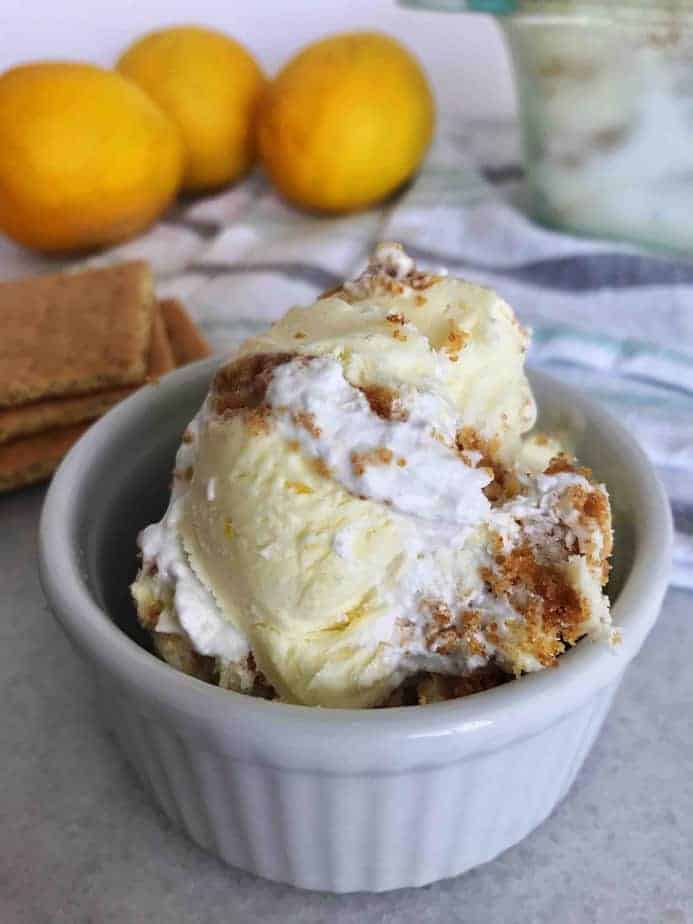
Lemon Meringue Pie Ice Cream, is this real life? I love lemon everything! For me, it’s only second to chocolate. My lemon meringue pie recipe is one the first pies to go at thanksgiving time! And if you try this ice cream, you’ll be lucky if it makes it through the night. The ice cream has a bright lemony flavor, which is complemented by the sweet marshmallowy meringue and crunch of graham cracker crust. And while this ice cream does require preparation of a few separate elements the base is simple and does not require the complication of an ice cream freezer.
Not to toot my own horn or anything, but this may be one of the best recipes I’ve ever created. Pie is one of my favorite things to make and I had a stroke of inspiration one night about how lemon meringue pie would make an incredible ice cream flavor. I set out a few days later to make this creation come true!
This recipe consists of 3 elements: the ice cream, the meringue, and the crust.
Making the Meringue: Why aren’t my egg whites whipping?
When you’re making your meringue the first thing you’re going to do is separate your egg whites from your egg yolks. It’s really important that you don’t have even a speck of yolk or oil anywhere near your egg whites as this will impede them whipping up!
Even using a plastic bowl can affect your egg whites from whipping up, since plastic has an oil base. So I recommend using a glass bowl or a stainless steel bowl.
Room temperature egg whites will also whip up better than cold ones!
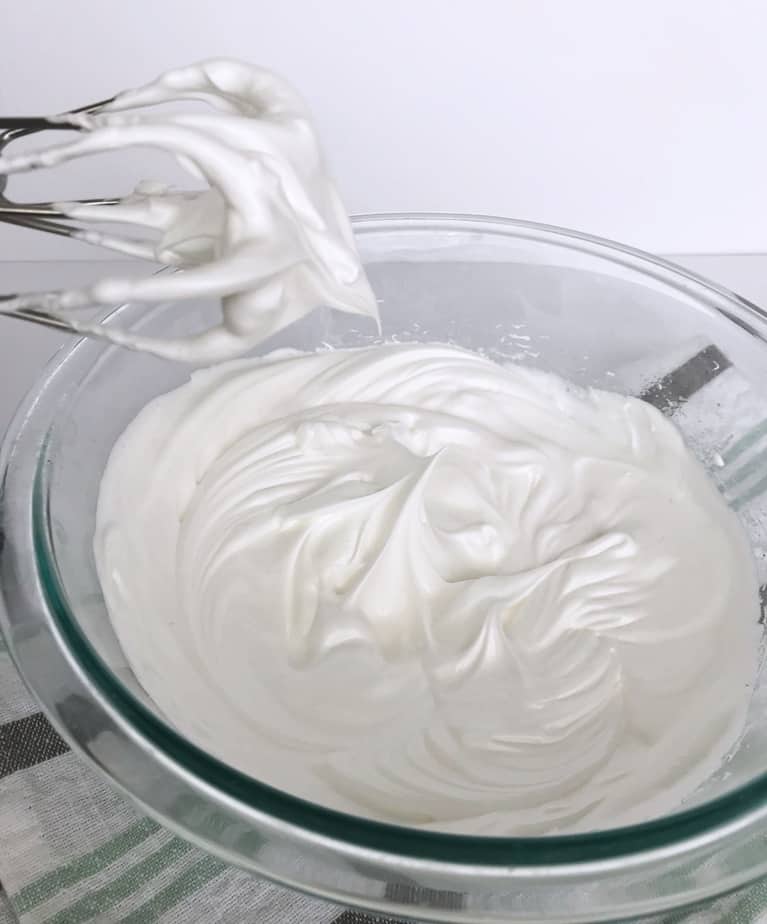
To make this meringue you’ll start by heating your egg whites and sugar together in a bowl over a pot of hot water. You’ll want to stir them constantly until the egg whites and sugar become frothy and warm and the sugar has dissolved. Then remove from the heat and start whipping until you have glossy stiff peaks.
Important Egg safety!
If you’ve ever seen those warning signs on the side of the cookie dough packages you’ll know you’re not supposed to consume raw eggs. So if you’re playing it safe then you’ll want to grab a candy thermometer and make sure your egg whites and sugar get up to 144-149 degrees Fahrenheit to ensure any bacteria has been killed before removing from the heat and whipping them up.
I’ll be honest, I don’t typically bust out my thermometer, I usually just go off of look and feel. Especially since I don’t know anyone who has gotten sick off of raw eggs. But if you’re serving this to young children, elderly people, or anyone with a weak immune system then I suggest you definitely will want to use a thermometer to make sure your egg whites are heated thoroughly.
And try not to eat all of the meringue before adding it into your ice cream!
The Lemon Ice Cream base: How does it stay soft?
So the great thing about this recipe is that it doesn’t need an ice cream maker! The base of this no churn ice cream recipe is the whipped cream and the sweetened condensed milk. The whipped cream gives the ice cream that light texture without the ice cream maker churning the air into it. The sweetened condensed milk adds sweetness to it but the thick and cream texture also ensure that the ice cream isn’t too icy when it’s frozen.
Then we add the lemon juice and lemon zest to really brighten this base up and give it that powerful lemon flavor! You can also add just a drop or two of yellow food coloring at this point too if you want. Totally not necessary, but I love seeing the contrast between the lemon ice cream base and the bright white meringue swirls!
Keep that crust crispy!
The graham cracker crust is pretty straight forward—graham cracker crumbs, butter, sugar, salt. I like to bake my mixture to make sure it stays crispy even when layered between ice cream and meringue!
Then all you have to do is layer each element repeatedly into a container (I used a large loaf pan!), freeze, wait (not so) patiently, and then EAT!
Enjoy!
Alyssa
If you love ice cream, you'll definitely want to check out our other ice cream recipes:
- Cherry Ganache Ice Cream (No Churn)
- Gooey Butter Cake Ice Cream (Jeni's Splendid Ice Creams Copycat)
- Blackberry Sherbet
- Lemon, Orange, Banana Ice Cream
Tried this recipe and loved it? Comment and Rate it! Also send us a picture, WE WANT TO SEE!
Share it on Instagram and tag us and tag #infinetasterecipes so we can see it!
Don't forget to pin this recipe for later! You can also follow us on Pinterest here!
Lemon Meringue Pie Ice Cream–No Churn!
Ingredients
Graham Cracker Crust:
- 12 full graham cracker sheets about 6 ½ ounces, finely ground
- 5 tablespoons butter melted
- Pinch of salt
- ¼ cup granulated sugar
Meringue:
- ½ cup granulated sugar
- Pinch of cream of tarter
- 1 teaspoon vanilla extract
- 3 large egg whites
Lemon Ice Cream Base:
- 2 cups heavy whipping cream
- 1-14 ounce can sweetened condensed milk
- 3 tablespoons lemon zest zest of about 3 large lemons
- ¾ cup lemon juice juice of about 3 large lemons
- yellow food coloring optional
Instructions
Graham Cracker Crust:
- Preheat oven to 350 degrees Fahrenheit. Mix finely ground graham cracker crumbs with salt, sugar, and melted butter.
- Spread mixture across baking sheet and bake for 10 minutes. Stir crumbs once on baking sheet halfway through. The mixture should be crisp; be careful not to let it burn. Set-aside until assembling ice cream.
Meringue:
- Place egg whites, sugar, and cream of tarter in a heat safe bowl over a pot of simmering water. Stir constantly until mixture is slightly frothy, warm (not hot, you don’t want scrambled eggs), and sugar is completely dissolved. One way to test this is rub the mixture between your fingers, if you cannot feel any grittiness of the sugar then it is done!
- Remove bowl from simmering pot of water and let cool to room temperature. Then, using a hand mixer whip the egg whites. Start with a low speed and increase the speed after each minute. Whip until you have smooth, glossy, stiff peaks. Cool meringue completely before assembling ice cream.
Lemon Ice Cream Base:
- Whip cream until you have stiff peaks (see notes). In a separate bowl mix sweetened condensed milk, lemon juice, lemon zest, and 1-2 drops yellow food coloring.
- Fold mixture into whipped cream.
Ice Cream Assembly:
- In a large container (I used a large loaf pan) start by spreading a thin layer of ice cream base across the bottom. Then spoon in meringue and sprinkle graham cracker crust crumbs. You can be generous with your meringue and graham cracker crust—you have a lot! Then start the process over layering ice cream base, meringue, and graham cracker crust. Once you’re out of ingredients (you’ll probably have some graham cracker crust crumbs leftover), freeze the mixture until hard (about 4 hours).
- Let ice cream sit on counter for 3 minutes before eating to ensure to is the creamiest consistency.
Notes
Nutrition
Are you part of our Facebook Page? Follow along with what's new on In Fine Taste, share YOUR favorite recipes, ask questions, post pictures of what your making, and more! Like our page HERE
LEMON LOVERS! Check out these other delicious lemon recipes!
- The Best Lemon Meringue Pie
- Lemon Raspberry Meringue Parfait
- Blackberry Lemon Poppyseed Cake
- Fresh Strawberry Lemon Trifle
originally published on August 6, 2018

Mary Ann
HOLY MOLY!!! I made this for family today and it was a huge hit!! This is a special dessert!!
admin
I'm so glad everyone liked it! I agree, its a pretty magical dessert.
Sherri
I can’t wait to try out this recipe! 💛
Joan Bybee
Sounds delish! We just got home today and haven’t unpacked everything yet , but I love ice cream (and lemon), and will definitely make this!
Gma Jo
Karen Bybee
This sounds like something even I could make! 🙂 Can't wait to try it! Keep the recipies and ideas coming!
Sheri Bashaw
Looks so yum! Can’t wait to get more recipes
Mary Ann Yost
Im going to make this weekend!!!!!
Donna pettit
Sounds like a perfect summer dessert!
Suzanne
Yum! And so easy to make! Thank you for posting the recipe.
Carley
Looks amazing! Lemon is my favorite, I will definitely be trying this out soon!
Rachel
Amazing!
Allison
This sounds delicious! I must try!