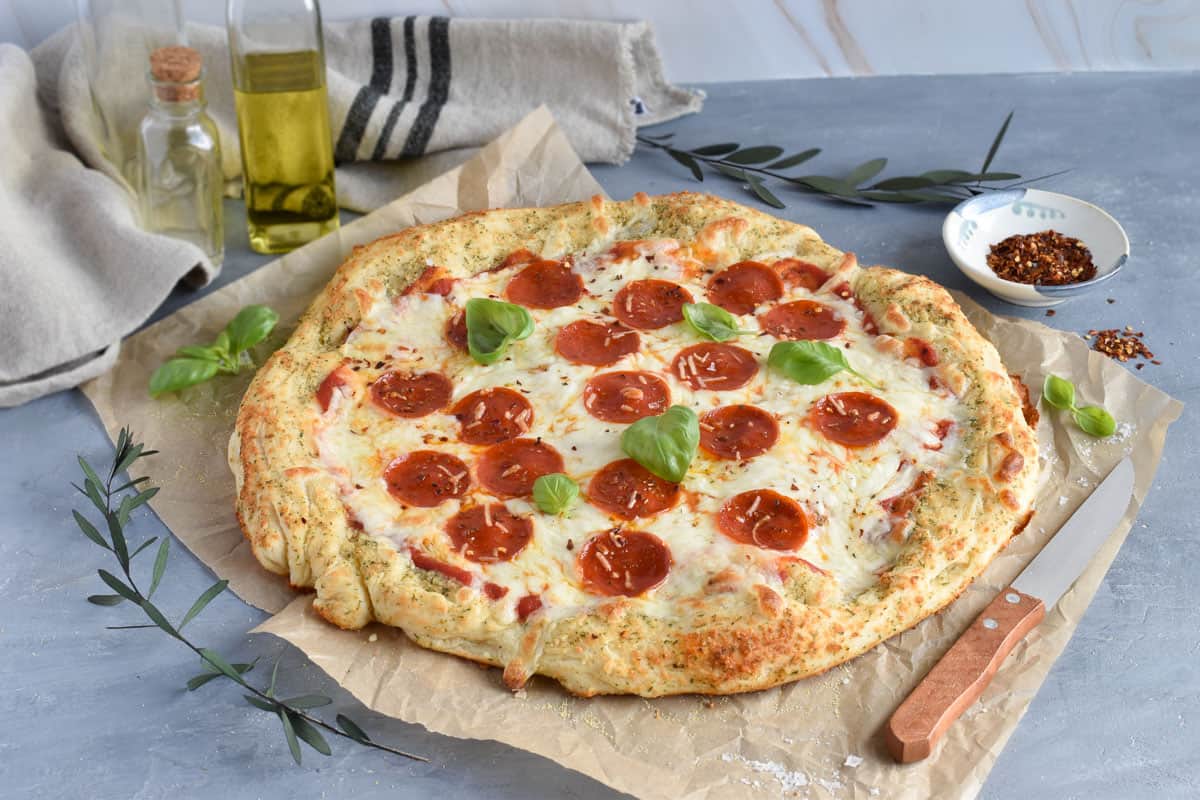
This easy pizza dough recipe makes the best homemade pizza crust. It’s soft, chewy, and has a buttery, flavorful crust that will convert anyone!

Jump to:
- Why Make This Recipe
- Ingredients for this Recipe
- Best Yeast for Pizza
- Bread flour vs. All-purpose flour: What Kind of flour is best for pizza dough?
- How to Make this Recipe
- How to Stretch Pizza Dough
- Make it a Flavored Crust Pizza
- Adding Cornmeal to the Pizza Crust
- Frequently Asked Questions (FAQs)
- Expert Tips
- Pizza Topping Ideas
- Storing Pizza Dough
- Try this pizza dough recipe with one of our specialty pizzas!
- The Best Homemade Pizza Dough
Why Make This Recipe
The recipe is simple and the ingredients are basic, but this pizza crust tastes anything but basic! You will love the texture of this pizza and I think you’ll be surprised by how easy it is to make.
One of my favorite things is this recipe makes two 12-inch crust and we give instructions on how to freeze one for later!
If you're looking for a pizza that uses no-yeast and has no rise time, try our 5-minute pizza dough.
Ingredients for this Recipe
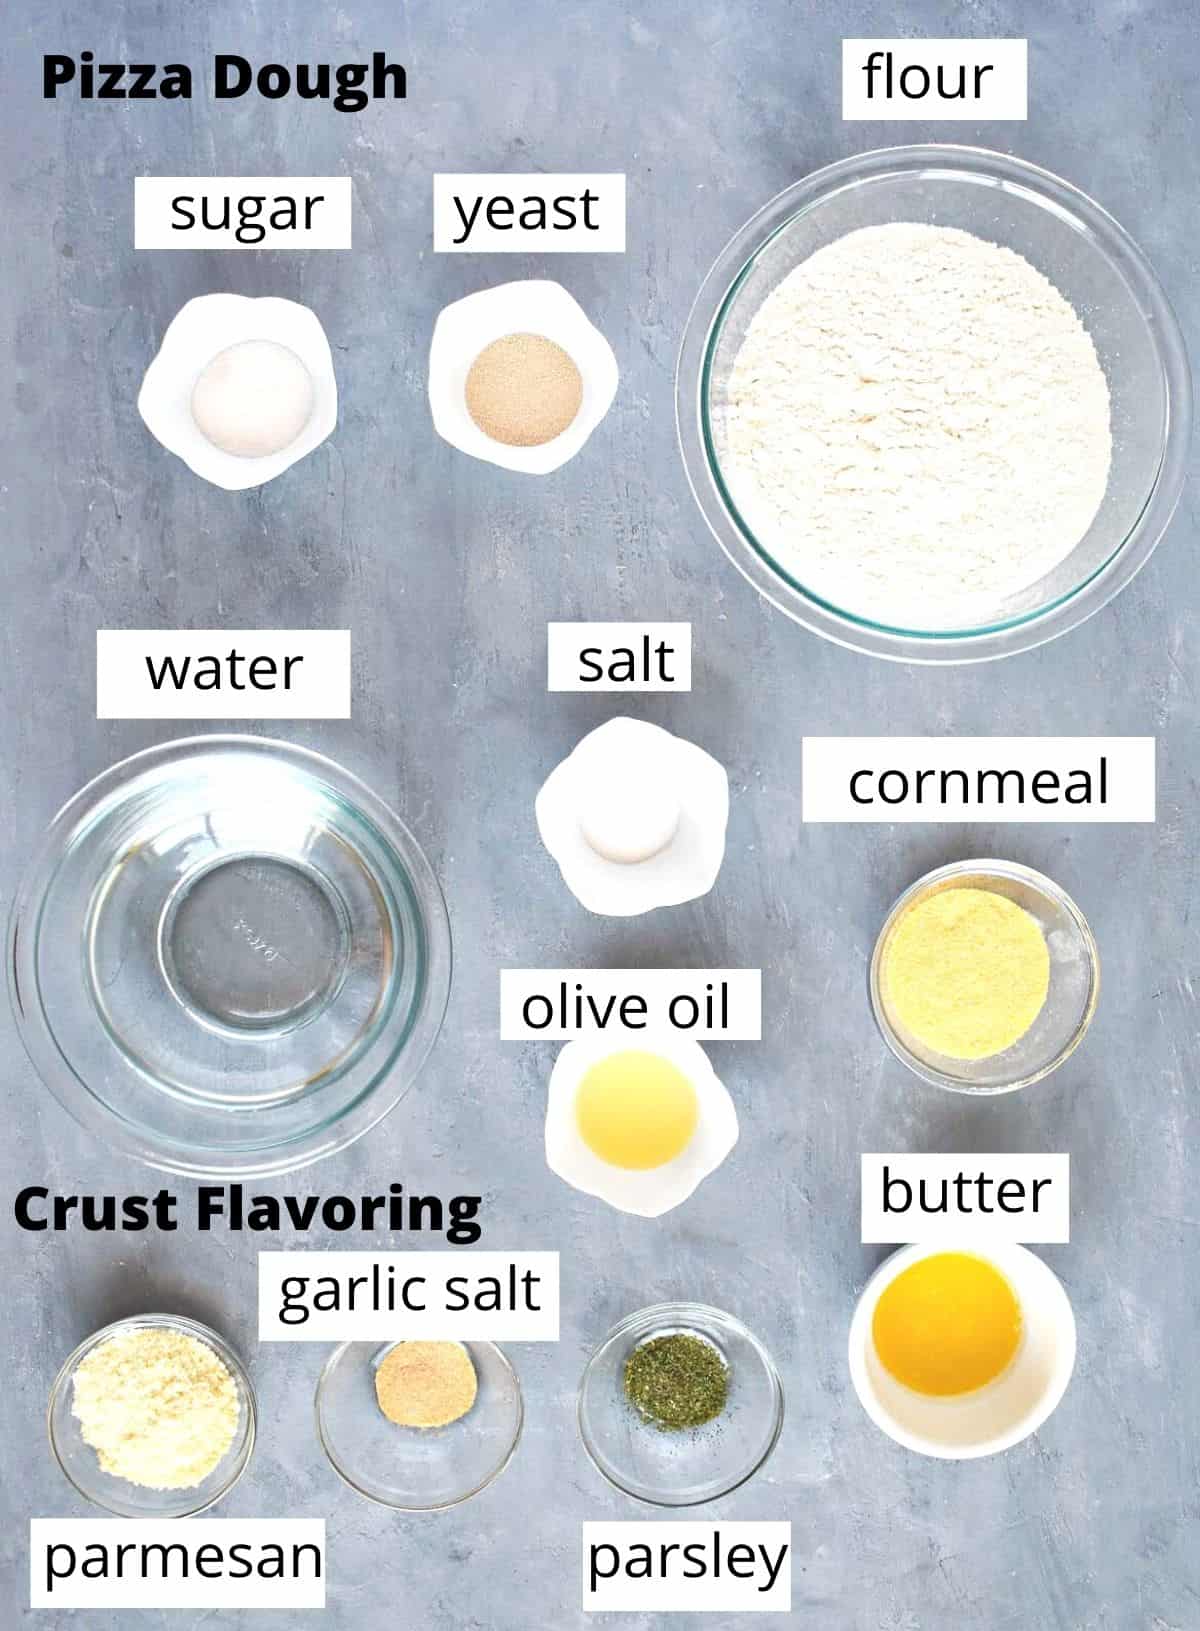
- Yeast. Active dry yeast to help our pizza rise.
- Sugar. White sugar to feed the yeast and help it become active.
- Water. Warm water (not to hot) to hydrate the dough.
- Salt. Just regular old table salt will do the trick, to add flavor.
- Olive Oil. Olive oil will add a little richness and flavor the dough.
- Flour. All-purpose or bread flour (see below for the difference).
- Cornmeal. Adds a little texture and crunch and helps prevent the pizza from sticking to the pan.
- The Flavor Blast. We brunch the pizza dough with a flavorful combination of butter, parmesan, garlic, and herbs to flavor this pizza crust and make it even more amazing.
Best Yeast for Pizza
Short story: Pizza yeast is not the same as active dry yeast. Use active dry yeast in this recipe.
If you’ve ever looked at the yeast section in the baking aisle you’ve probably seen several kinds of yeast, including pizza yeast. It seems like a no-brainer, pizza yeast is the best choice for pizza, right? WRONG.
Pizza yeast is not the same as active dry yeast. Pizza yeast is designed to take your pizza dough from nothing to ready in 30 minutes. It skips the rising and resting of the pizza dough and goes from mixing straight to being shaped and baked.
Pizza yeast also contains dough relaxers which is what makes it possible for the dough to skip the important resting stage. Without the dough relaxers it would not be possible for the dough to be shaped into a pizza round yet.
While this might all sound great, when you use pizza yeast you lose out on a lot of flavor and texture. With regular active dry yeast, that resting period allows the dough to ferment, develop flavor, and gases to give your pizza a great taste and texture.
Bread flour vs. All-purpose flour: What Kind of flour is best for pizza dough?
Short Story: Both will work for this recipe but each will yield slightly different results.
The difference between bread flour and all-purpose flour is the protein content. Bread flour has somewhere around 11-13% protein content, while all-purpose flour has 9-11%. Protein in the flour helps develop gluten in the dough as it is kneaded to give it structure and allowed gases to form so the dough can rise.
In general, I have found that bread flour gives my pizza dough a crispier, slightly chewier crust, which I generally prefer. All-purpose flour leaves you with a softer crust. That said, I use all-purpose flour in this recipe regularly. There is no right or wrong answer, only preference, or often in my case—what flour is in my pantry?
How to Make this Recipe
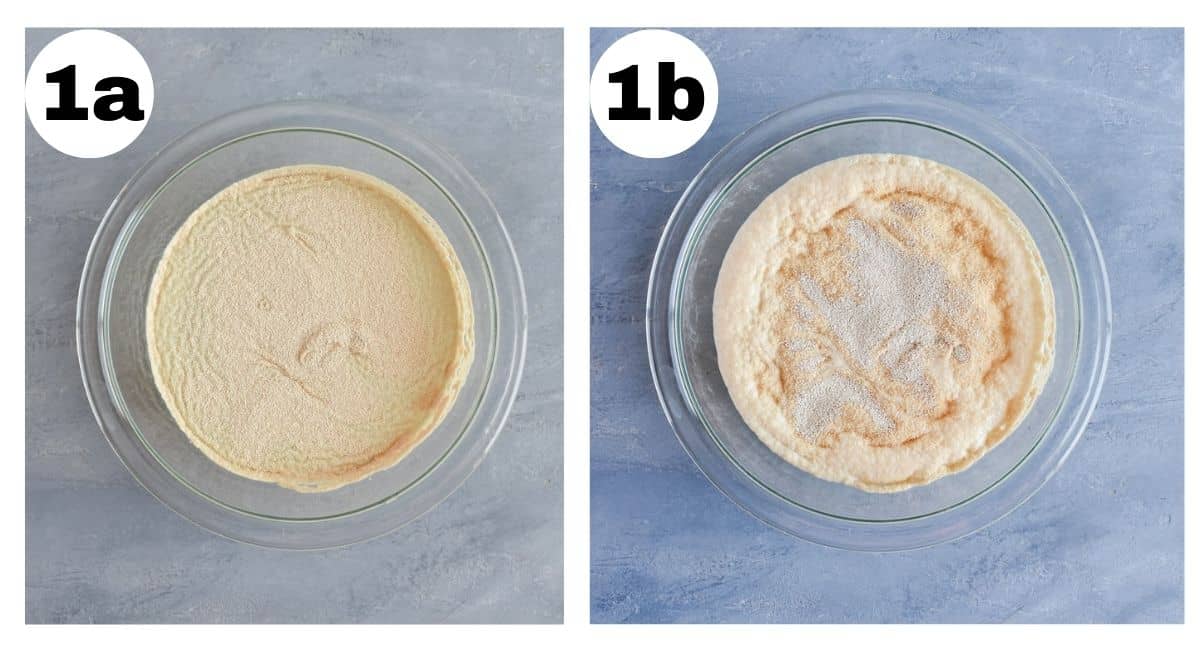
- Bloom the yeast. Mix together warm water, sugar, and yeast and let the mixture sit for 5-10 minutes. The yeast will start to bubble and look quite frothy.
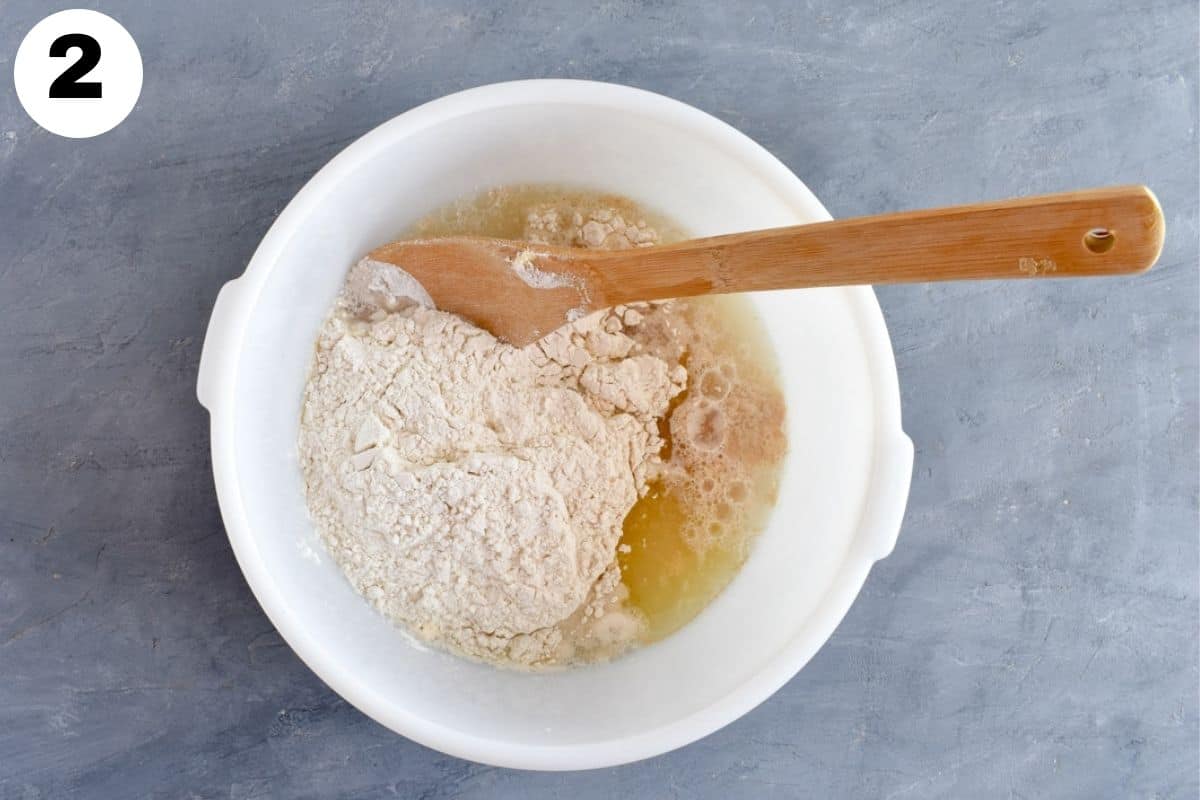
- Add the Flour. In a large mixing bowl, add your yeast mixture to 1 ½ cups of flour—stir together. Add in the salt and olive oil. Then gradually add in 2 more cups of flour until the dough starts to form a ball.
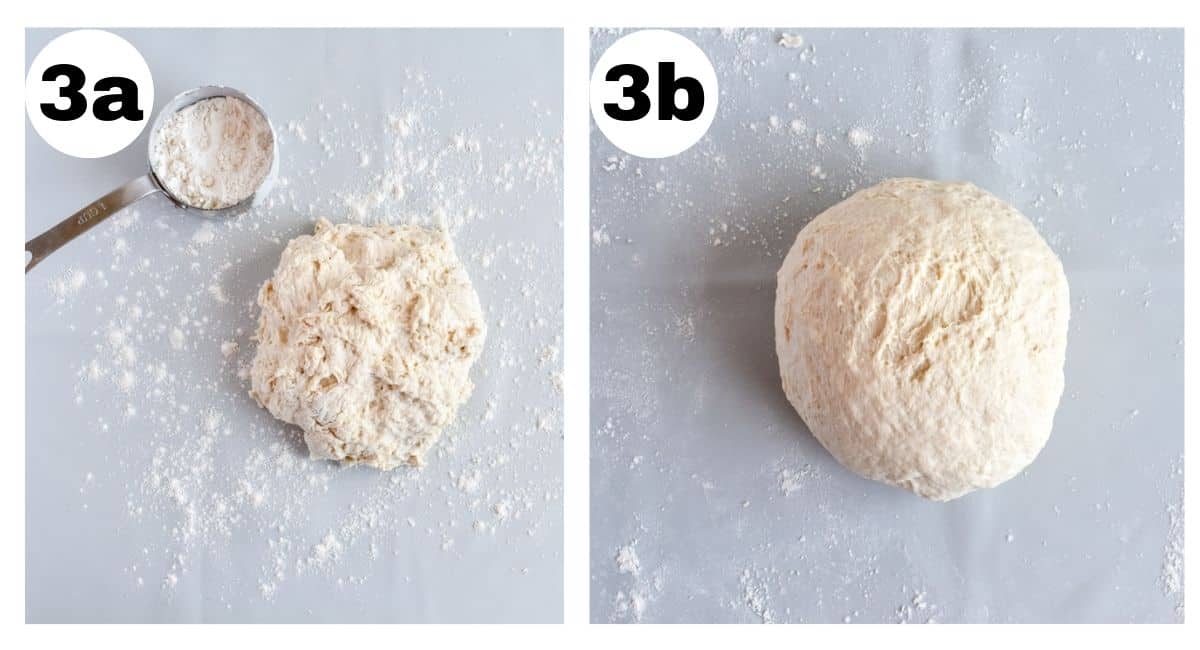
- Knead. Knead the dough for 5-10 minutes either on an oiled or lightly floured surface. If using a stand mixer to knead it will be closer to 5 minutes, if doing it by hand it will be closer to 10 minutes. The dough should become smooth and elastic
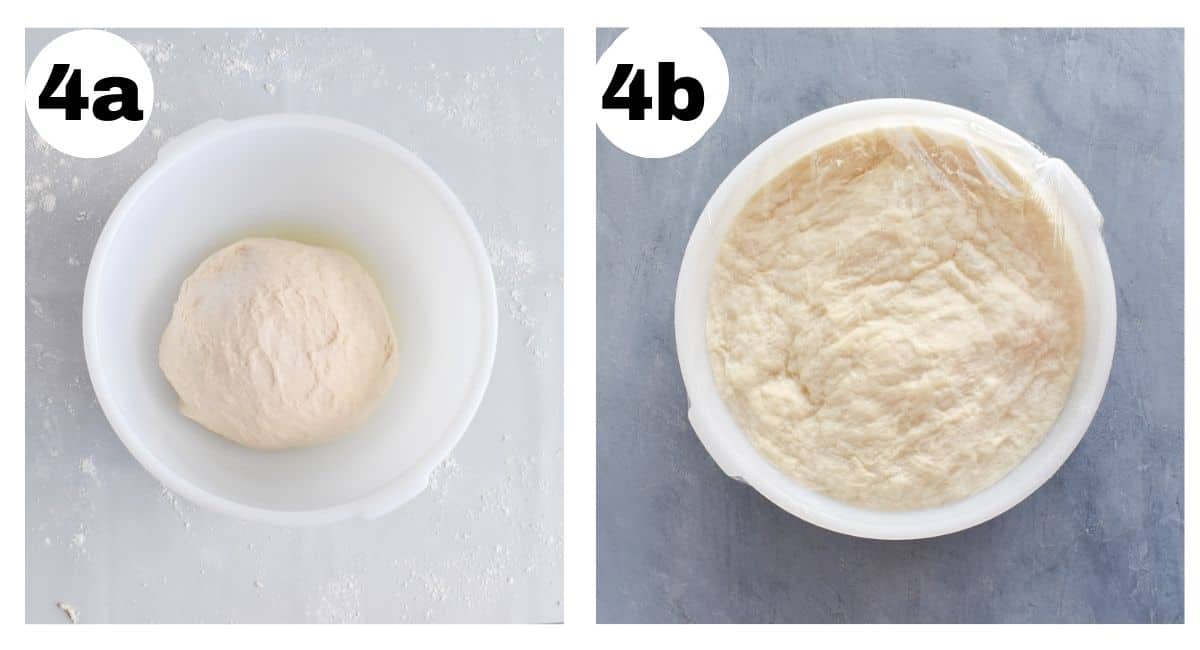
- Let Rise. Place the dough in a greased bowl and cover. Let rise in a warm place to rise for 1-2 hours until it has doubled in size.
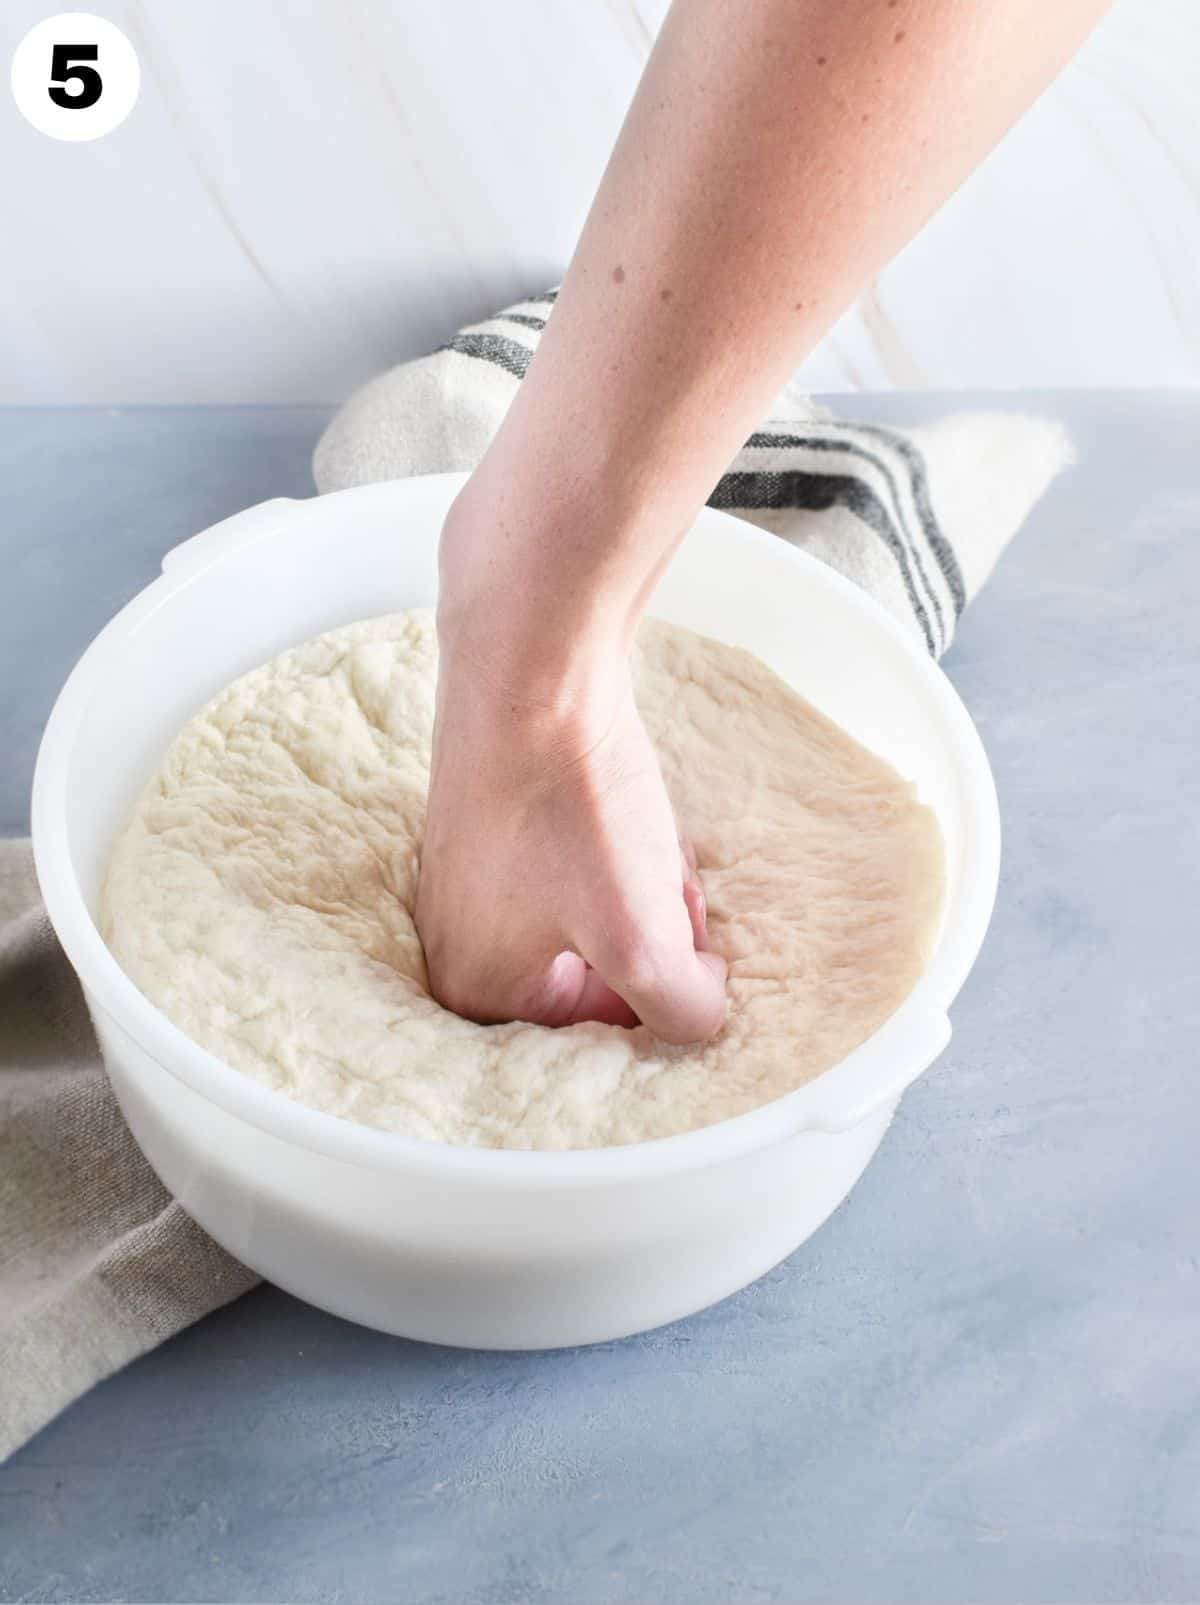
- Knock it back. Punch down the pizza dough and knock the air out of it. Knead the dough a few times until it begins to tighten up again.
- Let Rest. Divide the dough in half shape it into two balls. Let the dough rest for 15 minutes.
- Preheat. Preheat your oven to 475 degrees Fahrenheit. Dust your baking sheet or work surface with corn meal. If you are using pizza stone or baking steel cornmeal will help your pizza slide easily onto it and not stick.
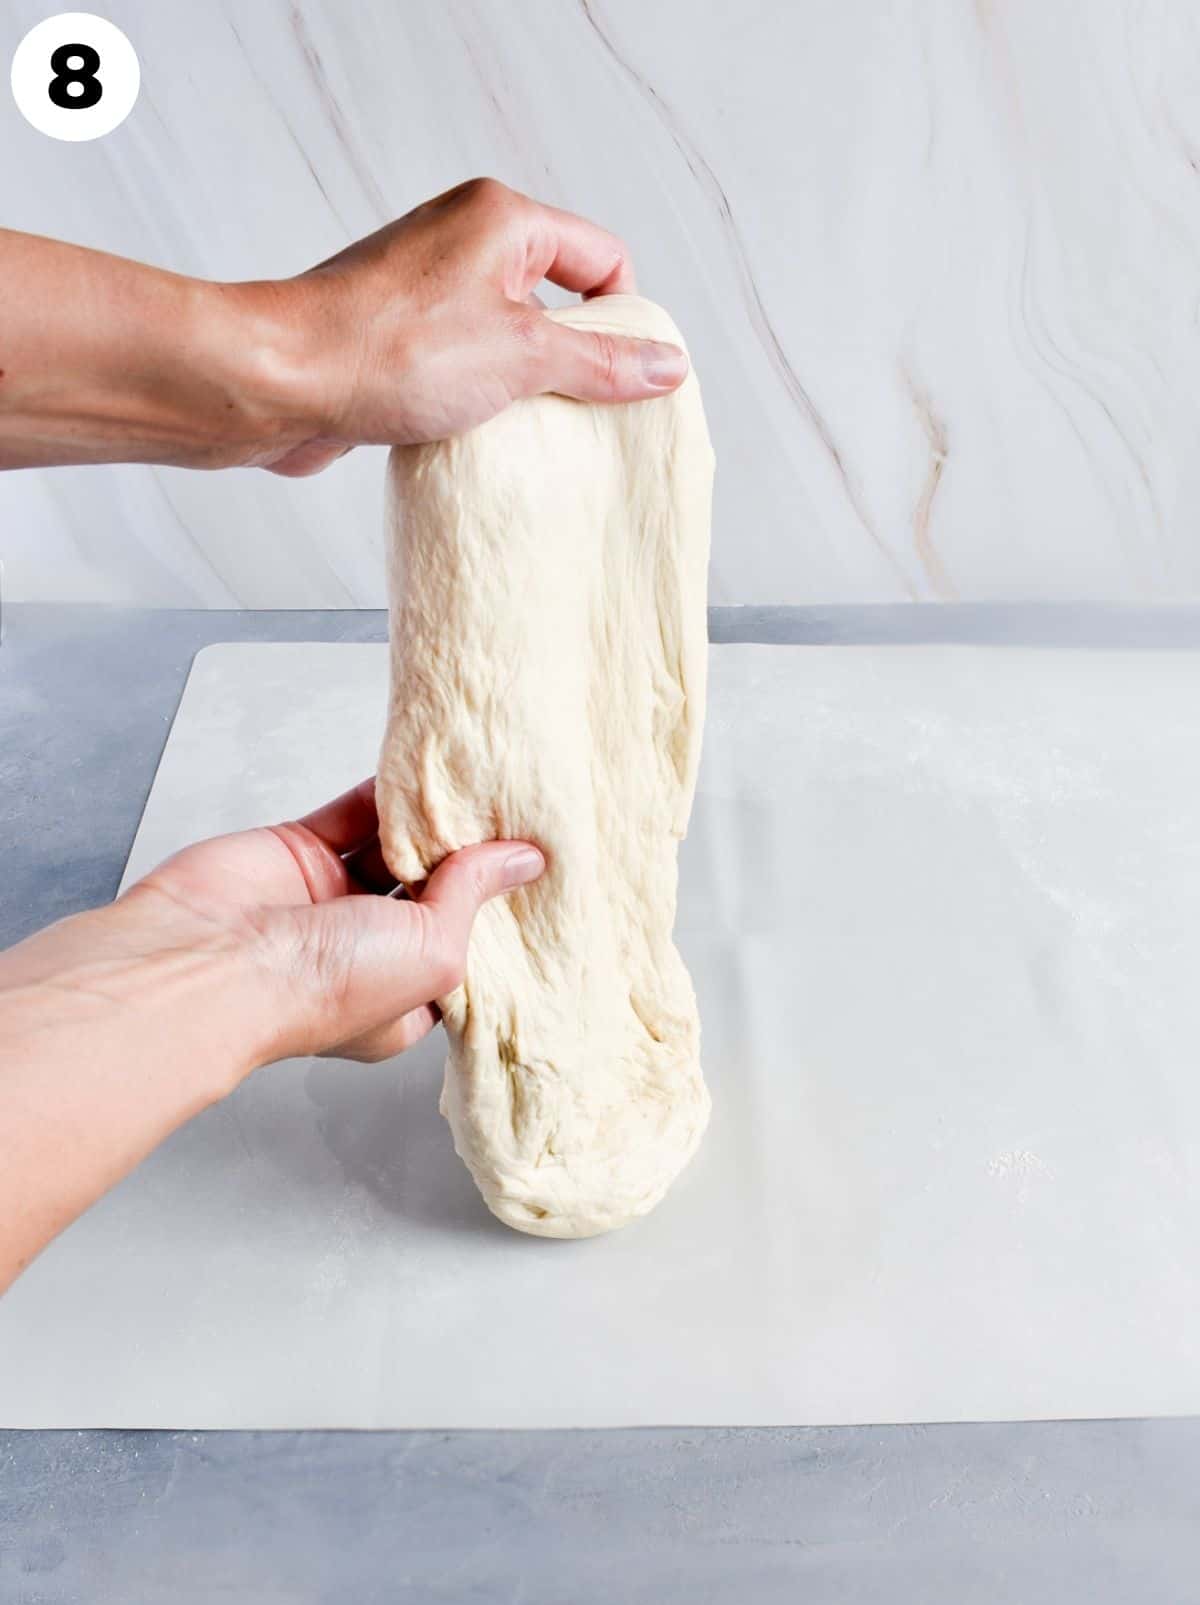
- Stretch the dough. Gently stretch your dough into a 12-inch circle. You can also use a rolling pin if you prefer.
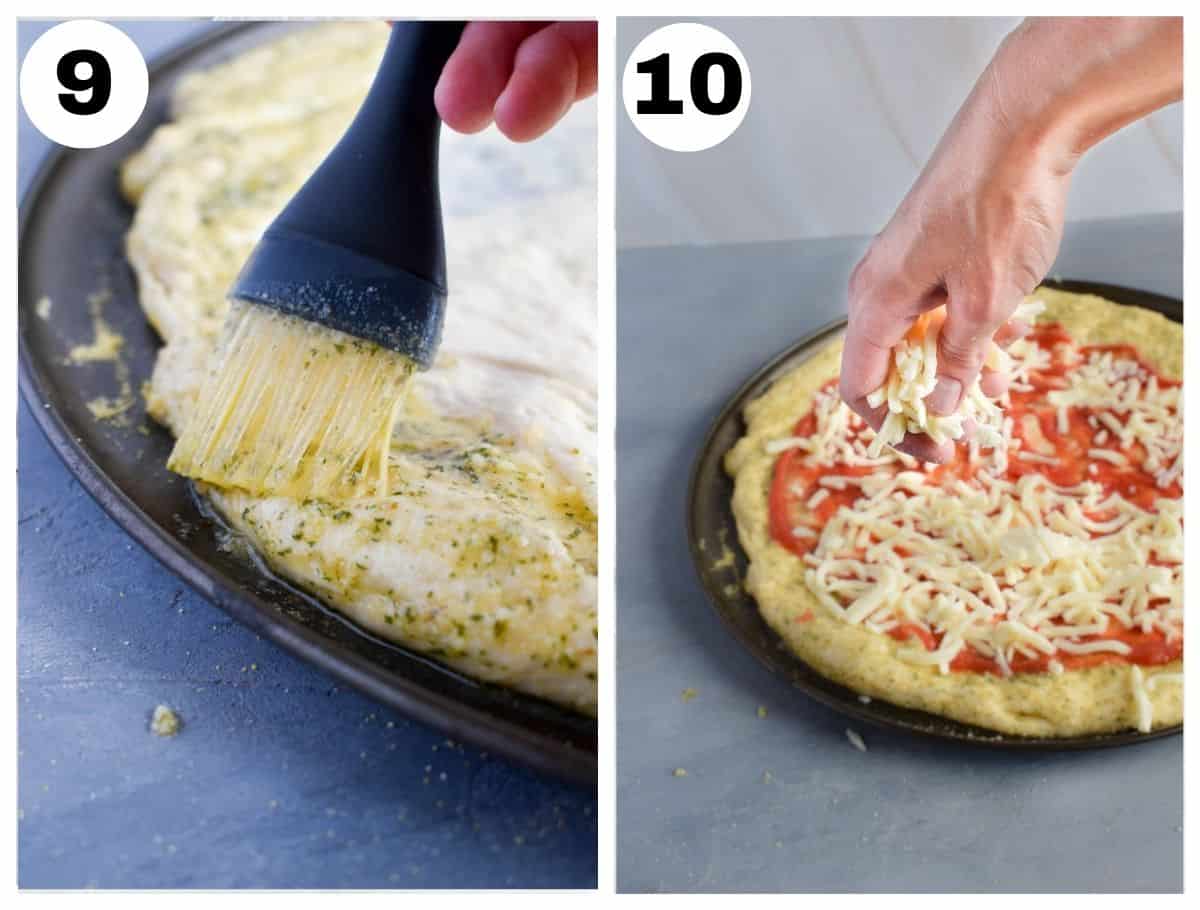
- Flavor your Crust. Place your stretched dough onto your baking sheet. Mix together your butter and seasoning for flavoring your pizza crust and brush them onto the edge (crust) of your pizza.
- Add your toppings. Add your sauce, cheese, and toppings of choice.
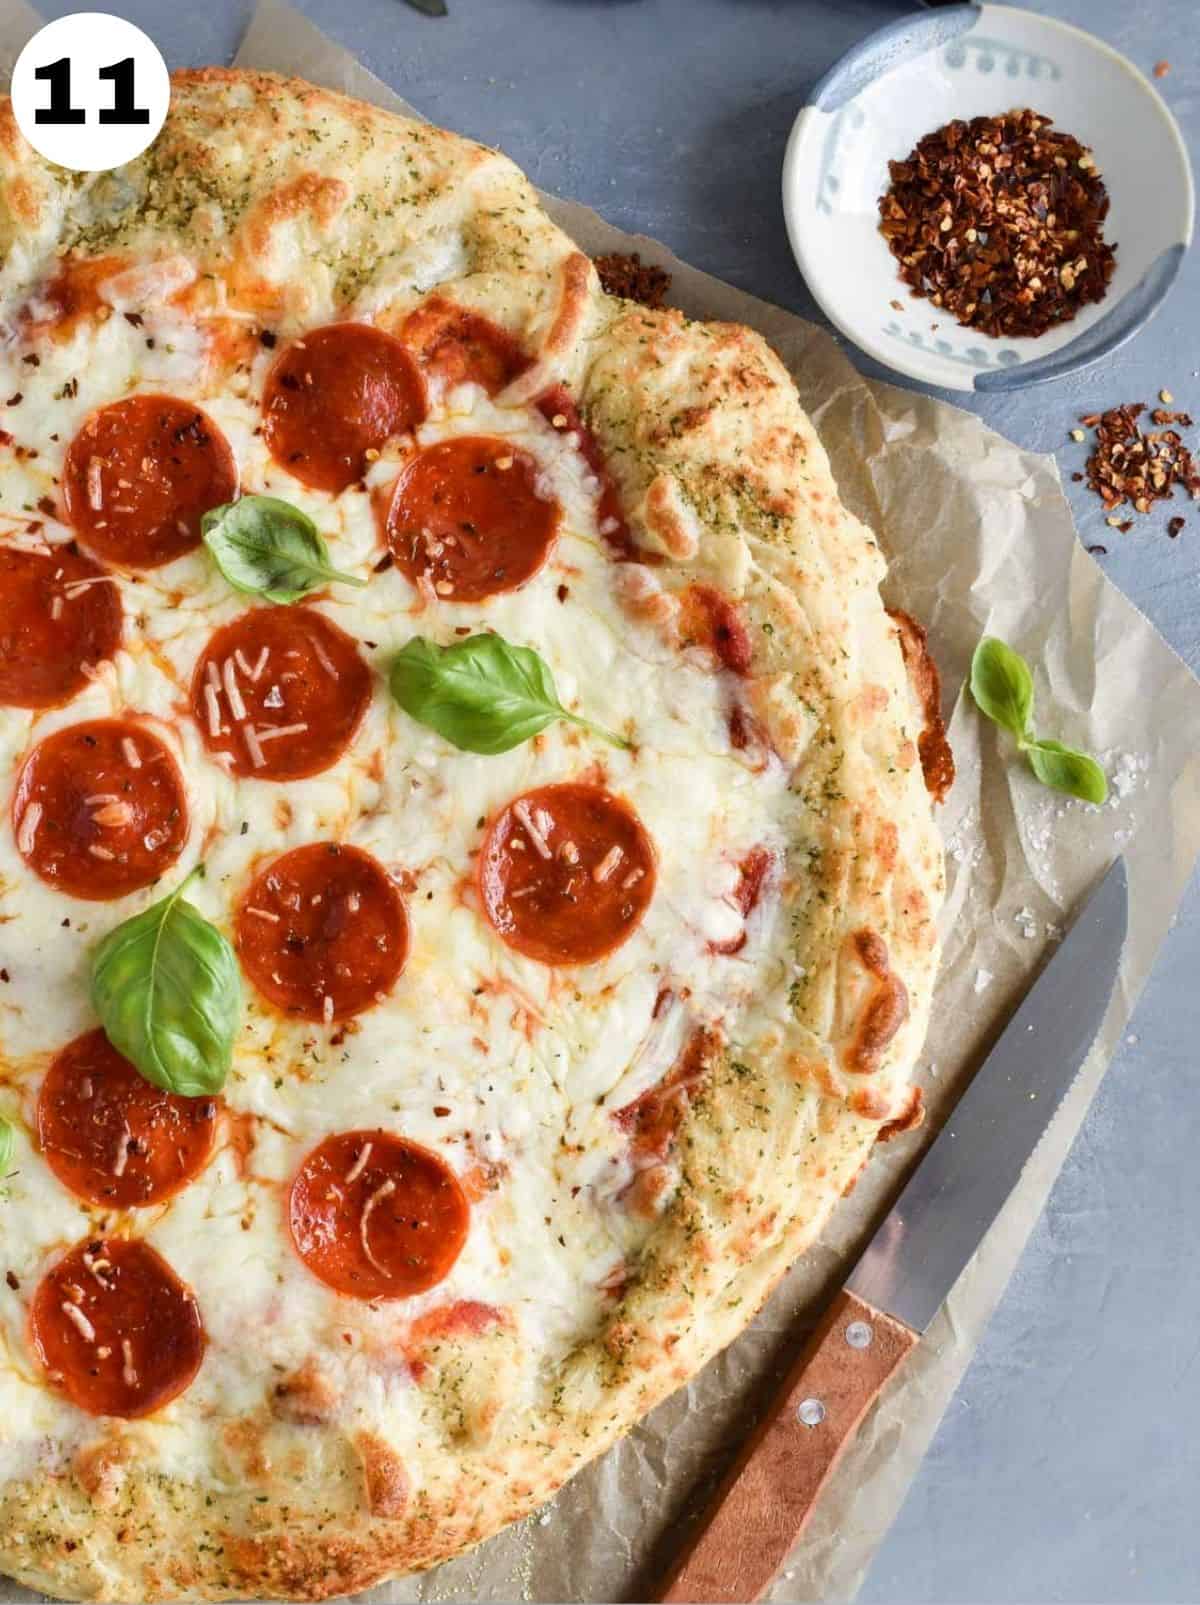
- Bake. Preheat your oven to 475. Bake pizza for 10-12 minutes until golden on the edges and the cheese is nice and melted.
How to Stretch Pizza Dough
Rolling vs. Stretching
Neither rolling or stretching your pizza dough is right or wrong. Each will give you slightly different results, it is really a matter of personal preference.
I grew up always rolling mine out with a rolling pin because that’s what I was taught. As I’ve gotten a little older and a little more particular about my cooking, I’ve found I prefer a hand stretched or hand spread pizza. And here is why:
When you use a rolling pin to roll out your pizza dough you force the air bubbles out. The result is you end up with a thinner, denser, and more cracker-like pizza crust.
I personally love all the air pockets and bubbles in a pizza crust which is why I now prefer to hand stretch my pizza.
How to Stretch Pizza Dough By Hand
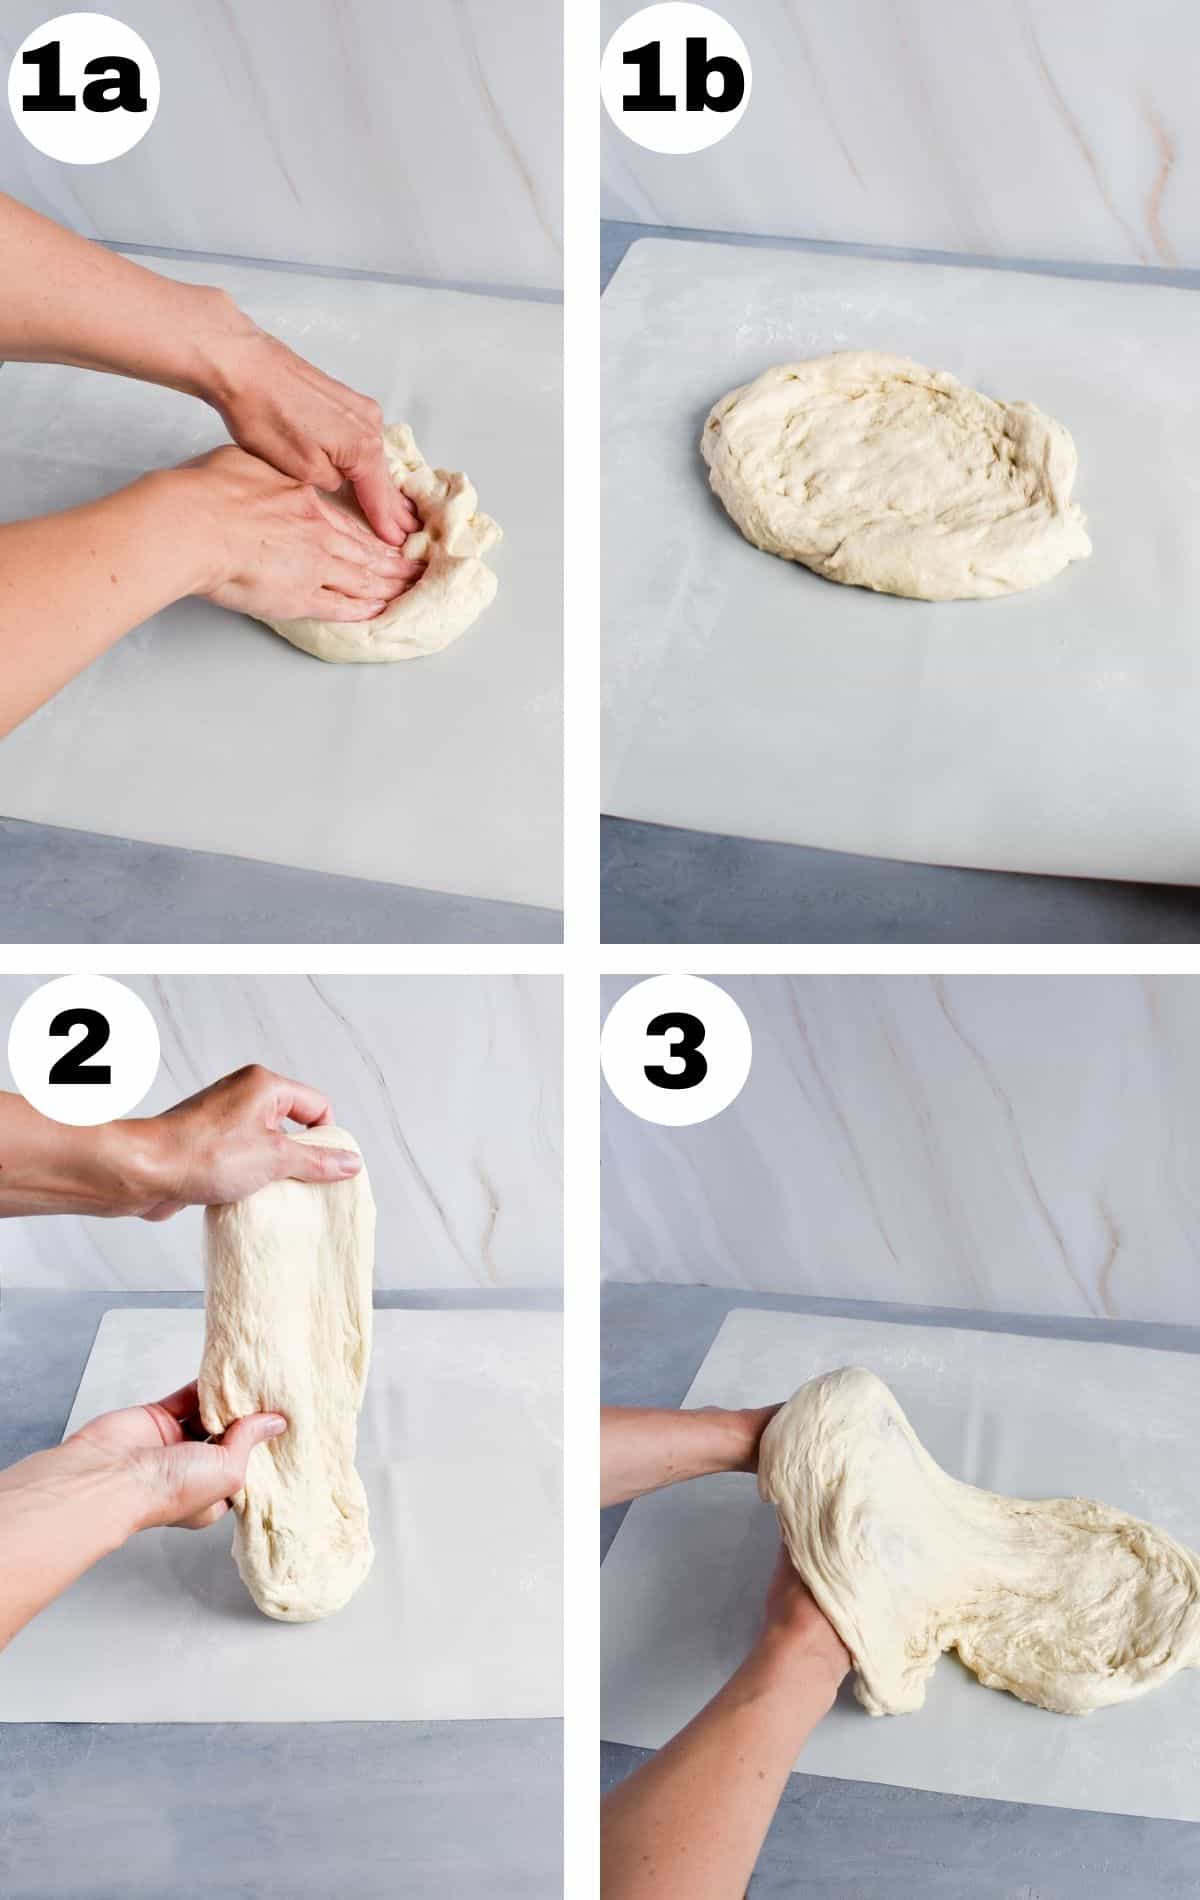
- Start by pushing the dough from the center outward ever so gently. Do this all the way around the pizza dough. You’ll see that the center of the dough starts to thin out and a rim starts to form on the outside—this will be your crust.
- Pick up the dough by the edge/crust and slowly feed it from one hand to the next in a circular motion. This will help it stretch a little more.
- Drape the pizza over the back of hands/knuckles and gently stretch it all while moving in a circular motion.
- If the pizza dough is prone to tearing, set it down and let it rest for 5 minutes before continuing to stretch. You can also lay it down on a flat surface and stretch if it is still delicate.
- Lay down on your baking sheet (or pizza peel if transferring to a pizza stone/baking steel). Smooth out any wrinkles and if you have holes try to pinch them closed before adding your toppings.
Make it a Flavored Crust Pizza
How do you make your pizza dough taste even better? Season it! I always recommend basting your crust with a little something extra.
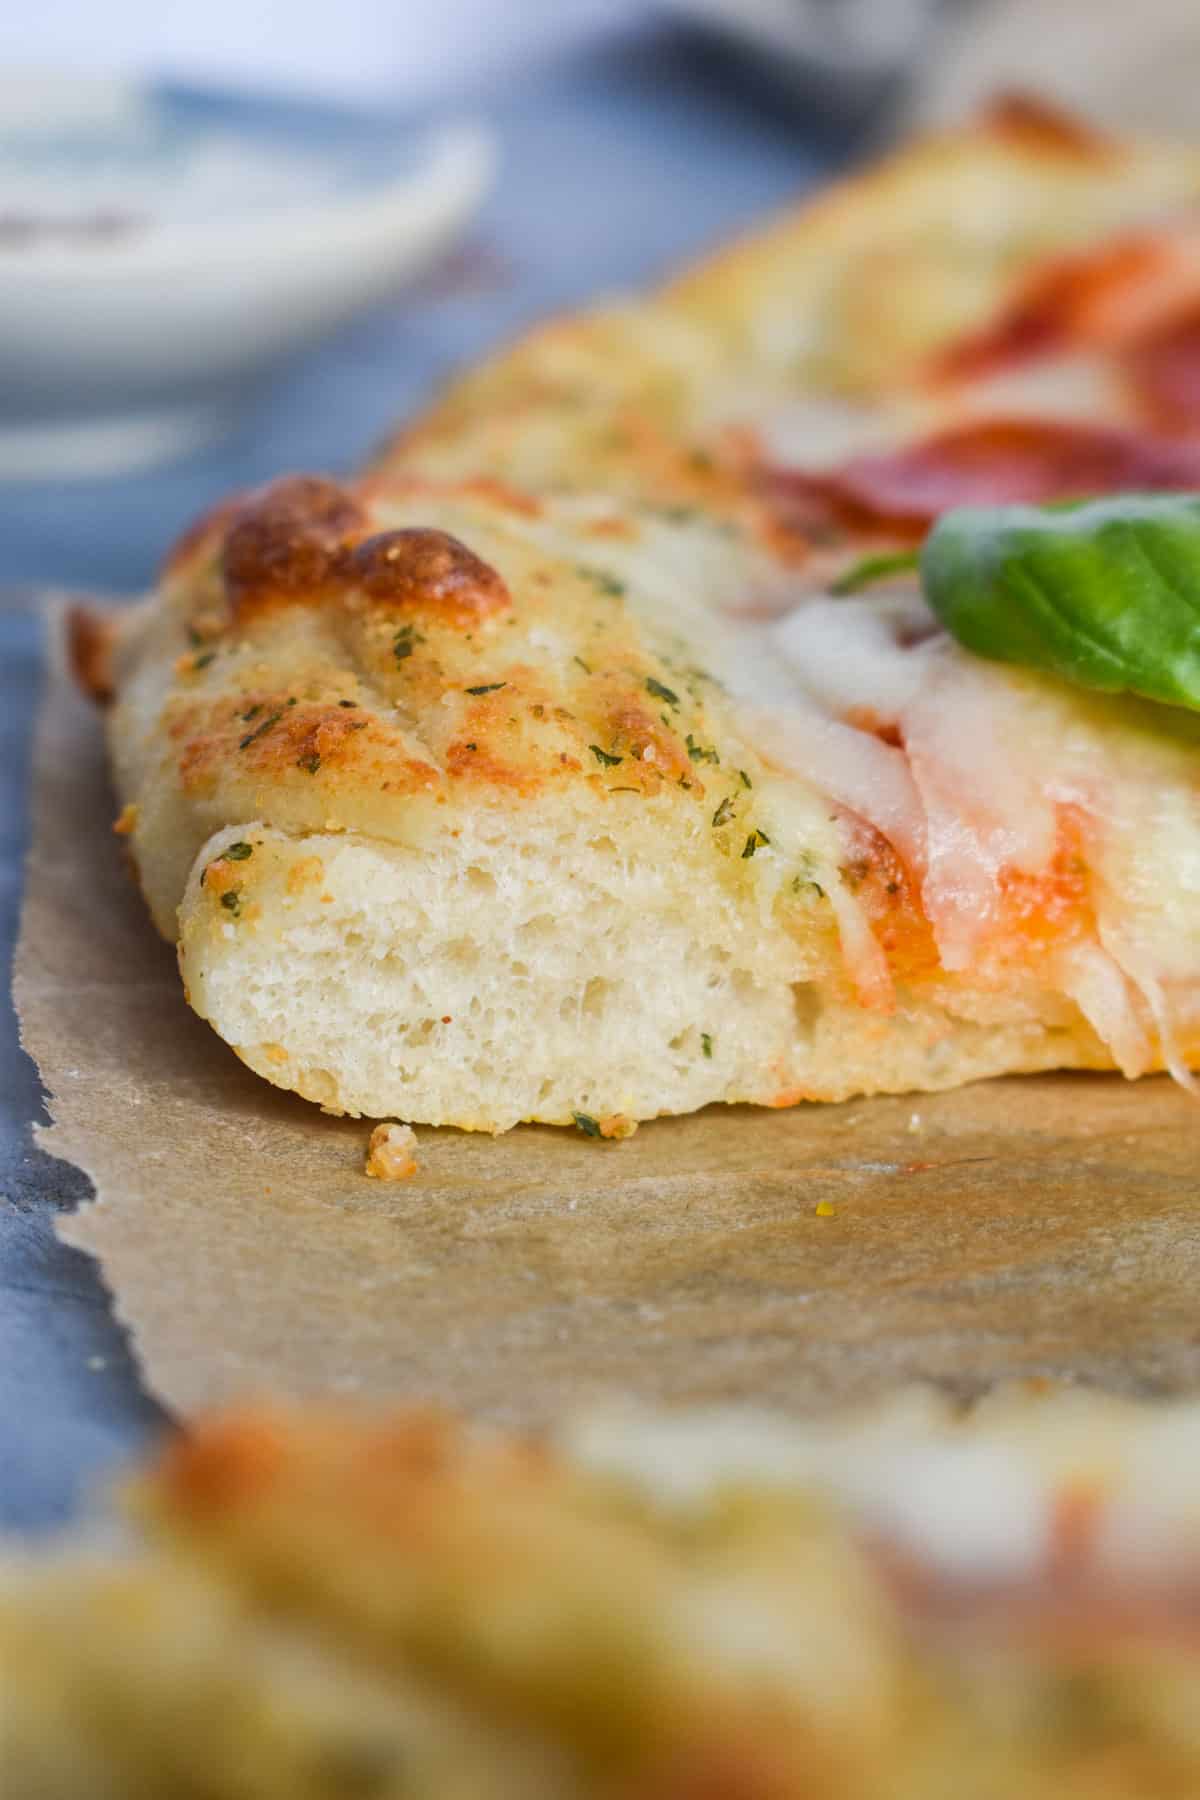
I like to flavor my pizza dough by basting it with a mixture of butter, parmesan cheese, salt, garlic powder, and parsley. It’s amazing how much better a pizza tastes with just a little flavoring!
Butter always has the best flavor, in my opinion, but you could also use olive oil. Garlic is of course a must, parmesan adds that perfect savory salty flavor, and a little bit of herbs, like parsley makes this pizza crust perfectly seasoned and incredibly delicious! This is my preferred combination, but try adding your own twist to it!
Adding Cornmeal to the Pizza Crust
I love adding cornmeal to this pizza crust recipe. Have you ever noticed that your delivery pizza has little cornmeal on the bottom of the crust? The cornmeal adds some texture and crunch to the pizza while preventing the crust from sticking to the pan.
Just dust the bottom of your baking sheet with cornmeal. Then, when you place your rolled out pizza dough on top, all the cornmeal will stick to the crust giving you that delivery pizza taste!
Frequently Asked Questions (FAQs)
Yes, you can absolutely make this pizza dough without a stand mixer. It will just take a little extra muscle and time. You’ll probably need to knead your dough for closer to 10 minutes.
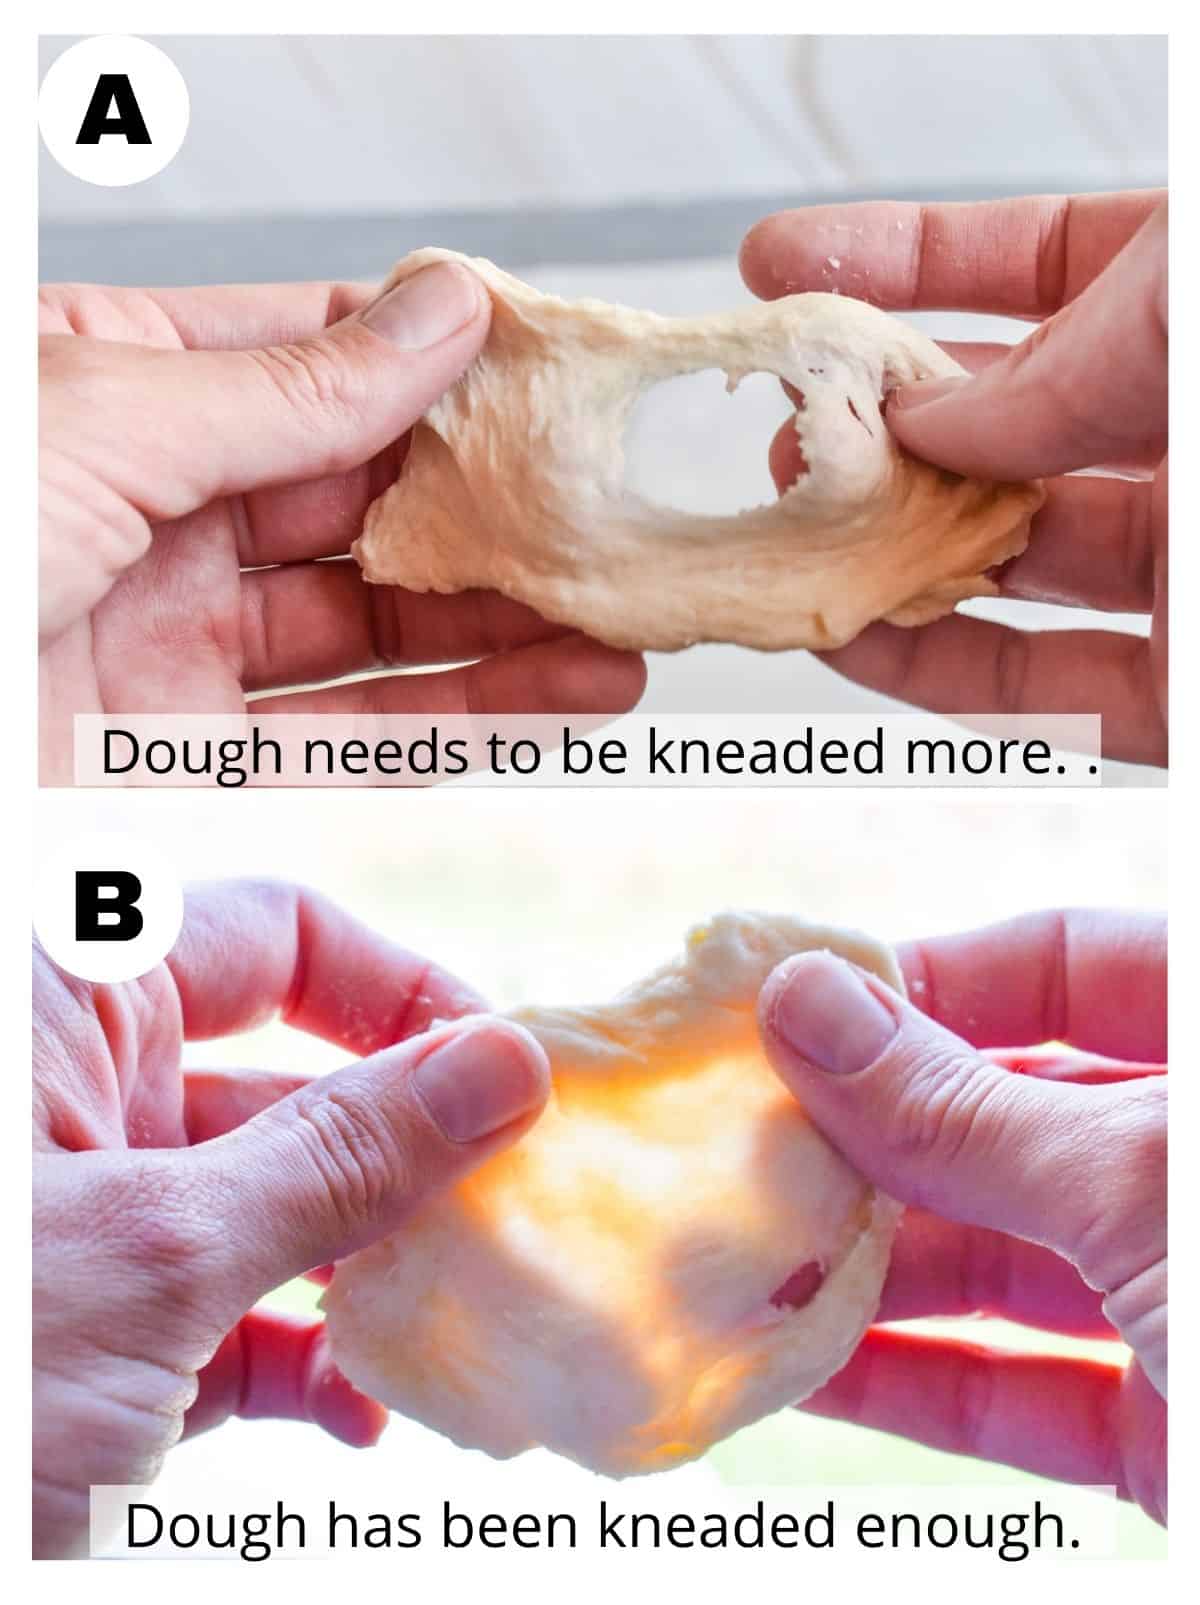
Smooth and Elastic. The appearance of your dough will be smooth and elastic. When you first start working the dough it uneven and scraggly. As you work the dough it becomes smooth and elastic.
It’ll Bounce Back. Gently poke your dough with a finger, if it bounces back then your pizza should be ready!
The Window Pane Test
The Window Pane Test. This is generally considered the gold standard of checking if the dough is ready. What you are really checking for is elasticity and gluten development in your pizza dough. The test is simple, tear off a small chunk of dough. Pat it into a small flat round and gently stretch it. You should be able to stretch it thin enough that you can see light from a window or even your fingers as they gently pull on the dough behind it. If it passes the windowpane test then your dough has developed enough gluten to support your pizza as it bubbles and gasses expand in your dough as it bakes.
If your homemade pizza crust still isn’t rising after 1-2 hours, your yeast may be bad or your water may have been too hot, killing the yeast in the first step.
If your kitchen is cold could be hindering your dough from rising. Try placing it somewhere warm. Check out our tip for getting your dough to rise in expert tips below.
You will want to use a fine or medium ground cornmeal. Most cornmeal you find at the store are a fine or medium. I typically use yellow cornmeal because it’s what I have in my pantry. But either white or yellow cornmeal will work just fine in this recipe.
The finest grind is corn flour which will be too light and powdery for our pizza. The coarser cornmeal gives an unpleasant texture to the pizza as it’s too gritty.
Expert Tips
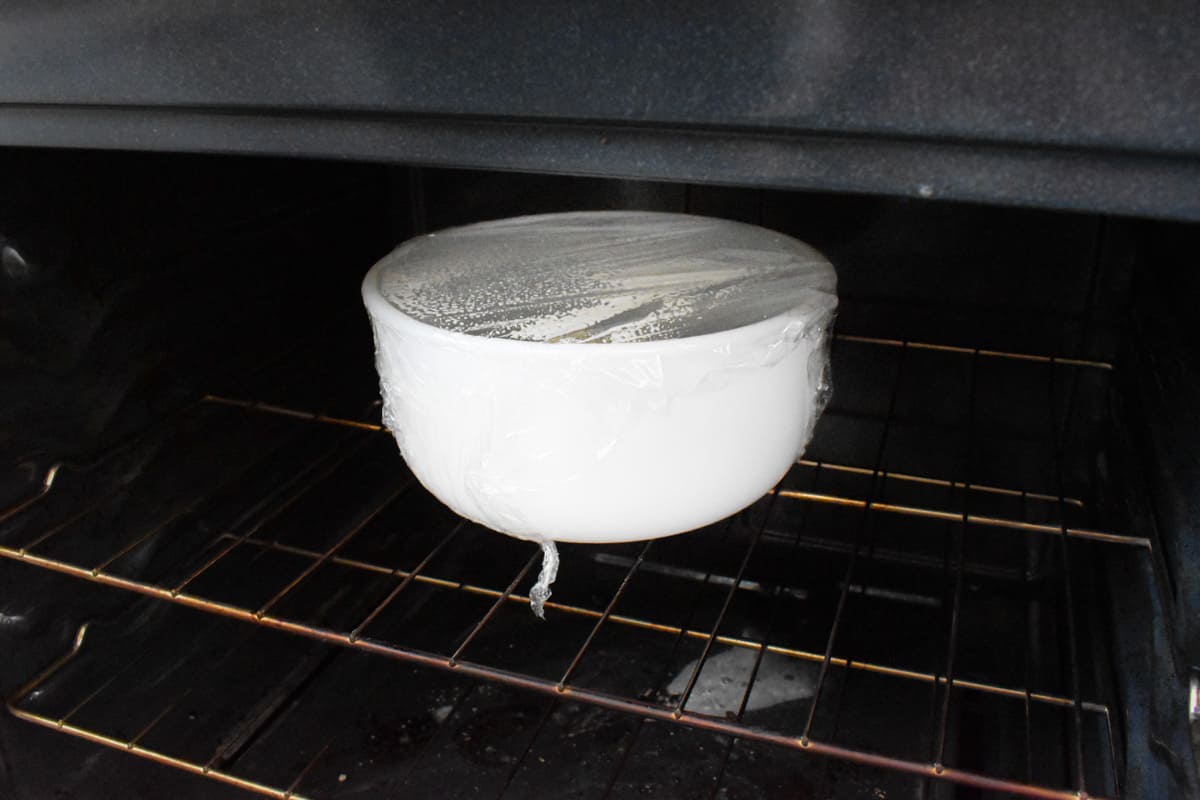
- Help your pizza dough rise. One of my favorite tips for getting your pizza dough to rise well is to place it in a warm oven! It’s easy, just turn your oven on to about 200 degrees Fahrenheit while you prepare your pizza dough. Then when it’s time to let your pizza dough rise turn off your oven, and place your covered pizza dough inside to rise. It helps your pizza crust rise beautifully.
- Make it a deep dish. When making a deep dish pizza, I like to use cake pan or even better, a cast iron dish with a higher rimmed edge. You’ll need a pan that has a 1-2 inch rim around it. Brush the pan generously with oil and then let your pan sit in the heated oven for about 10 minutes before you place your pizza crust inside. Be careful, the pan will be hot! Then add your toppings and bake!
- Make it thin crust. For a thin and crispy crust , I recommend using bread flour instead of all-purpose flour. Then make sure you roll your crust out as thin as you want it! If you don’t like air bubbles in your pizza, give the crust a few pricks all over with a fork.
Pizza Topping Ideas
Sauces
Try mixing it up with your pizza sauces. Or skip the sauce all together and add some dollops of ricotta on top of your mozzarella.
- Tomato sauce
- Basil pesto
- Alfredo sauce
- White garlic sauce
- Roasted Red Pepper Sauce
Cheeses
I always use mozzarella but loving adding a mixture of cheeses on my pizza for max flavor!
- Mozzarella
- Buffalo mozzarella
- Burrata
- Fontina
- Parmesan
- Feta
- Goat Cheese
- Ricotta
Fruit and Vegetables
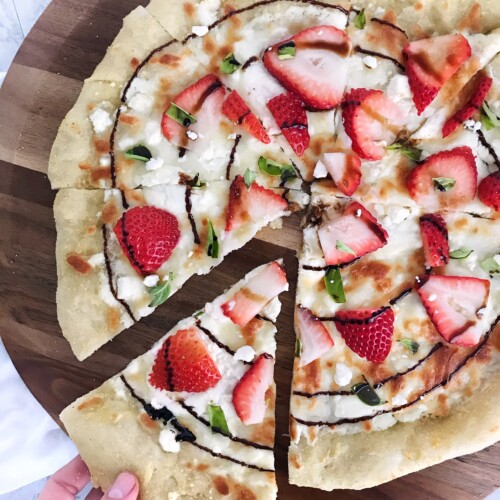
Veggies are a great way to add flavor and texture! I love adding fruit to my pizza for a sweet a savory combo. If you add fruit I recommend you add it after the pizza is baked so it doesn’t make the pizza soggy.
- Bell peppers
- Onions
- Olives
- Pepperoncinis
- Jalapenos
- Roasted Garlic
- Canned or fresh Pineapple (you can add this one before being baked)
- Strawberries
- Peaches
- Pears
Meats
I love the saltiness meat can add to a pizza, but there is more than just pepperoni!
- Pepperoni
- Salami
- Sausage
- Bacon
- Chicken
- Prosciutto
- Ham
- Canadian Bacon
Specialty Toppings
Add one of these extra special toppings to make your pizza pop.
- Honey
- Hot honey
- Balsamic honey
- Balsamic glaze
- Fresh herbs (like fresh basil)
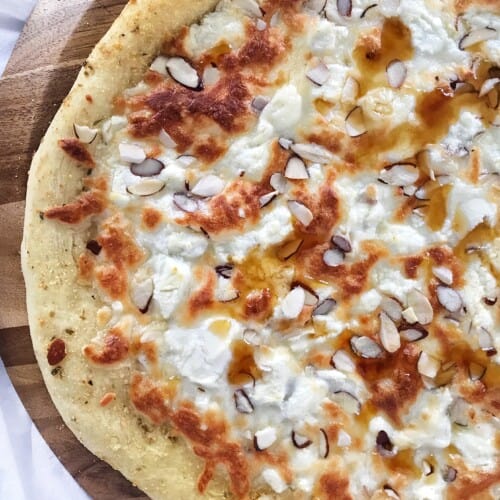
- Sliced almonds
- Pecans
- Sea salt
- Crushed red pepper
Storing Pizza Dough
How Long does Pizza Dough Last in the Fridge?
This pizza dough can be stored in the fridge for up to 3 days. After the dough has been kneaded, allow the dough to rise for 1-2 hours until doubled. Then, take the dough and divide it into two balls. Brush the dough with a little oil or spray it with some cooking spray and wrap it in plastic wrap.
When you are ready to use it, let the dough come to room temperature for about 30 minutes before using.
How to Freeze Pizza Dough
One of the great things about this recipe is that it makes enough for 2 12-inch pizzas. It’s perfect for baking one now and freezing one for later.
After your dough has risen and you’ve kneaded your pizza dough a bit, simply divide the pizza dough ball into two equal balls. Then take one and wrap it in a few layers of plastic wrap and stick it in the freezer to use later.
How to Defrost Pizza Dough
To defrost your pizza crust, remove the pizza dough from the freezer and let it thaw in the refrigerator overnight or for about 12 hours. Then, place let your pizza dough sit on the counter to come to room temperature for about 30 minutes before you attempt to use it. Then continue on to step 4, and you’re good to go.
Try this pizza dough recipe with one of our specialty pizzas!
P.S. If you tried this recipe or any other In Fine Taste recipe take a second and rate it below! We love hearing what you think. Let’s stay in touch! Sign up for our newsletter or follow us on Facebook, Instagram, TikTok, Youtube or Pinterest for more recipe ideas.

The Best Homemade Pizza Dough
Ingredients
Pizza dough:
- 1 ½ cups warm water
- 1 tablespoon active dry yeast (instant yeast will work fine too)
- 1 tablespoon sugar
- 2 teaspoons salt
- 2 tablespoon olive oil
- 3 ½ cups flour plus extra for kneading dough (see notes)
- Cornmeal
Butter Mixture for Brushing Pizza:
- 3 tablespoon Butter (can use olive oil)
- 3 tablespoon parmesan cheese finely grated (powdered kind works too)
- ¼ teaspoon Garlic salt (or to taste)
- ¼ teaspoon Dried parsley (or to taste)
Instructions
- In a large mixing bowl combine warm water, sugar, and yeast. Let mixture stand for 5-10 minutes until completely dissolved and yeast is beginning to bubble.Stir in 1 ½ cups flour, salt, and olive oil with a wooden spoon. Then gradually add 2 more cups of flour until the dough starts to ball up. The dough should be soft and sticky. If the dough is too wet add another tablespoon or two of flour.
- Tip the dough on to a lightly floured surface and sprinkle flour on top. Knead for 5-10 minutes.
- Coat your previously used mixing bowl with olive oil. Shape your dough into a ball and place into the bowl. Pull a large piece of plastic wrap out and spray it with cooking spray. Cover the top of the bowl with plastic wrap (cooking spray side down). Place in a warm place to rise for 1-2 hours until doubled in size (see notes).
- After dough has doubled, knock the air out of the dough. Knead a couple of times until the dough tightens up a little bit. Divide the dough in half and shape into 2 balls. Place back into the bowl, re-cover with plastic wrap, and let rest for 15 minutes. You can freeze one ball at this point if you’d like (see notes).
- Preheat oven to 475 degrees Fahrenheit. Take your baking sheet or pizza stone and sprinkle cornmeal over baking sheet or pizza stone (this gives the pizza an extra crunch and texture—don’t skip it!)
- Tip dough on to lightly floured surface stretch your dough (or roll out using a rolling pin) into a 12-inch circle. Transfer dough to baking sheet or pizza stone.
- In a small bowl mix the ingredients listed under “Butter Mixture for Brushing Pizza.” Use a pastry brush (or a spoon if you don’t have one) and coat the pizza crust with the mixture. Then sprinkle with additional cornmeal.
- Add desired toppings to pizza crust and bake for 10-12 minutes
Notes
Nutrition
Originally published September 13, 2018
See our web story for this post.



Cara H
Thank you so much for all of the details on how to properly make pizza crust. I tried both methods, 3 stretched and 1 rolled (I had doubled the batch). I used bread flour. The stretched dough is sooooo much better! Thank you! Calories are listed per 1 gram and seem very off. Is over 100 calories per gram correct?
In Fine Taste
Just wanted to let you know that the nutrition has been updated on this post! It should now reflect the nutrition for 1 slice (1/8 of a pizza).
- Alyssa
Cara H
Thank you so much for all of the details on how to properly make crust. This is not my first time looking for a recipe and none have had clear steps such as yours. I tried both methods, 3 stretched and 1 rolled (I had doubled the batch). I used bread flour. The stretched dough is sooooo much better! Thank you! Calories are listed per 1 gram and seem very off. Is over 100 calories per gram correct?
In Fine Taste
Hi Cara, thanks for taking the time to comment! I’m glad the recipe worked out well for you 🙂
No, that does sound off for the calories. Let me look at it and see if I can figure out what’s going on there.
- Alyssa
Teresa Douglas
Will try this pizza dough recipe tonight & may replace my current recipe.
In Fine Taste
I'd love to hear how it turned out for you Teresa!
- Alyssa
Karen
Delicious! The garlic salt/olive oil on crust was so good!