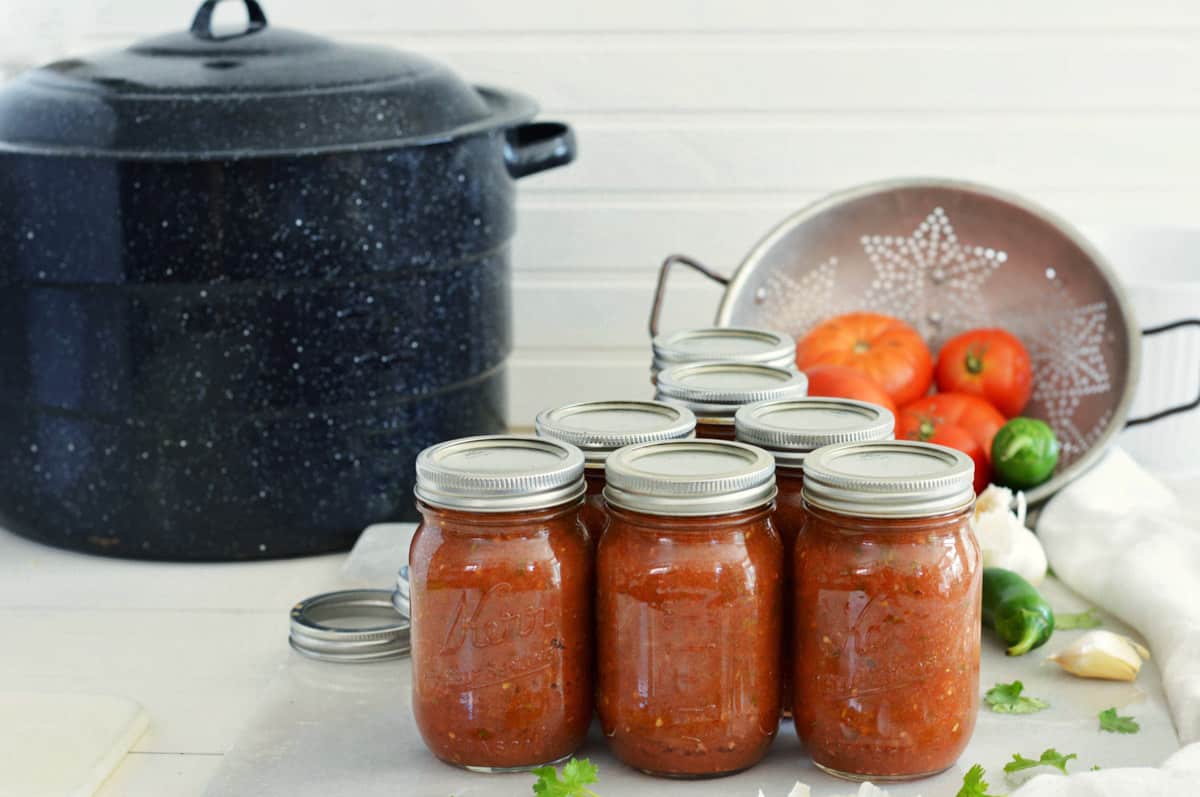
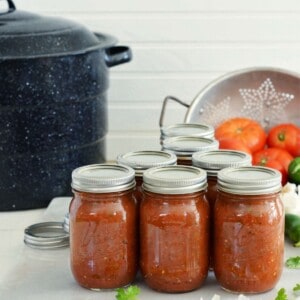
Preserve the taste of summer for months to come when you learn how to can salsa! We'll give you step-by-step directions for this easy recipe featuring fresh tomatoes, onions, jalapenos, garlic, cilantro and lime in a restaurant-style salsa.
Jump to:
Why this Recipe Works
Top Reasons You'll Love this Salsa and Learning How to Can it!
- Outstanding flavor. This homemade salsa is a little sweet, a little spicy and a lot of delicious! It's a great flavor combo.
- Best snack. Is there anything better than snacking on chips and salsa? Chips and salsa has to be our favorite snack. We love thin, crisp, lightly salted chips served with this delicious homemade salsa fresca. We could eat it by the quart!
- Easy. We'll show you how to can salsa --It's so easy to make a big batch of this salsa all at once. And then, you've got a lot on hand to make life even better!
- Restaurant style. Personally, we love restaurant-style salsa with its smoother texture. We like getting all the flavors in each bite!
- Versatile. We love this salsa roja with chips, but it's also great on scrambled eggs, chicken, fish and pork, and for tacos, enchiladas, burritos, quesadillas, and yes, just about any Mexican recipe.
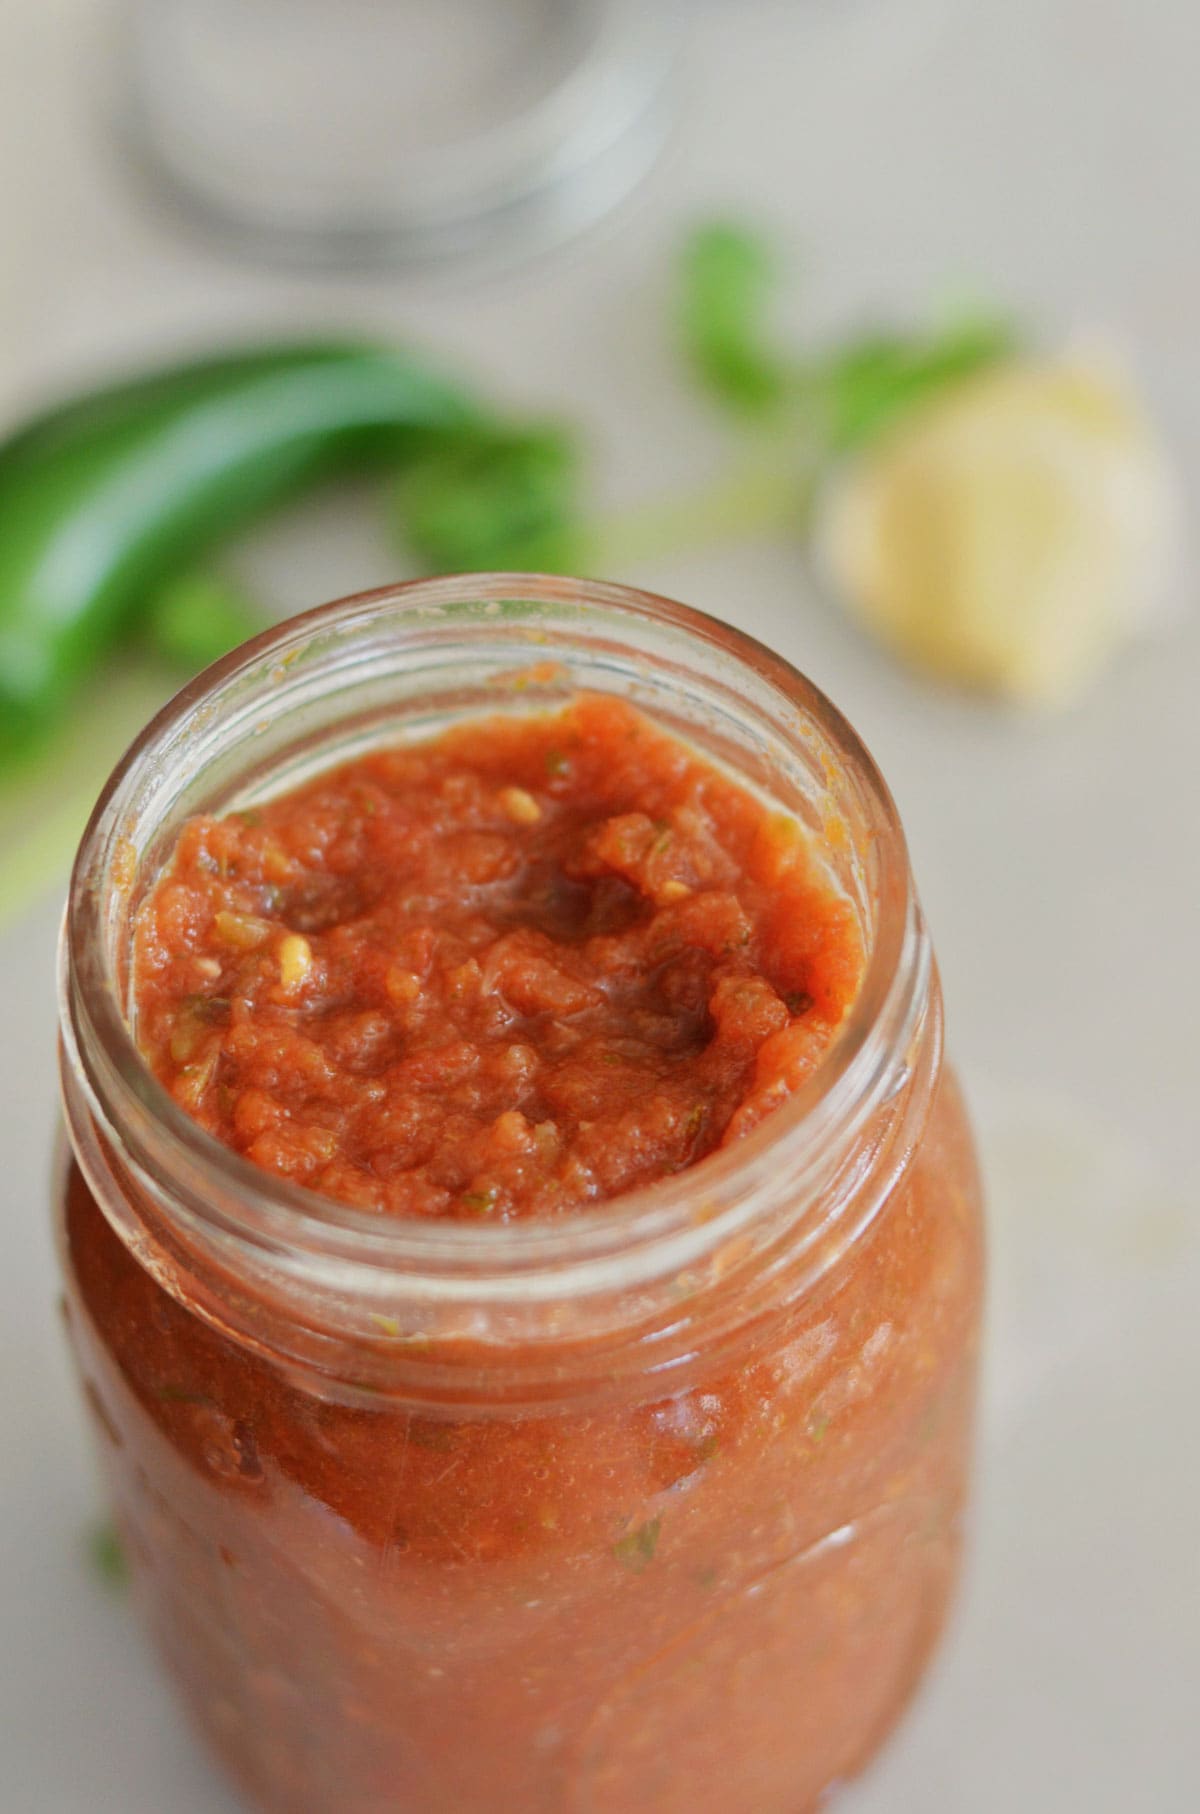
We love the consistency of restaurant-style salsa where the ingredients are blended together into a somewhat smooth sauce. By blending the salsa in our blender, we get all the delicious flavors at once -- in every bite!
This homemade salsa lets you really taste those fresh tomatoes; it's slightly sweet, slightly tangy and has just a pinch of salt and a touch of heat. It's the perfect combination. This homemade salsa recipe has the right amount of acid (from lime juice and vinegar) for home canning. If you adjust it, don't stray from the amounts of these acidic ingredients to keep your salsa food safe.
We can't put in words how much we like this salsa! Honestly, we could eat it by the spoonful. It's also great with tortilla chips and lots of other Mexican dishes.
Canning Supplies
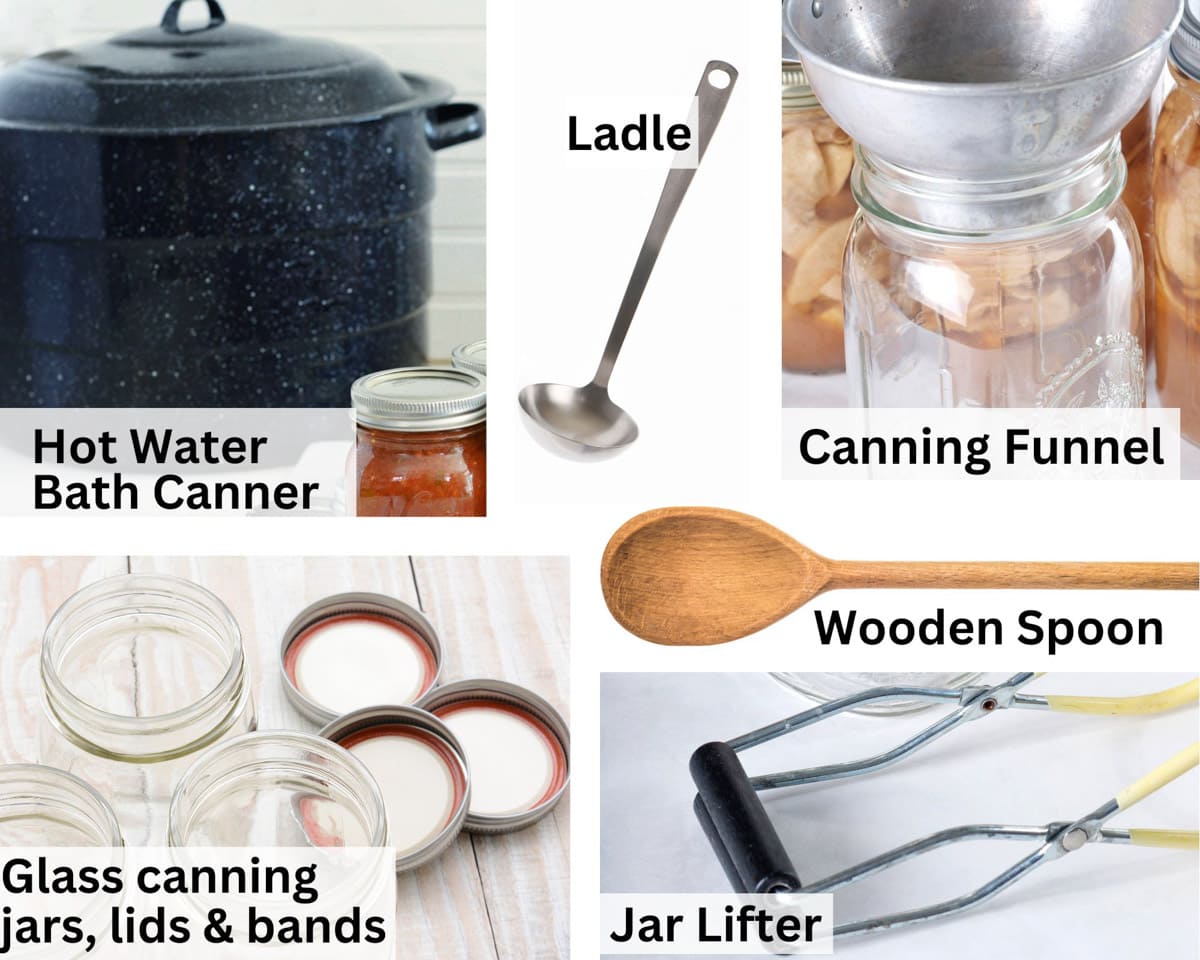
To can salsa, you need some basic canning supplies and equipment. Here's a quick list to help you succeed in your salsa canning adventure!
- Hot Water Bath Canner. You'll need a water bath canner or a large, deep sauce pot with a lid, and a rack to boil the jars and seal them.
- Glass Canning Jars, Lids, and Bands. You need special jars to preserve food. These will have coordinating lids and bands. You can reuse the jars and bands, but you always want to start with new lids.
- Common Kitchen Utensils. A wooden spoon can help remove bubbles from your salsa, a ladle is helpful for transferring salsa from the pot to the jars, and a paring knife is useful to remove the core from tomatoes.
- Home Canning Funnel. While not mandatory, a canning funnel can save you a big mess, as it's made to funnel food perfectly into the jars.
- Jar Lifter. Although you can lift jars out with tongs, or by other means, a jar lifter makes it easy to remove jars from the hot water and avoid burns.
Ingredient Notes

- Roma Tomatoes. These dense, fleshy tomatoes are the main ingredient in this homemade salsa. They have good flavor and aren't as watery as some tomatoes.
- Yellow Onions. These onions offer sharp flavor and bright texture for the salsa. You can substitute white or red onions which have more water and more subtle taste.
- Jalapeño. One of the best known spicy chili peppers in the world. The jalapeno measures 2,500-8,000 on the Scoville scale, rather low compared to many other peppers. It spices up the salsa and gives is more intense flavor. You can add heat by including the seeds of the pepper in your salsa.
- Garlic. Garlic is a vegetable. It's a close relative of the onion, but it's used more like an herb or spice. It gives deep flavor to the salsa.
- Cilantro. The leaf of the coriander plant, cilantro is commonly used in Mexican cooking. With a lemon, peppery taste, the flavor from these delicate leaves is delicious in salsa.
- Bottled Lime Juice. Lime juice is the perfect complement to salsa and really all Mexican food. More importantly, lime juice gives the necessary acidity to make this salsa safe when canning. It's important to use bottled lime juice when canning as it has a confirmed level of acidity. If we're eating the fresh salsa, we prefer fresh squeezed lime juice!
- Sugar. There isn't enough sugar in this recipe to make it sweet, but a small touch rounds out the flavors and softens the vinegar.
- Coarse Kosher Salt. Salt is a flavor enhancer and brings out the taste of the ingredients in the recipe. We prefer coarse Kosher salt or natural sea salt, as iodized salt may produce a metallic flavor and even make your salsa cloudy (due to its anti-caking agent.)
- Red Wine Vinegar. Vinegar brings out the flavors of the other salsa ingredients. It adds a little snap to the salsa too. Vinegar, along with lime juice gives the acidity needed to keep the salsa food-safe after canning. Make sure the vinegar you use is 5% acidity.
How to Make this Recipe
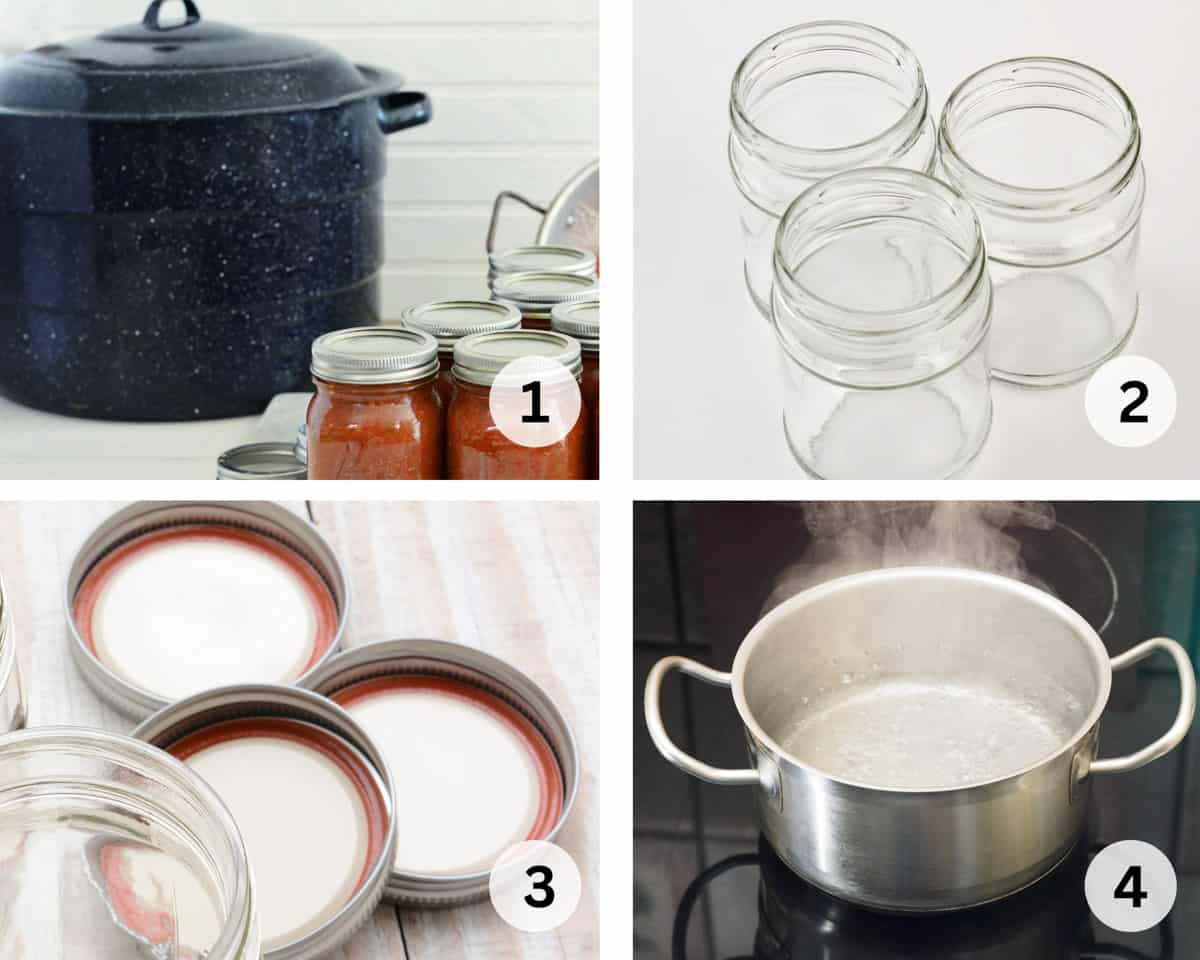
- Prepare Canner. Prep water bath canner by filling it with water that's a level at least an inch over tops of your jars. Heat water to simmer.
- Simmer. Place clean pint jars in the simmering water canner until ready to use, but don't boil.
- Wash bands and lids. Wash and rinse jar bands and lids in warm soapy water.
- Warm bands and lids. Set band and lids in pan of hot, not boiling, water to stay warm.
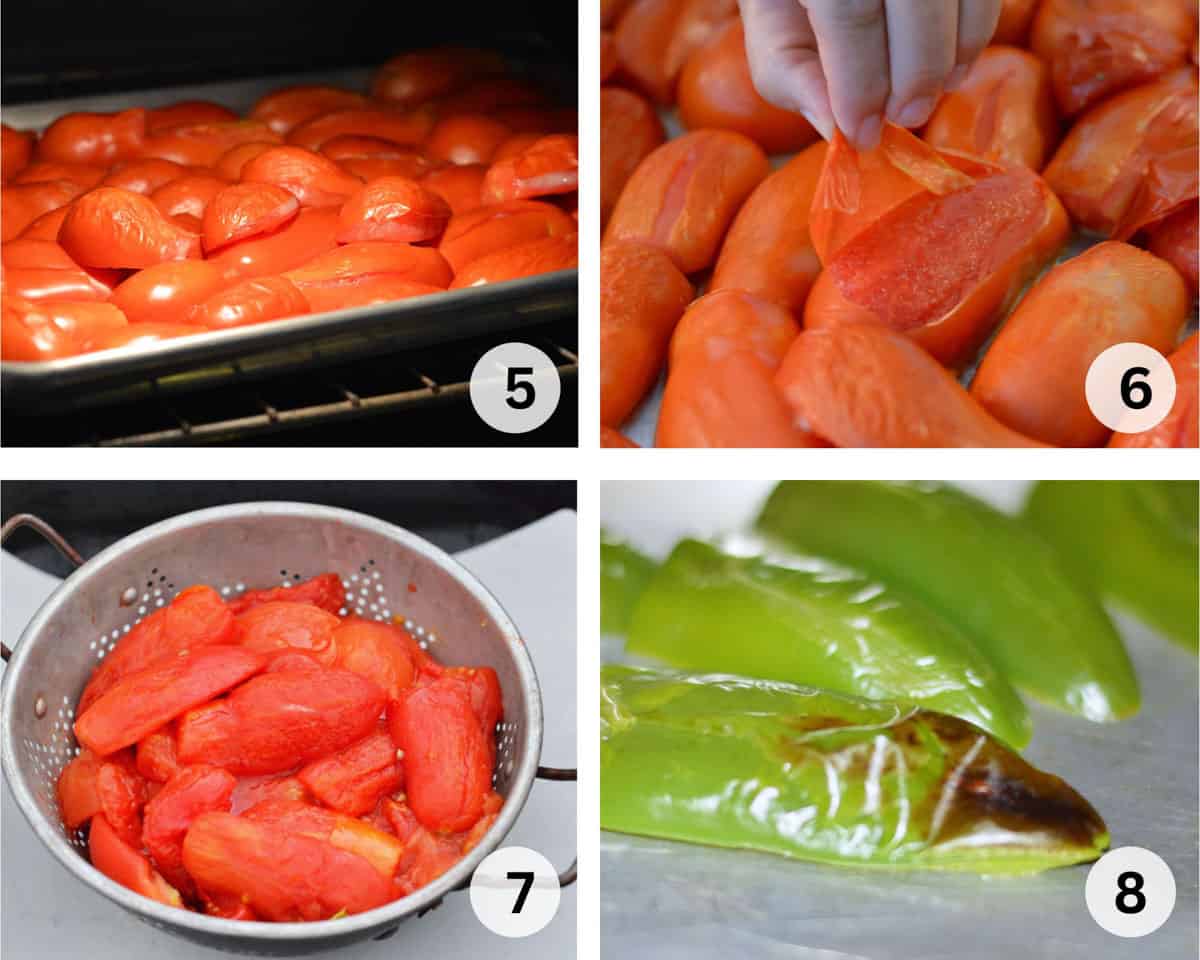
- Prep Tomatoes. Remove cores, then cut tomatoes in half and place them cut side down on a large rimmed baking sheet. Roast tomatoes by broiling on high for 5-7 minutes until skins begin to blister & shrivel. Good tomatoes are the most important thing when you're learning how to make salsa.
- Peel Tomatoes. Remove tomatoes from oven and easily peel off the skins.
- Drain tomatoes. Place tomatoes in colander to drain excess liquid Push them to remove liquid. Don't worry about getting it all out, but removing some liquid will keep your salsa from getting runny. Save your tomato juice! It's great for soups, dressings and even to drink!
- Prepare jalapeños. Cut jalapeños in half; remove stem, membrane and seeds; place them cut side down on cookie sheet. Broil 5-10 minutes until the skins begin to blister. Remove from oven; place in paper bag to let them sweat. Peel.
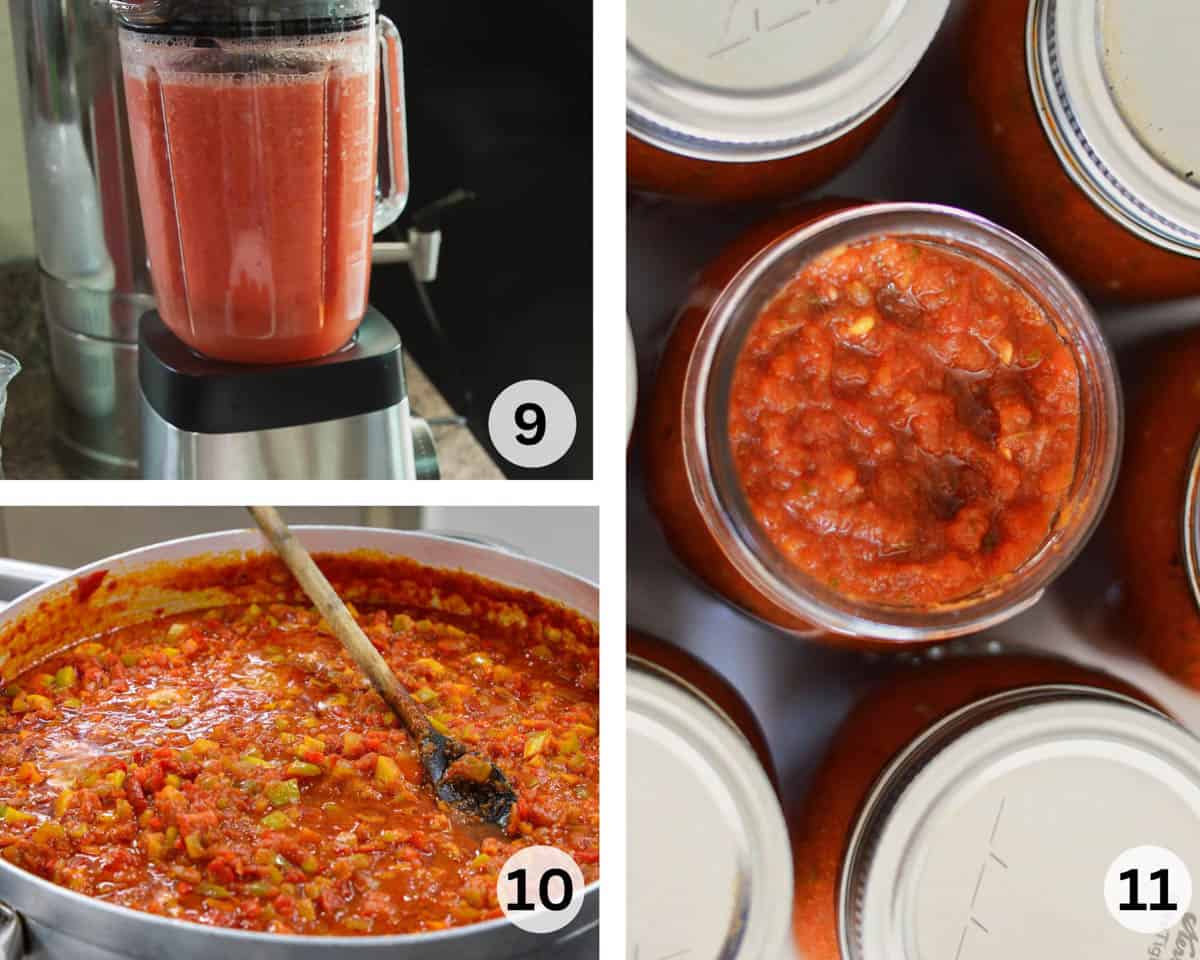
- Combine Ingredients. Place all ingredients in blender and blend until smooth (you will need to do this in batches to fit in blender).
- Cook Salsa. Pour salsa in large pot and bring to a boil. Reduce heat; stir and simmer for 10 minutes.
- Fill Jars. Fill sterilized canning jars with salsa, within ½-inch of top. To remove air bubbles, gently tap bottom of jar on flat surface, then run a chopstick, wooden skewer or long handle of wooden spoon around inside edge of jar. Wipe rim of jar clean; add lid and band then tighten with your fingertips.
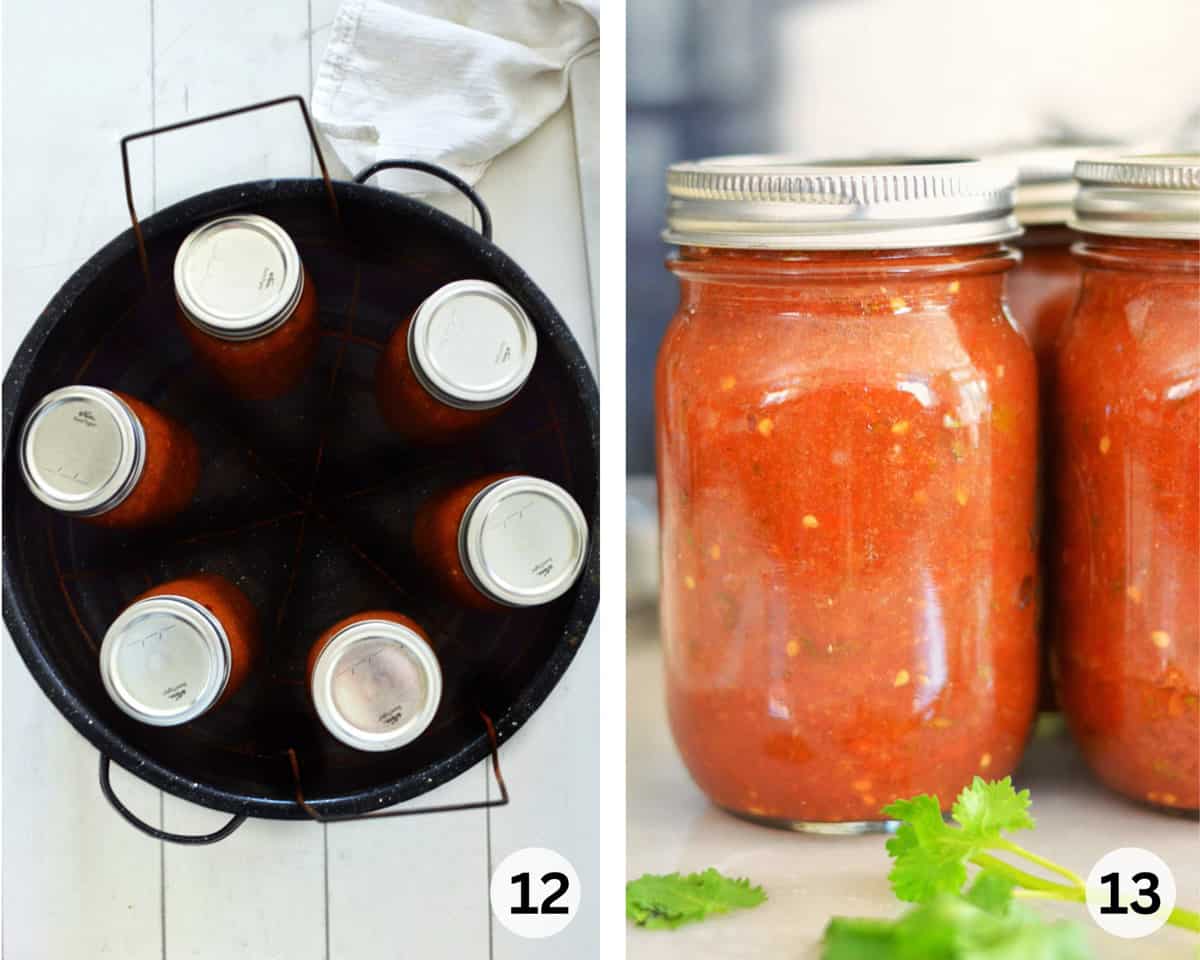
- Process Jars. Place filled jars in water bath canner while water is simmering. Water must cover jars by 1 inch. Adjust heat to medium-high, cover canner, and bring water to a rolling boil. Process jars for 20 minutes - adjust for altitude (see chart.) Process in a water bath canner for 20 minutes.
- Remove and Cool. Remove jars carefully from the water bath and let cool to room temperature. Check to make sure the jars have sealed correctly (lightly press down on top of the lid; it should be firm - if not, you will need to refrigerate salsa or re-process it).
Adjust Your Recipe Above Sea Level

If you are at an altitude higher than 1,000 feet above sea level, you need to adjust the boiling water processing time for successful canning like this: From 1,001-3,000, five minutes; 3,001-6,000, 10 minutes; 6,00-8,000 feet, 15 minutes; 8,001-10,000 feet, 20 minutes.
Frequently Asked Questions (FAQs)
Yes. Tomatoes have an average ph of 4.0-4.5. Not all foods can safely be canned using the water bath method. Less acidic foods (pH higher than 4.6) require a pressure canner to achieve hotter temperatures to kill off microorganisms. This is why you should not significantly adjust when hot water bath canning.
If you are preparing tomatoes for canning, you need to remove the peels and seeds. There are no tested canning recipes that include the skins. We easily peel our tomatoes after roasting them. You can also use the blanching method the same way we blanch peaches in this dessert recipe.
You must add acid to canned salsas because the natural acidity may not be high enough. Commonly used acids in home canning are vinegar and lemon juice. Lemon juice is more acidic than vinegar, but has less effect on flavor. Use only vinegar that is at least 5% acid and use only commercially bottled lemon juice. Bottled lemon juice has a consistent level of acidity that will keep your jars safe.
Yes. Each quart of salsa, or tomatoes, needs a teaspoon of salt. Coarse Kosher salt works best for canning as it doesn't have the metallic flavor iodized salt may give canned salsa.
During storage, pulp and juice in home canned salsa and tomatoes may separate, Separation is caused by an enzyme, (Pectose), found in high concentrations in tomatoes. The enzyme is activated when tomatoes are cut. Don't worry about this, just stir your salsa after opening. It will be just right!
One reason salsa becomes watery is the type of tomatoes used. Some tomatoes are much better for salsa; Roma tomatoes are good in salsa because they have less juice.
If you want hotter homemade salsa, just add the seeds from the jalapeno.
Expert Tips
- Don't can damaged tomatoes. You should also avoid tomatoes from dead vines. These tomatoes could have harmful pathogens. Canning process time may not be enough to kill disease organisms which could give you salsa that is unsafe to eat.
- Use bottled lime juice when canning. You can use fresh lime juice for this salsa recipe if you don't can it. Just put is in an airtight container in the fridge and eat within three days. For canning you need to use bottled juice. Bottled lime and lemon juices have a standardized acidity level, while the fresh squeezed level can vary. It's important for the ph balance to be exact.
- Fire roast your tomatoes. For a richer flavor, you can place your tomatoes (and jalapenos) in a cast iron pan or on your grill. Wait until tomatoes blister, then move around to char each side. The charred vegetables will peel easily and give you a deep flavor. Then follow recipe as written.
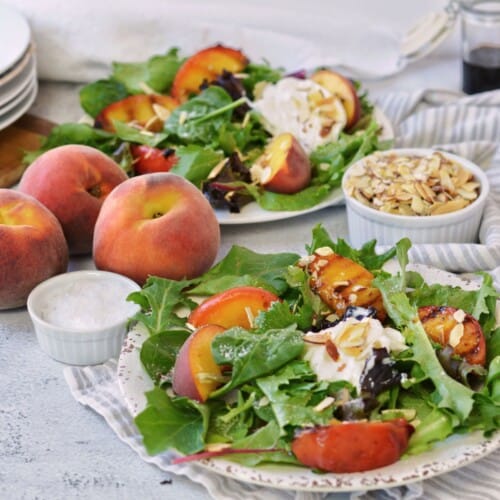
- Try our other salsa recipes! We love this salsa recipe, but we've got some other salsas for you to try! If you don't want to can it, make our fresh salsa fresca. We add a little fruit in our delicious pineapple salsa. And our mandarin guacamole is a cross between salsa and guac!
Serving & Storage Tips
Serve salsa at room temperature. For the best flavor, warm salsa to room temperature before serving. This will help bring out the taste of the tomatoes and make it more delicious!
Eat your salsa within 5 days. Once you have opened a bottle of salsa, make sure to eat it within 5 days. There are no preservatives in your homemade salsa.
Store bottles in a cool place. Put your salsa on a shelf preferably in a cool place and away from direct light. Always refrigerate your salsa after opening.
Salsa should keep 12 to 18 months. If canned and stored properly, the salsa shelf life is about 12 to 18 months. Older salsa may be safe to eat if the jar is in good condition and the seal is intact, but quality and flavor will diminish.

P.S. If you tried this recipe or any other In Fine Taste recipe take a second and rate it below! We love hearing what you think. Let's stay in touch! Sign up for our newsletter or follow us on Facebook, Instagram, TikTok, Youtube or Pinterest for more recipe ideas.
How to Can Salsa
Ingredients
- 12 cups peeled and drained tomatoes about 75 Roma tomatoes
- 3 medium large yellow onions for more mellow flavor, use white or red onion
- 6 jalapeños membranes and seeds removed
- 10 cloves garlic
- 3 bunches cilantro; top leaf part twisted off
- ¾ cup bottled lime juice
- ½ cup red wine vinegar
- 3 Tablespoons sugar
- 2 Tablespoons sea salt or coarse Kosher salt
Instructions
- Prepare water bath canner by filling it with water that's at least an inch over top of your jars. Heat water to simmer. Place clean pint jars in the simmering water canner until ready to use, but don't boil.
- Wash and rinse jar bands and lids in warm soapy water. Set band and lids in pan of hot, not boiling, water to stay warm.
- Remove cores, then cut tomatoes in half and place them cut side down on a large rimmed baking sheet. Roast tomatoes by broiling on high for 5-7 minutes until skins begin to blister & shrivel. Remove tomatoes from oven and easily peel them. (I use 3 large pans).
- Place tomatoes in colander to drain excess liquid Push them to remove liquid. Don't worry about getting it all out, but removing some liquid will keep your salsa from getting runny. Save your tomato juice,It's great for soups, dressings and even to drink!
- Prepare jalapenos similarly: cut jalapenos in half; remove stem, membrane and seeds; place them cut side down on cookie sheet.Broil 5-10 minutes until the skins begin to blister. Remove from oven; place in paper bag to let them sweat. Peel.
- Combine all ingredients in blender or food processor and blend until smooth (you will need to do this in batches to fit in blender).
- Pour salsa in large pot and bring to a boil. Reduce the heat, stir and simmer for 10 minutes.
- Fill sterilized canning jars with salsa, within½-inch of top. To remove air bubbles, gently tap bottom of jar on flat surface, then run a chopstick, wooden skewer or long handle of wooden spoon around inside edge of jar. Wipe rim of jar clean; add lid and band, then tighten with your fingertips.
- Place jars in water bath canner while water is simmering. Water must cover jars by 1inch. Adjust heat to medium-high, cover canner, and bring water to a rolling boil. Process jars for 20 minutes - adjust for altitude (see chart.) Process in a water bath canner for 20 minutes.
- Remove jars carefully from the water bath and let cool to room temperature. Check to make sure the jars have sealed correctly (lightly press down on top of the lid; it should be firm - if not, you will need to refrigerate salsa or re-process it).
Notes
- Don't can damaged tomatoes. You should also avoid tomatoes from dead vines. These tomatoes could have harmful pathogens. Canning process time may not be enough to kill disease organisms which could give you salsa that is unsafe to eat.
- Use bottled lime juice when canning. You can use fresh lime juice for this salsa recipe if you don't can it. Just put is in an airtight container in the fridge and eat within three days. For canning you need to use bottled juice. Bottled lime and lemon juices have a standardized acidity level, while the fresh squeezed level can vary. It's important for the ph balance to be exact.
- Adjust for altitude. If you are at an altitude higher than 1,000 feet above sea level, adjust boiling water processing time as indicated for successful canning:
| Altitude Feet/Increase Processing Time | |
| · 1,001- 3,000/5 minutes · 3,001- 6,000/10 minutes · 6,001- 8,000/15 minutes · 8,001-10,000/20 minutes |


Dina says
This looks delicious and totally doable. Thanks for sharing. Love your food.
Suzanne says
Really good salsa!