You can turn ordinary desserts into show-stoppers just using a vegetable peeler! Chocolate curls can add so much to a dessert, and these chocolate swirls and twirls are so much fun to make! Here we'll show you the simplest techniques to curl chocolate.

Jump to:
Why Make This?
There are so many ways to make desserts elegant by using chocolate shavings and curls. Our technique is fast, it's easy and it's fun! You can pile the curls atop a French silk pie, garnish a layered parfait or cover a shaved chocolate cake.
What You'll Need
All you need to make curly chocolate is a large milk chocolate bar and a simple vegetable peeler.
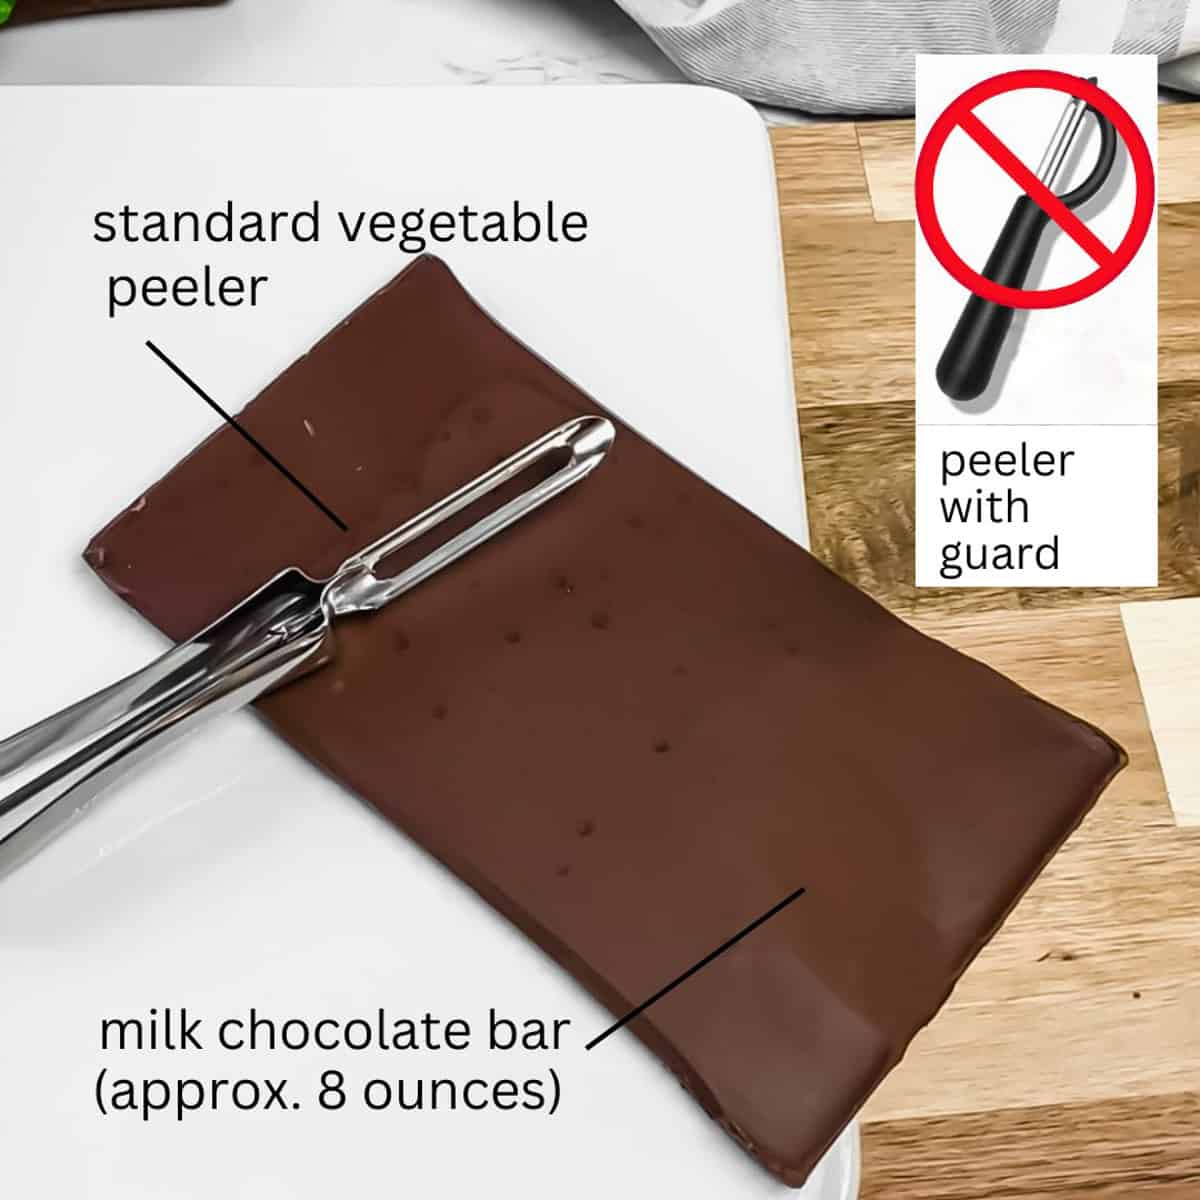
- Large milk chocolate bar. The large bar will give you more surface area to work with. You can get various sized curls from the edges of a large bar. Milk chocolate has a higher fat content which makes the bar softer and easier to work with. An 8 ounce bar will give you enough to top a medium-large dessert! Smaller bars are great for individual treats.
- Vegetable peeler. A simple straight edge vegetable peeler works best. Use one without a guard, or extra accessories. You want to be able to get a clean strand with each stroke and not have the chocolate caught or crushed in the guard. You don't need swivel action or a curved peeler, just a simple straight edge peeler with sharp blades.
Making a Variety of Curls
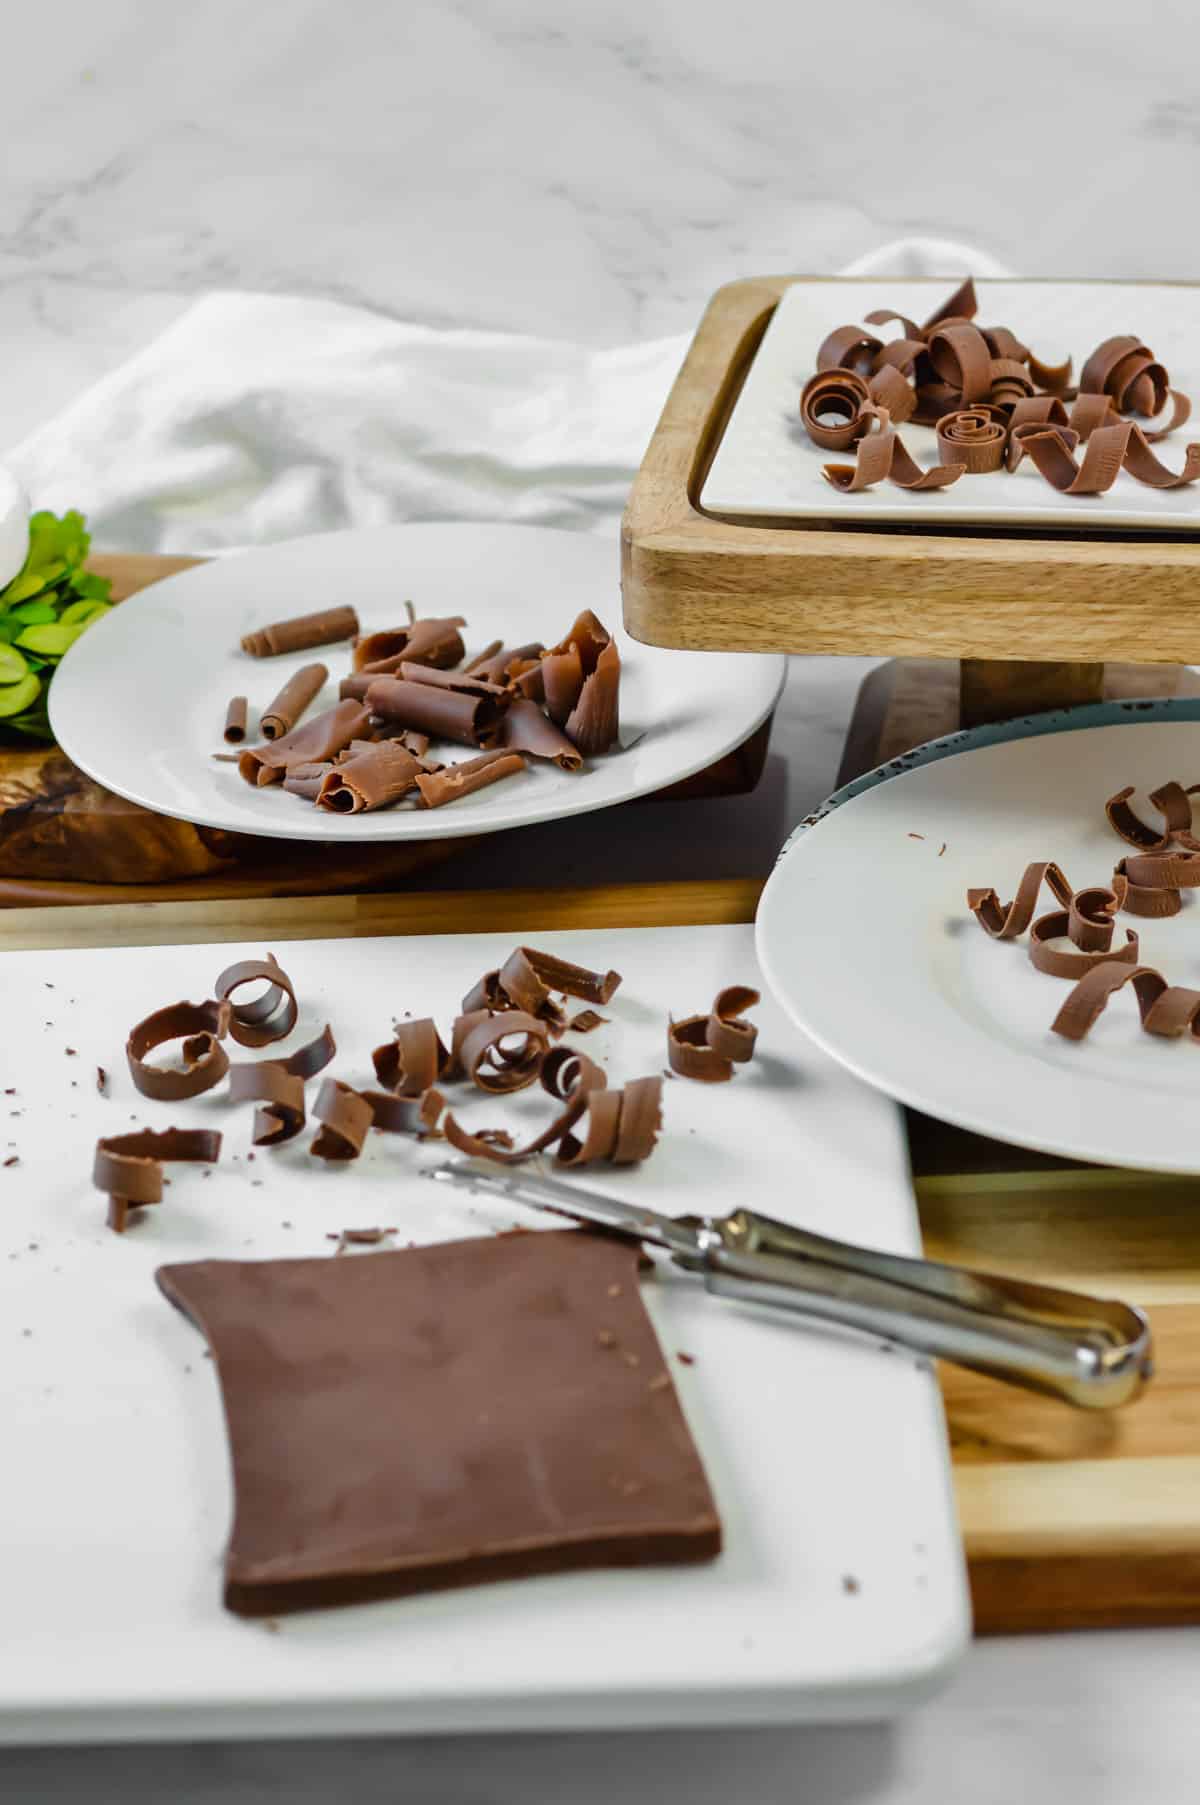
There are many ways to make chocolate curls. We think making chocolate curls with a vegetable peeler is the easiest. Using a candy bar is the simplest method with consistent results. Our family has been using this method for 50 years!
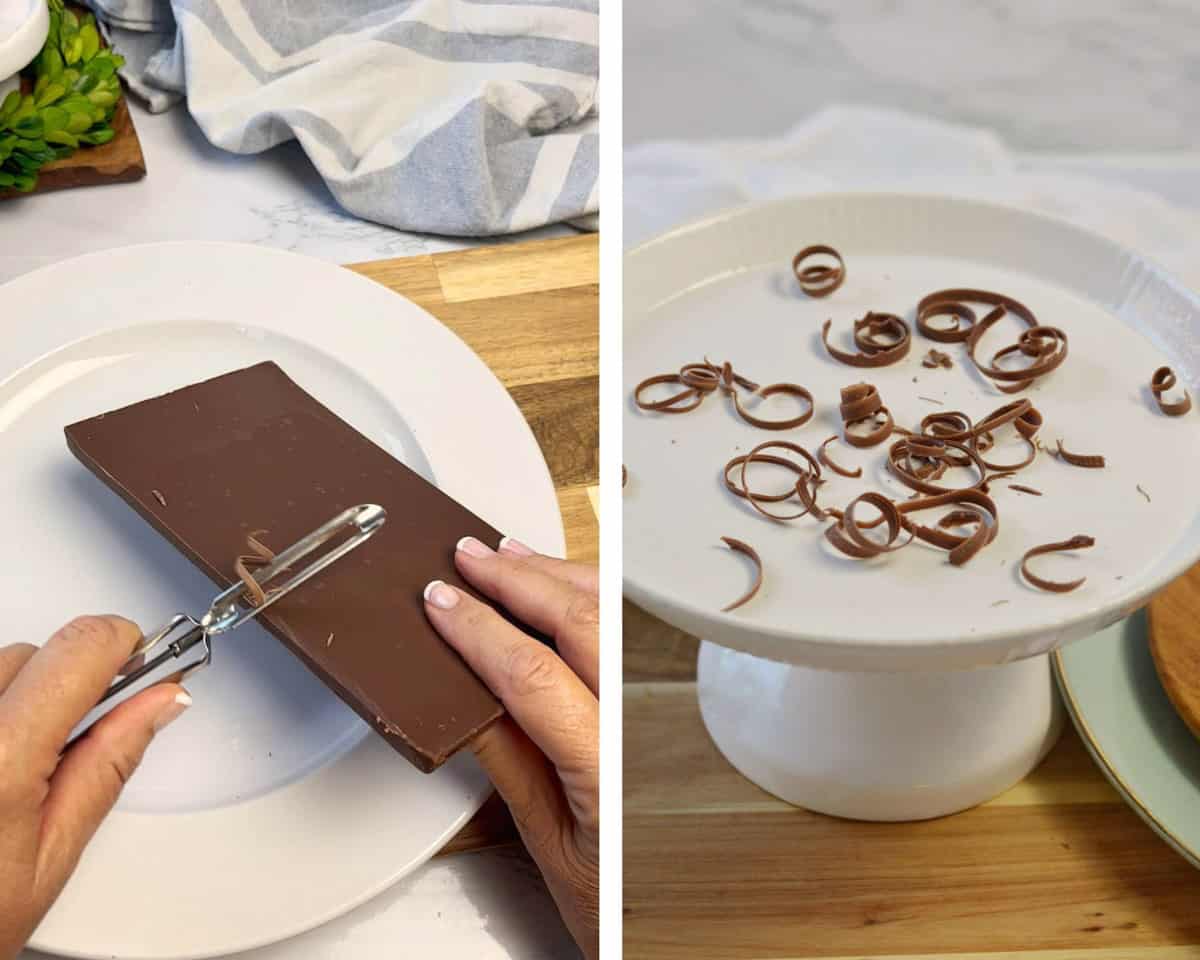
To make a curl, use a standard vegetable peeler on a large, room temperature milk chocolate bar (no nuts).
Gently peel strips off the bar, rotating as the chocolate warms in your hands. Try to dig into the bar a little and get a grip on the chocolate. If you have cold hands, or you can't shave curls off the bar, consider placing the chocolate bar in the microwave for 10 seconds ONLY.
We're going to show you five different kinds of chocolate decor we typically make. We've named them all to keep track of them. Let's take a look at how to make chocolate swirls, chocolate twirls, chocolate curls, chocolate waves and chocolate shavings!
Chocolate Swirls
For swirls, peel the narrow edge of the chocolate bar.

Chocolate Twirls
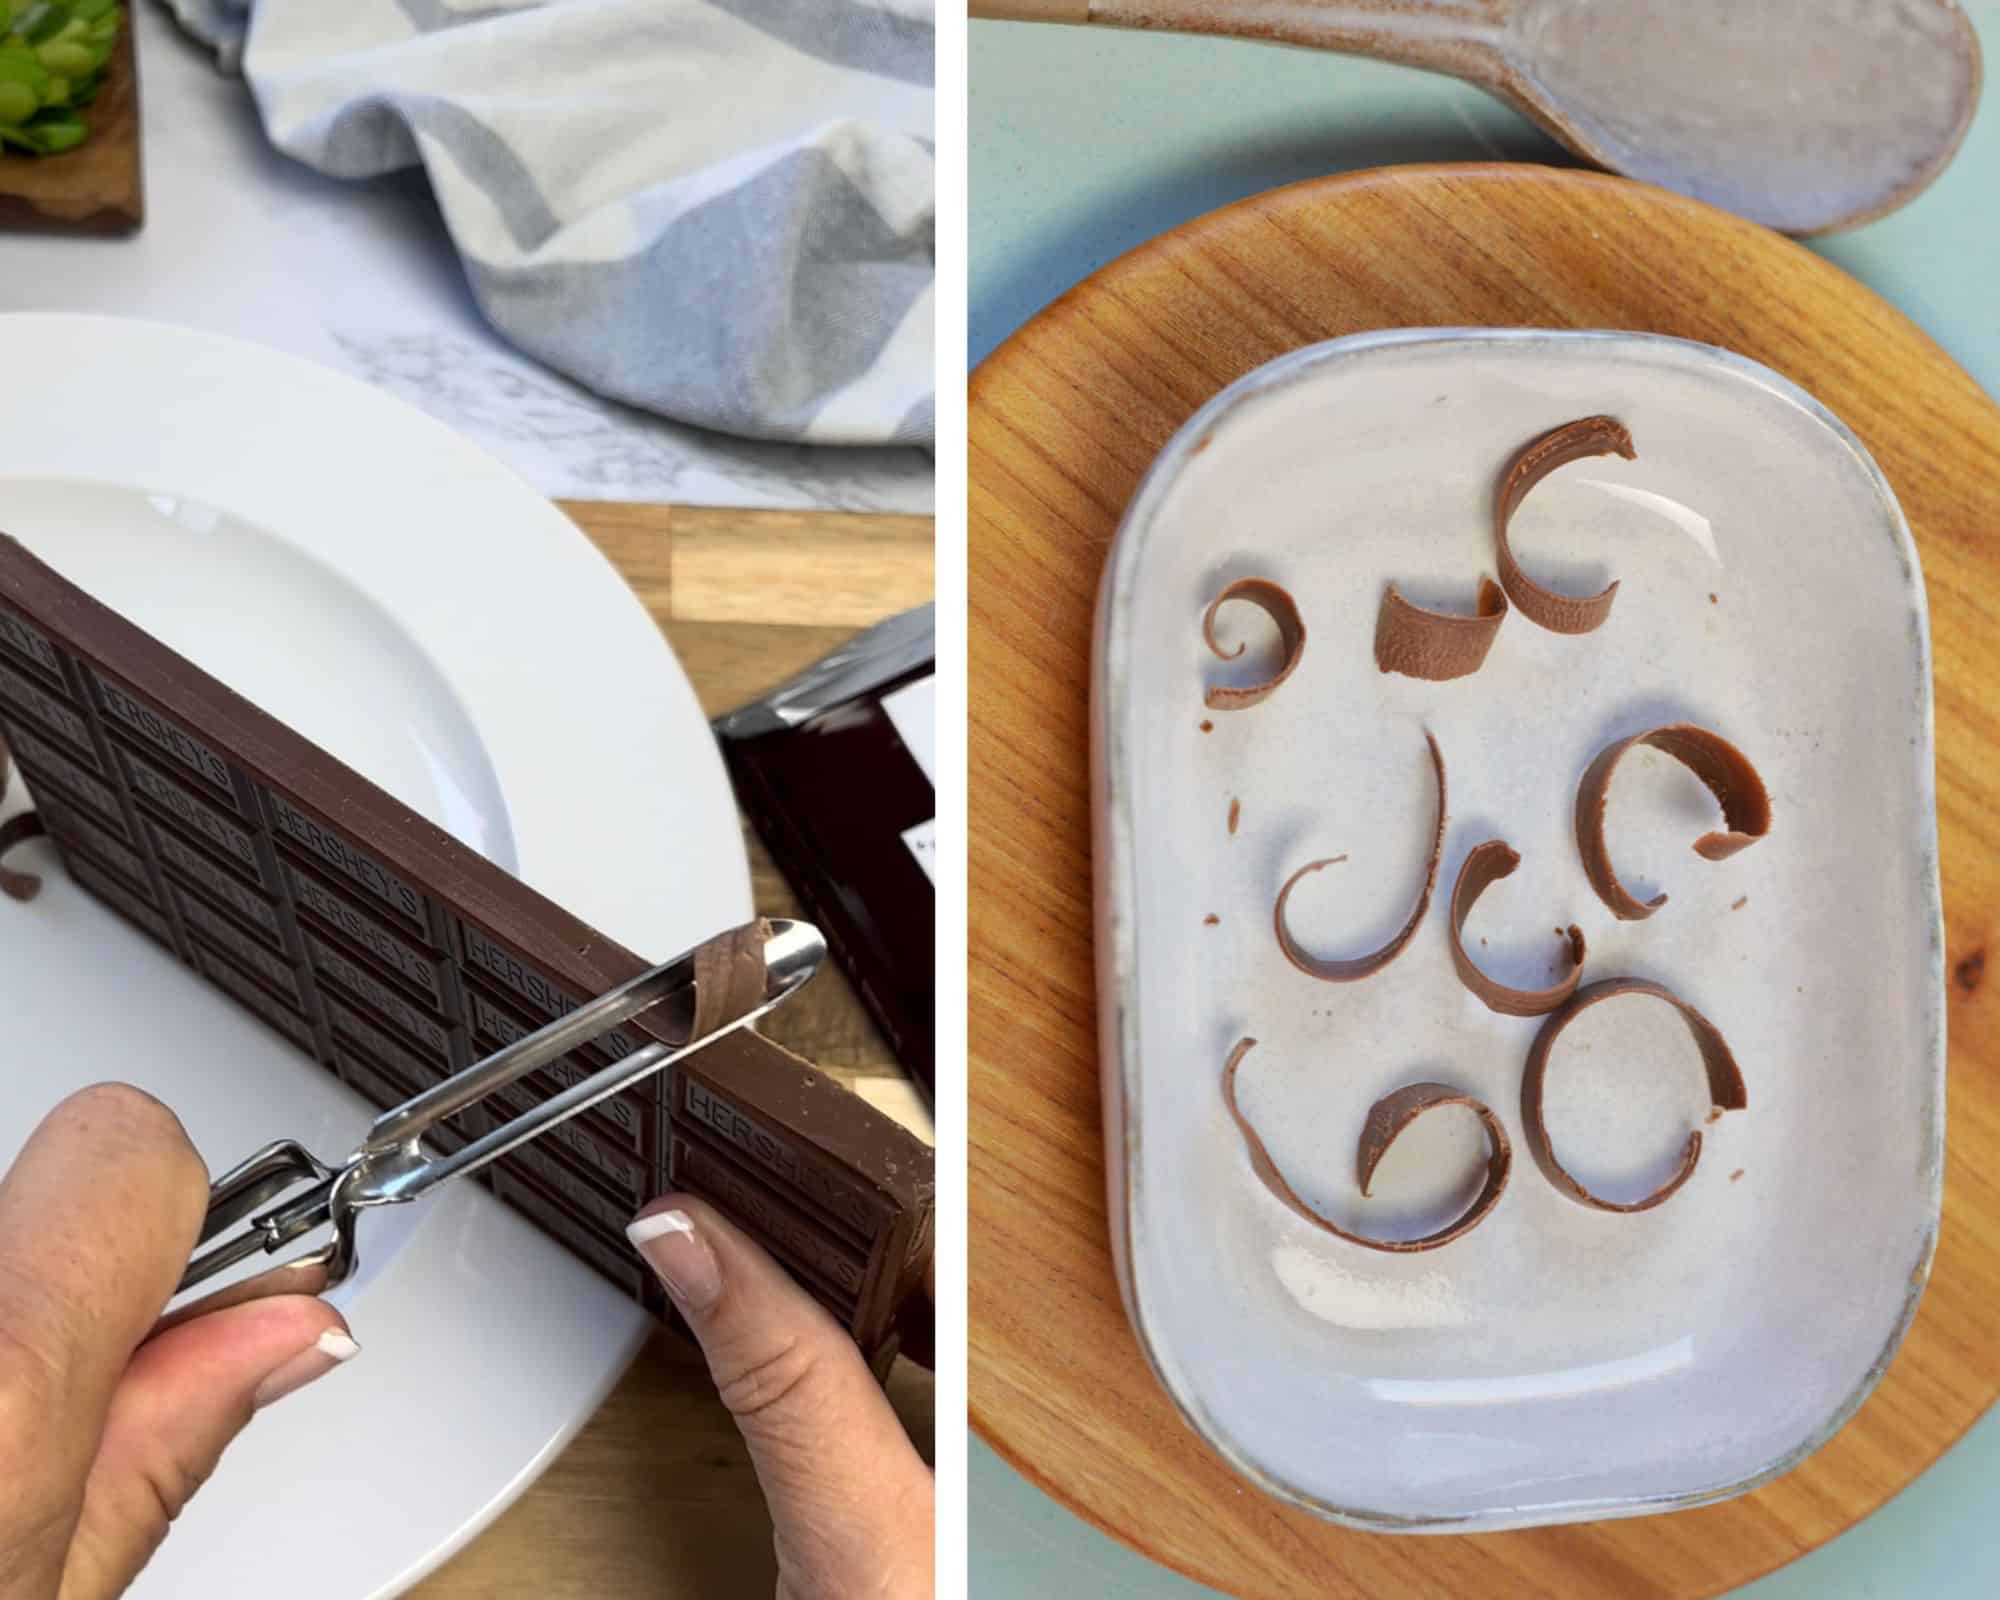
Shaving the sharp edge of the chocolate bar will create twirls.
Chocolate Curls
For fat curls, shave the flat side of the chocolate bar with your peeler.

Chocolate Waves
Make "C" shaped waves with your cheese grater or using short strokes of your peeler.
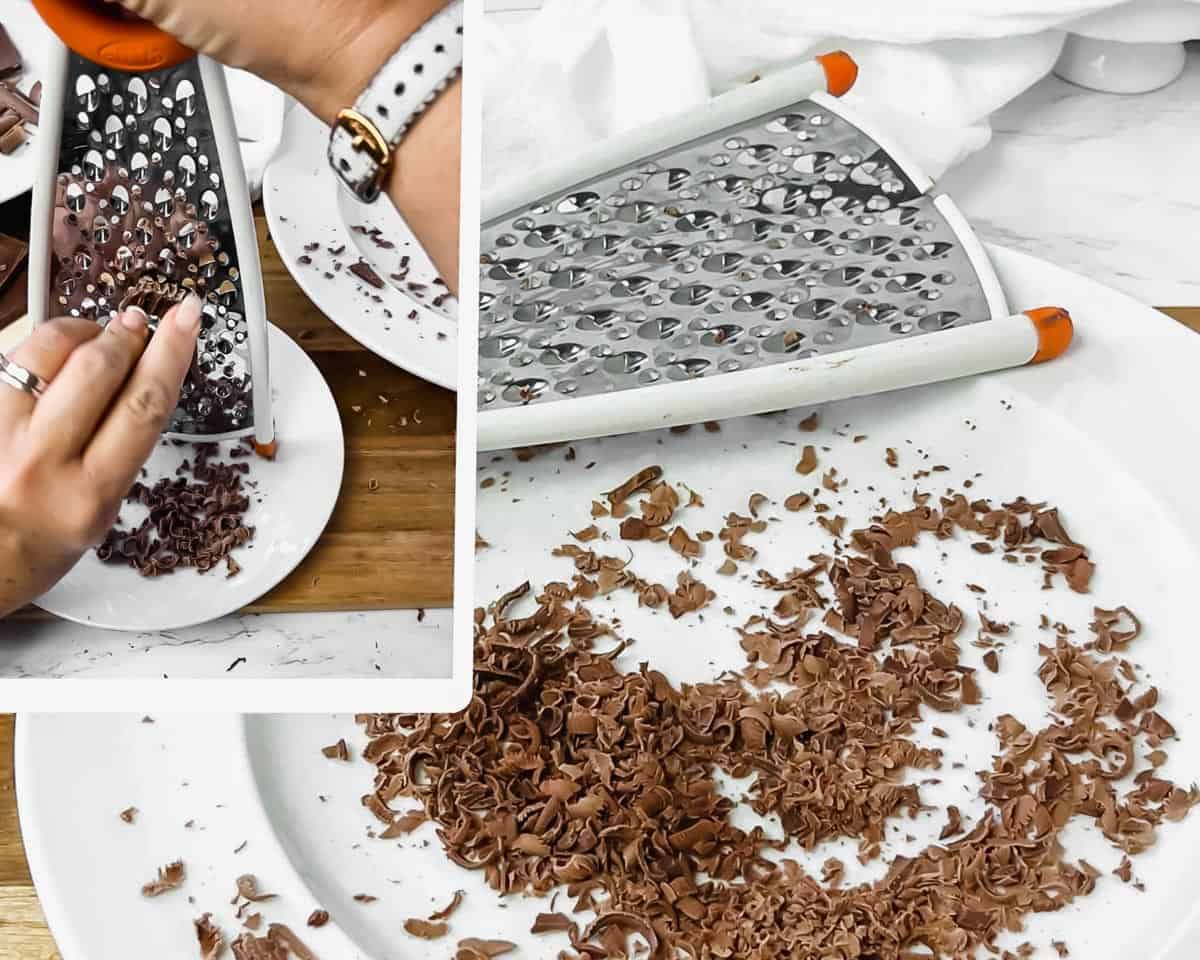
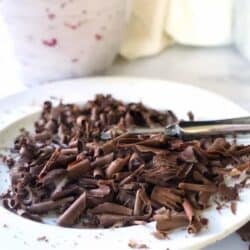
Chocolate Shavings
Use a grater to shred the chocolate bar and make shavings galore to top a dessert!
Factors to Consider when Purchasing Chocolate Bars
- Size. Purchase a bar that the right size for your job. A large 8 ounce bar will cover a full size dessert. For smaller desserts, smaller bars are fine.
- Thickness.The thickness of your chocolate curls will depend on the width and thickness of the chocolate bar you use. A thick bar can give you nice thick curls. A thin edge can give you a thin spiral of chocolate.
- Fat content.You want high fat content in the bar you choose. A high quality dark chocolate bar will be too hard and result in shaved chocolate or short brittle pieces. It's difficult to get good quality curls; from a bar with high cocoa content.
Expert Tips
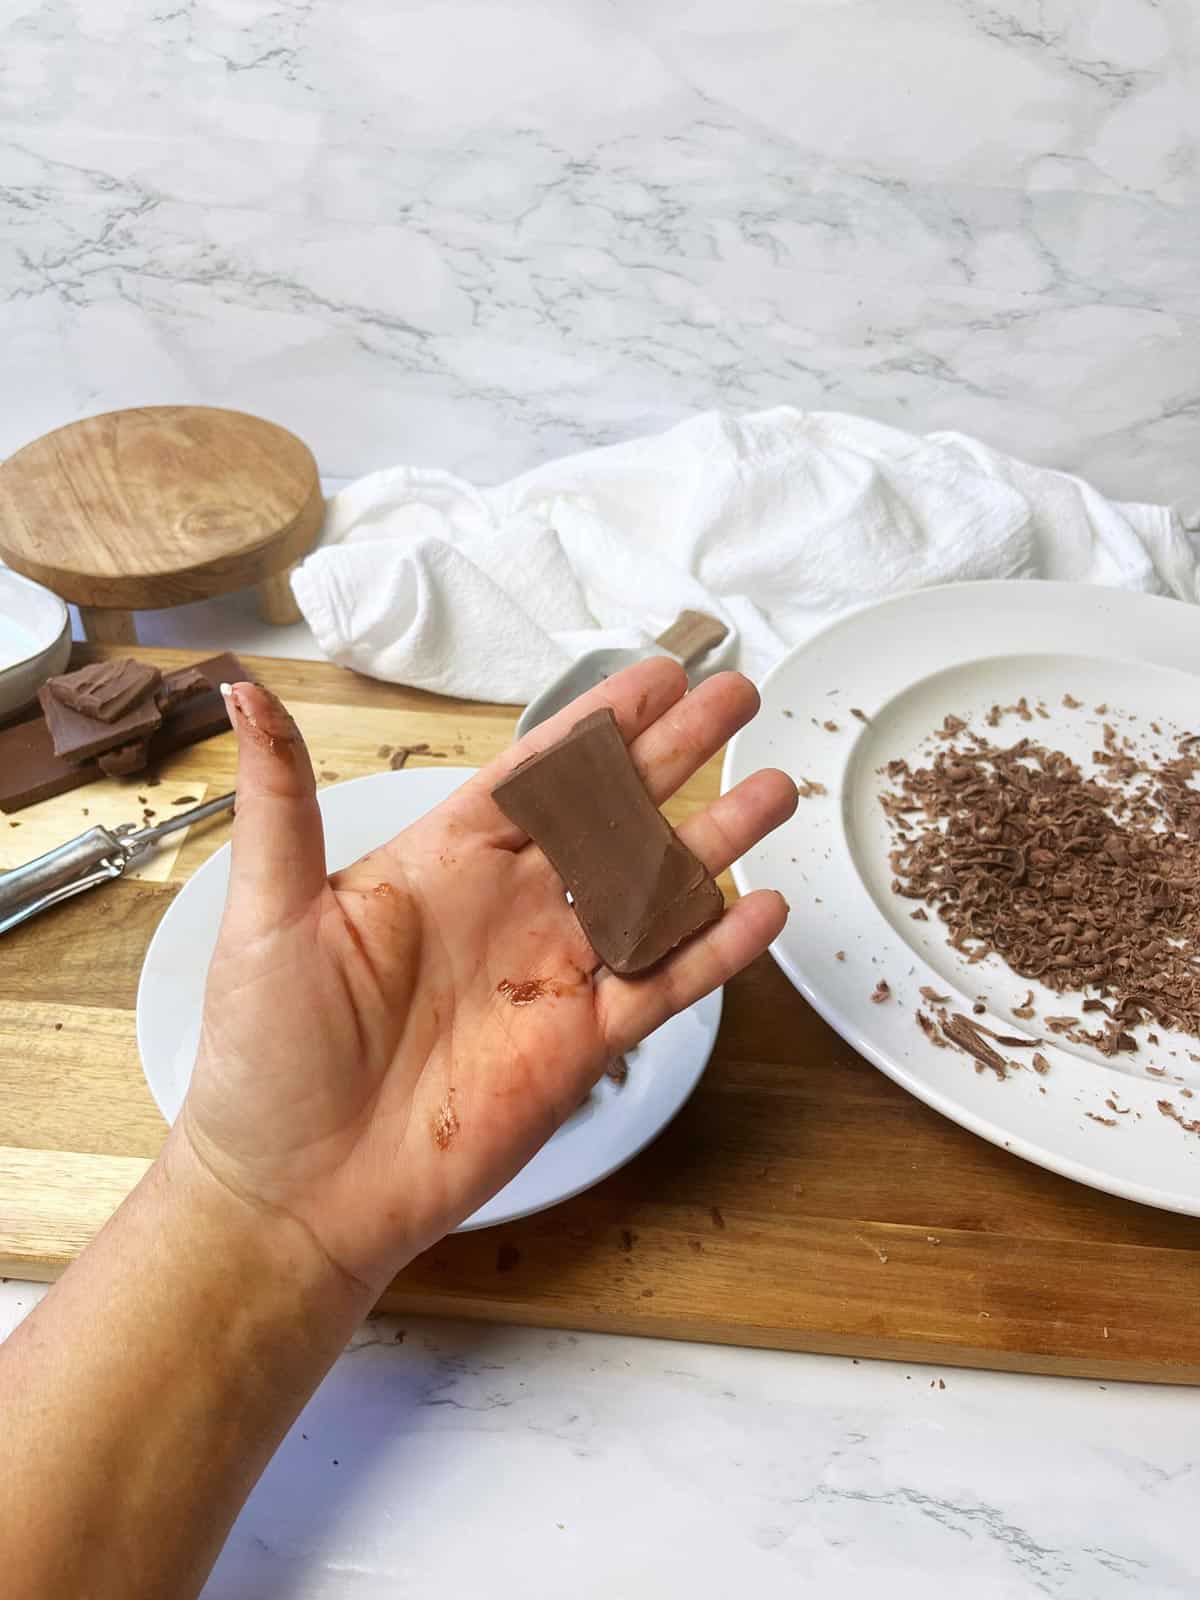
- Start with a room temperature chocolate bar. It's good to start with a room temperature chocolate bar. If it's stored in the fridge, try microwaving for about 10 seconds before shaving chocolate. The softer bar allows you to dig into the bar and create defined curls.
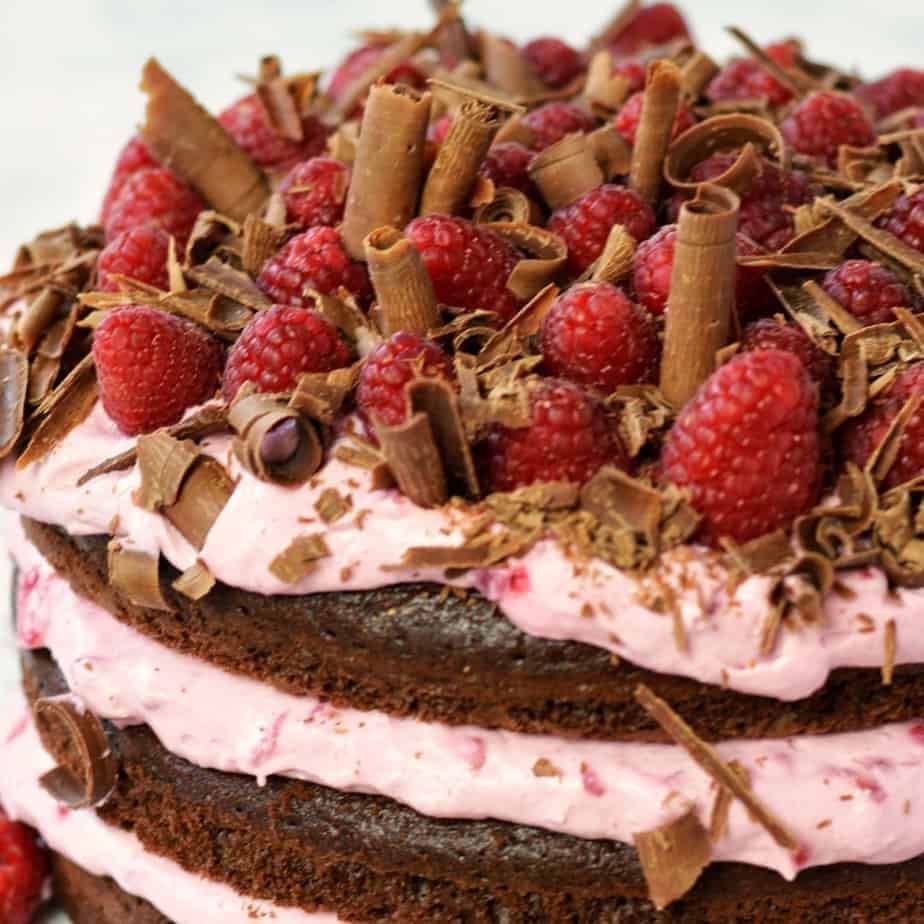
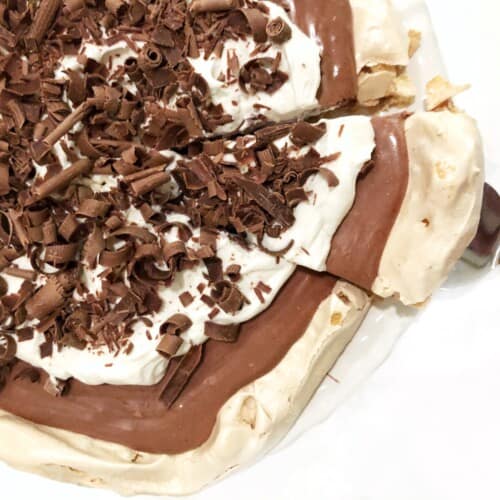
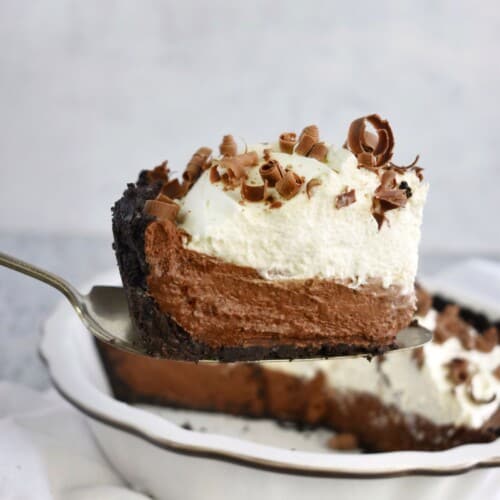
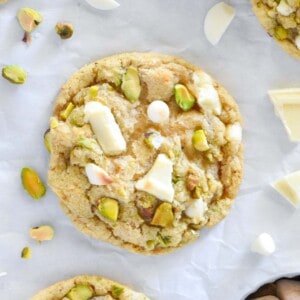
- Chocolate curls are an elegant garnish for any dessert. They make beautiful cake decor. Try them atop cream pies, trifles, parfaits, tortes and hot chocolate.
- To shave chocolate there are a variety of methods. You can do it with a paring knife. Also, you can use a metal spatula to scrape melted chocolate that has hardened. We think a peeler on a chocolate bar is the easiest technique!
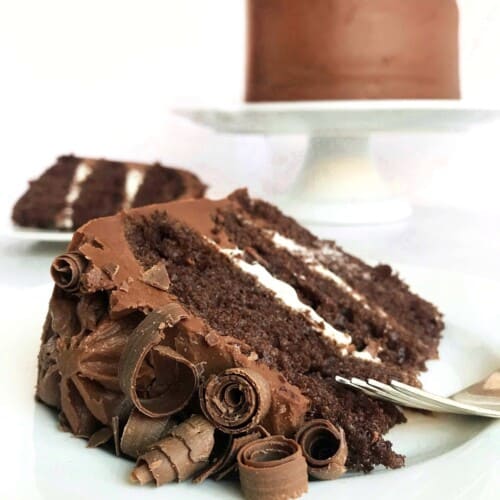
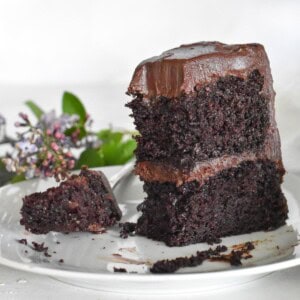
- Chocolate decor can elevate your dessert to pro level. For a dessert that's covered in chocolate curls like the chocolate raspberry cake (below), you'll probably use an entire large Hershey's chocolate bar. The simple addition of chocolate curls can elevate your dessert into something special with that looks like a came from a pastry chef.
How to Store Curly Chocolate
Once you have enough curls, set them aside in the refrigerator to keep them firm. They're quite delicate, and can break and melt easily. As a result, you don't want to handle them until you're ready to use them.
Chocolate curls can be frozen for up to three months. Freeze them in an airtight freezer container, taking care to stack them gently in the container. Do NOT overfill the container, because the curls can break.
You may also enjoy these desserts with chocolate curls!

P.S. If you tried this recipe or any other In Fine Taste recipe take a second and rate it below! We love hearing what you think. Let's stay in touch! Sign up for our newsletter or follow us on Facebook, Instagram, TikTok, Youtube or Pinterest for more recipe ideas.
How to Make Chocolate Curls
Ingredients
- 1 Large Hershey Bar approximately 8 ounces.
- 1 Standard, straight vegetable peeler. Don't use a peeler with a guard.
Instructions
- There are many ways to make chocolate curls. We think making chocolate curls with a vegetable peeler is the easiest. Using a candy bar is the simplest method with consistent results. Our family has been using this method for 50 years!
- To make a curl, use a standard vegetable peeler on a large, room temperature milk chocolate bar (no nuts).
- Gently peel strips off the bar, rotating as the chocolate warms in your hands. Try to dig into the bar a little and get a grip on the chocolate.
- If you have cold hands, or you can't shave curls off the bar, consider placing the chocolate bar in the microwave for 10 seconds ONLY.
Chocolate Swirls
- For swirls, peel the narrow edge of the chocolate bar.
Chocolate Twirls
- Shaving the sharp edge of the chocolate bar will create twirls.
Chocolate Curls
- For fat curls, shave the flat side of the chocolate bar with your peeler.
Chocolate Waves
- Make "C" shaped waves with your cheese grater or using short strokes of your peeler.
Chocolate Shavings
- Use a grater to shred the chocolate bar and make shavings galore to top a dessert!
Lara says
thanks!
Djean says
Love looking at this! Adds so much to the desserts!
Cindy says
This really adds a whole new level to the cake presentation, and it's not even time consuming. Thanks!