A versatile breakfast, brunch or dessert pastry, cherry cream cheese danish is as delicious as it is pretty! Soft brioche dough is filled with sweetened cream cheese and cherries, braided, baked until golden, and drizzled with vanilla glaze.

Jump to:
Why You'll Love this Recipe
Top Reasons You'll Love this Cream Cheese Braid
- Delicious. This cherry braid is flavorful and so good!
- Beautiful. Cherry cream cheese Danish looks like it came from a French bakery.
- Popular. Everyone loves the cherry cream cheese braid.
- Easy to Make. It uses simple ingredients and is easy to make.
- Afternoon tea favorite. The cherry cream cheese braid is great for afternoon tea or a midnight snack, it's also great for breakfast or brunch.
- Versatile. The cream cheese braid can be made sweet or savory.
With a few simple tips, you can look like a pastry shop professional as you make this simple cherry cream cheese braid. Its like a cherry cheesecake turned into a sweet roll!
Prep time for this cherry cheese Danish recipe is fairly quick. You do, however, need to allow time for the dough to rise. There’s no active prep during this part, but take the timing into consideration when you’re baking.
Ingredient Notes
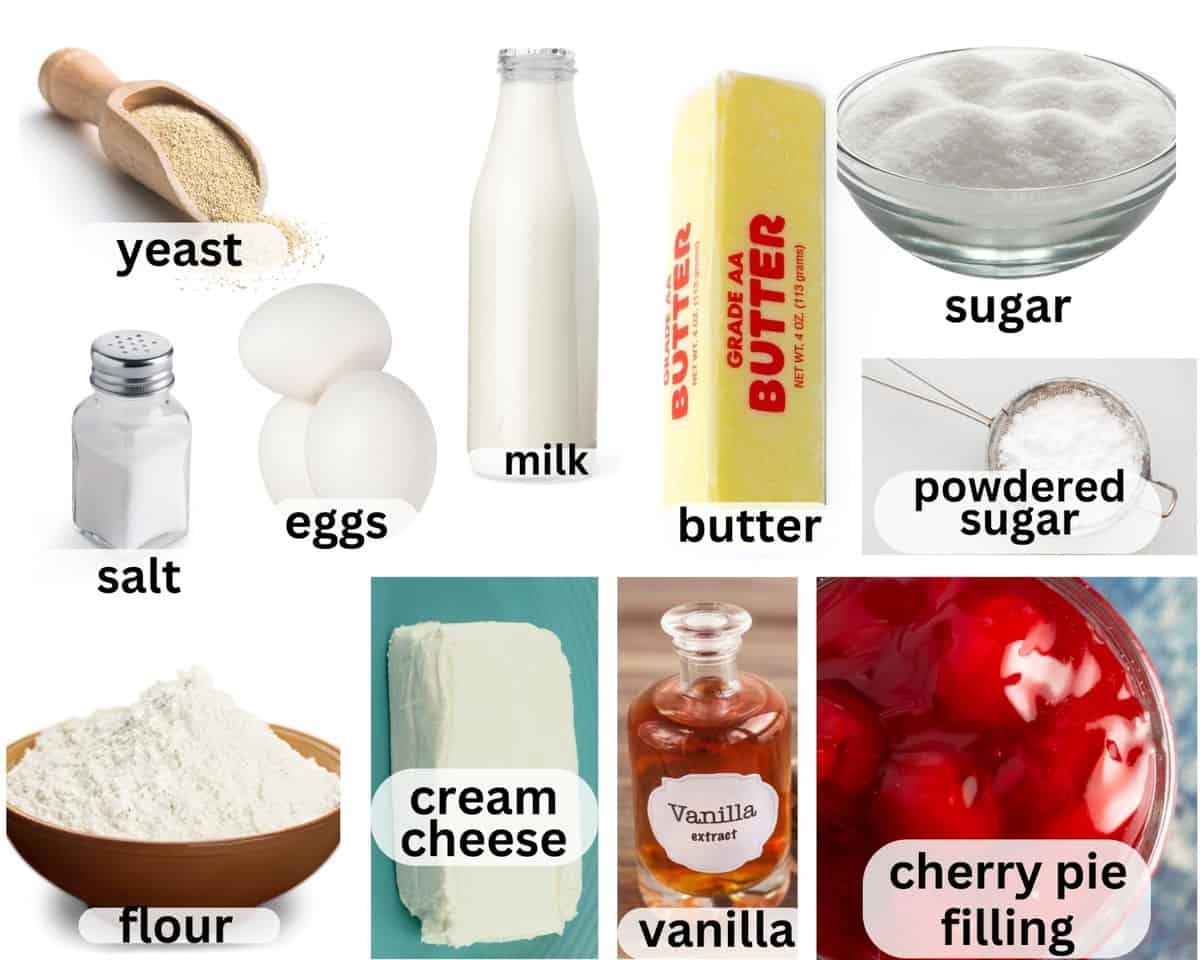
- Dry Yeast. Yeast is a leavening agent. It helps the cherry cream cheese braid rise to a soft texture.
- Milk. Milk is enriches the dough. As it warms, its steam helps leaven the bread. It’s also used as the liquid in the glaze.
- Butter. Butter tenderizes and adds flavor to the dough. It’s also used in the cream cheese filling where it adds smoothness and flavor.
- Sugar. Sugar adds sweet flavor to the dough and helps tenderize it.
- Eggs. Eggs add richness and structure to the dough for this cherry Danish recipe.
- Salt. Salt is a flavor enhancer and brings out the flavors in the braid dough.
- Flour. Flour is the foundation of the braided sweet roll dough. It gives structure to the bread.
- Cream Cheese. It forms the base of the filling for this cream cheese braid.
- Vanilla. Vanilla gives flavor to the sweet cream cheese filling and to the vanilla glaze.
- Cherry Pie Filling. We used canned cherry pie filling for the filling in this recipe. It adds bright flavor and color, and is the main attraction in the cherry cheese Danish.
- Almond Extract (optional). Almond extract will add depth of flavor to the cherry pie filling.
- Powdered Sugar. Powdered sugar sweetens the cream cheese filling, and sweetens and thickens the glaze for the finished cherry braid.
How to Make this Recipe
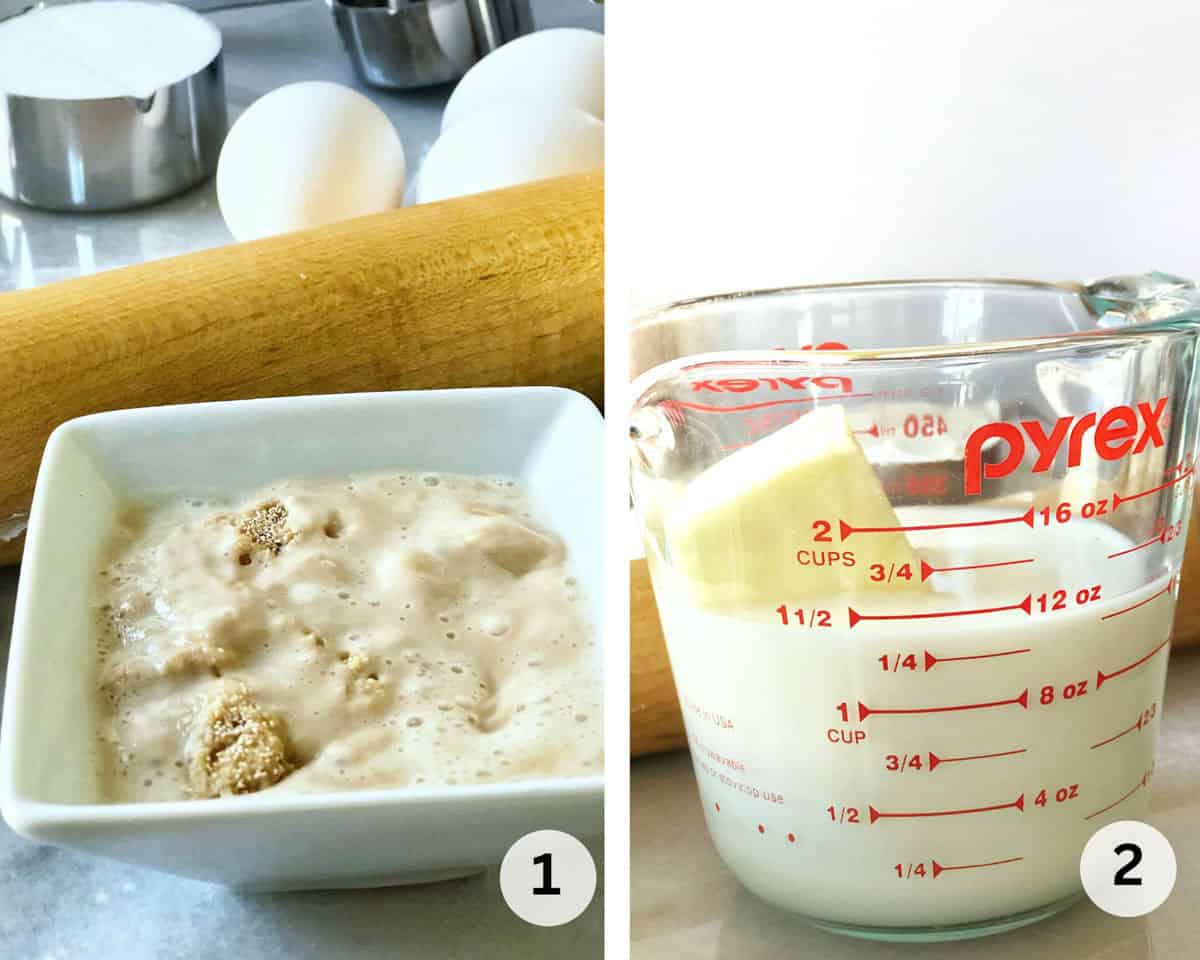
- For the dough: Add yeast to warm water (110 degrees – hotter water will kill yeast.) Let it bubble up to activate and soften yeast.
- Melt butter in milk (place butter in milk in glass measuring cup; put in microwave until melted.)
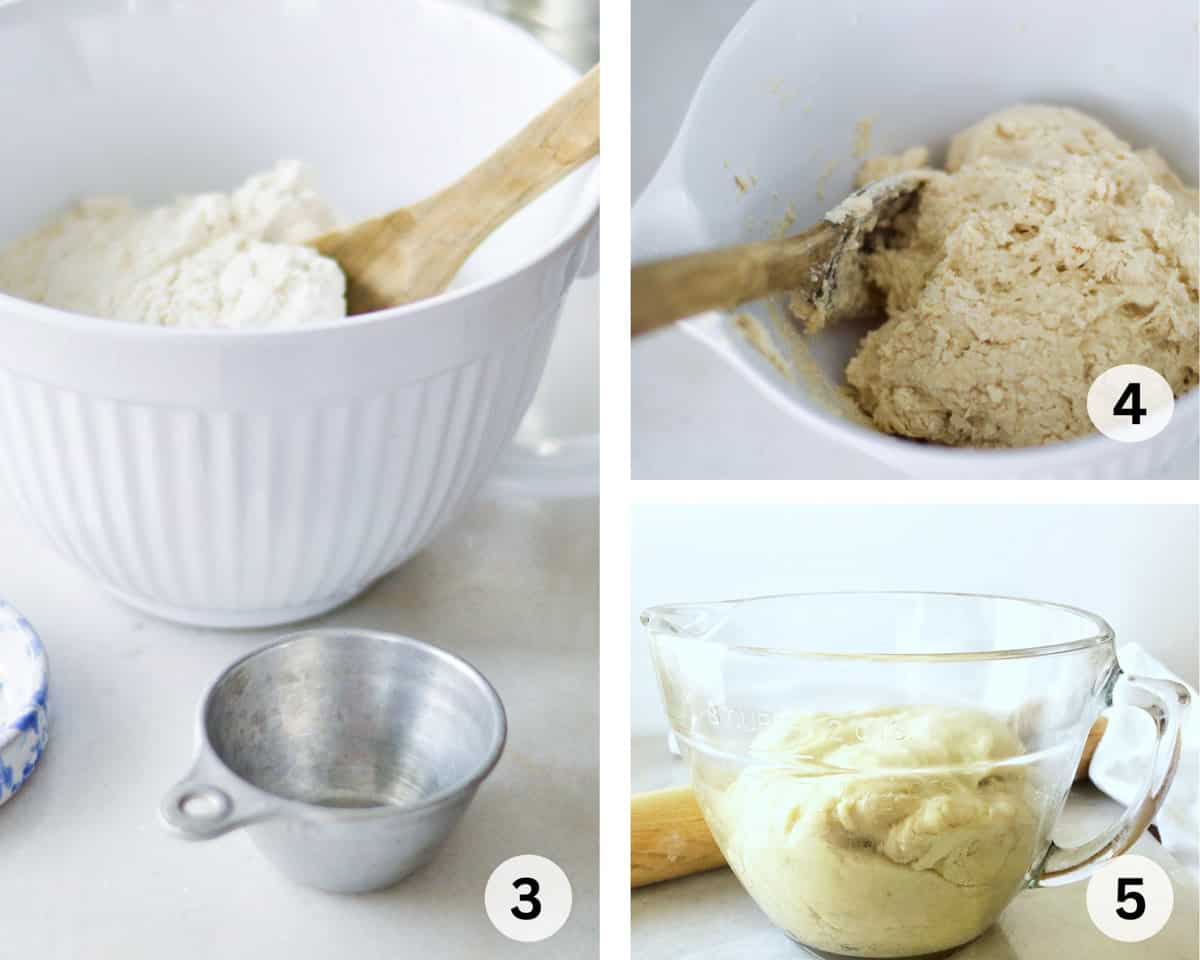
- In a large mixing bowl add yeast, sugar beaten eggs, and salt. Stir gently, then add cooled milk/butter.
- Add half of flour and beat for 5 minutes, then add rest of flour to make a soft dough.
- Place dough in greased bowl. Cover and allow to rise in warm place until double in bulk.
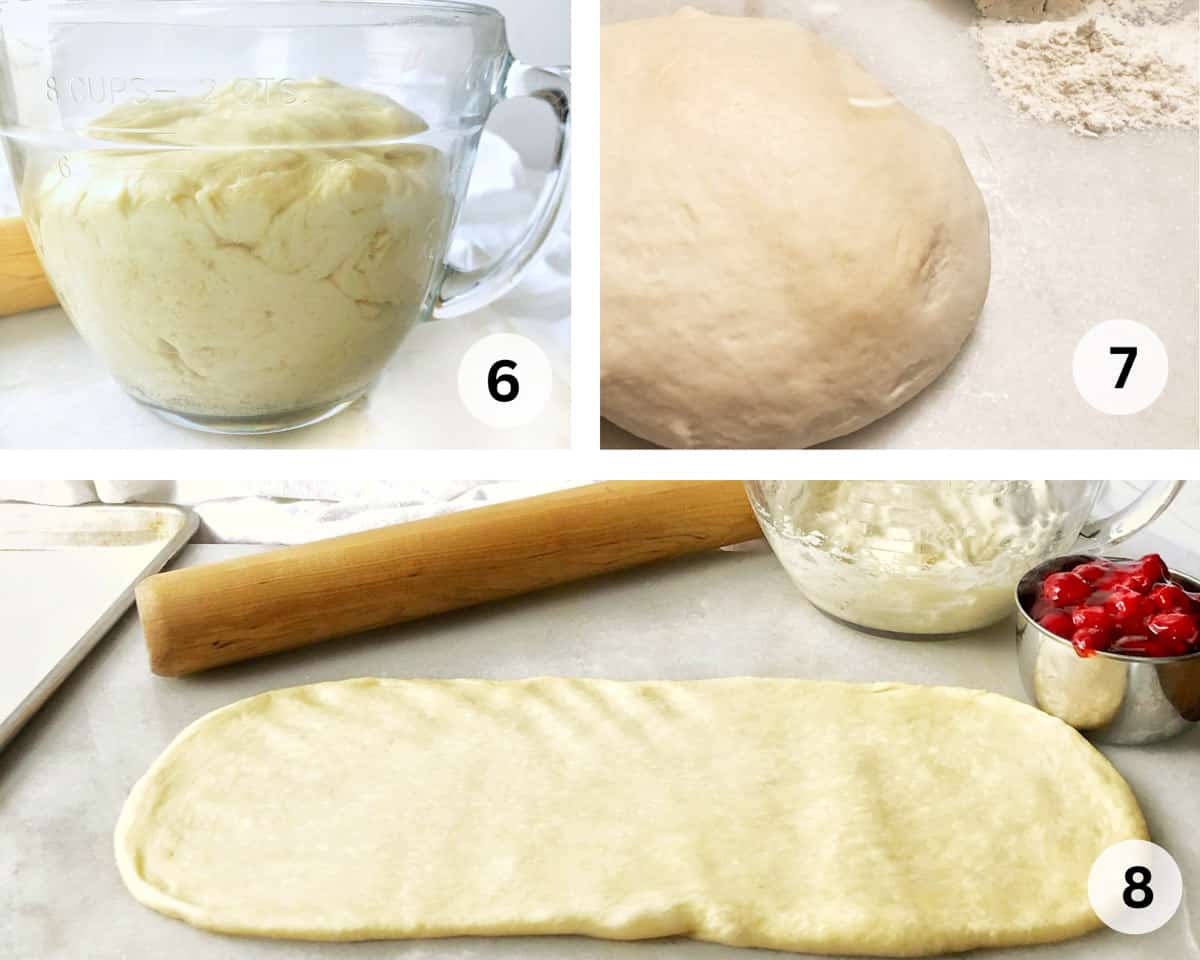
- Punch down dough.
- Let dough rest five minutes.
- Roll dough into a rectangle.
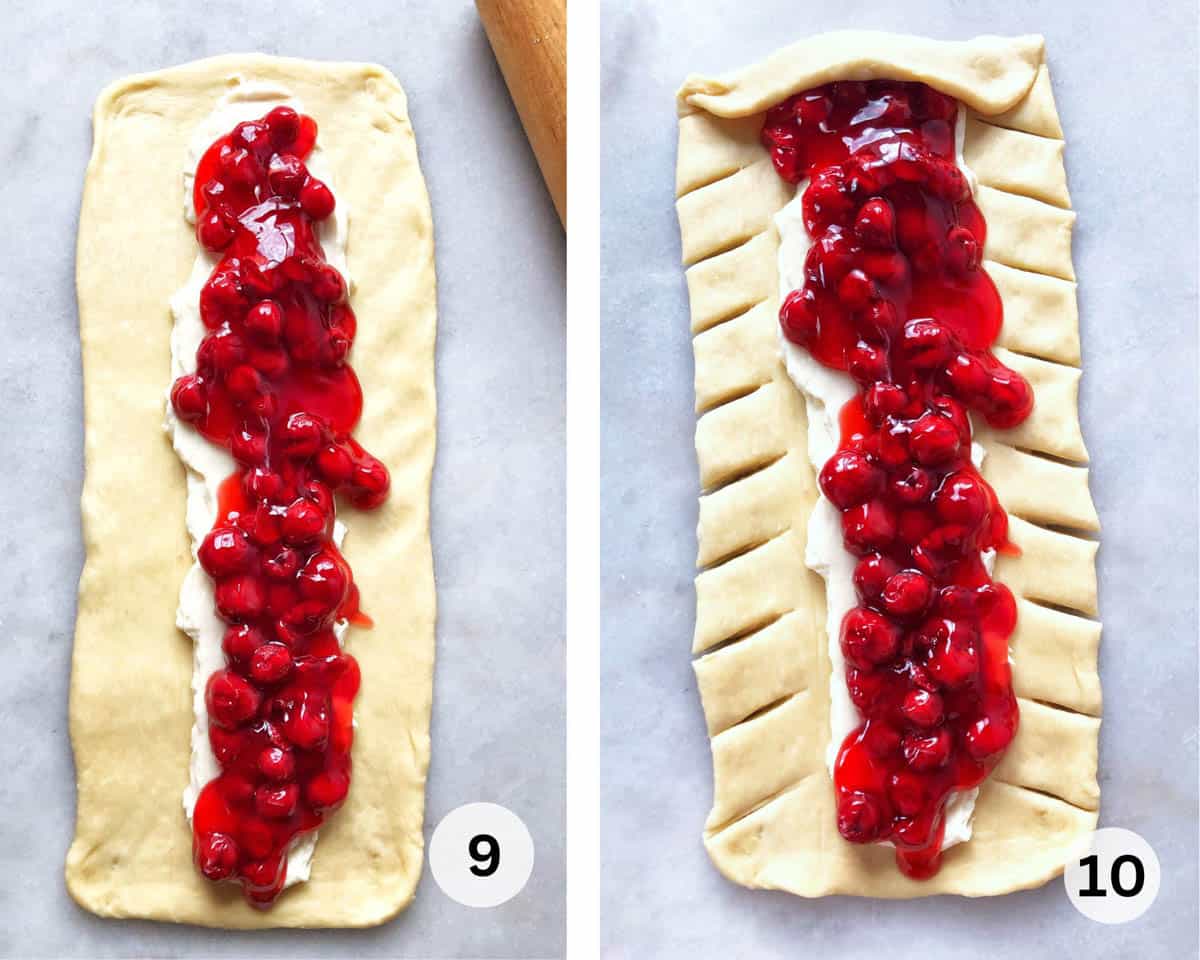
- For the cream cheese filling beat together ingredients for cream cheese filling until softened and blended. Next lightly mark dough lengthwise in thirds. Then spread cream cheese filling down middle third of dough. Leave an inch clear at top and bottom of dough. Next, spread cherry pie filling down middle third of dough over cream cheese mixture. Make sure to leave an inch clear at top and bottom of dough.
- Using a sharp knife, cut slash marks about 2-inches long and 1-inch wide down each side of dough (see picture).
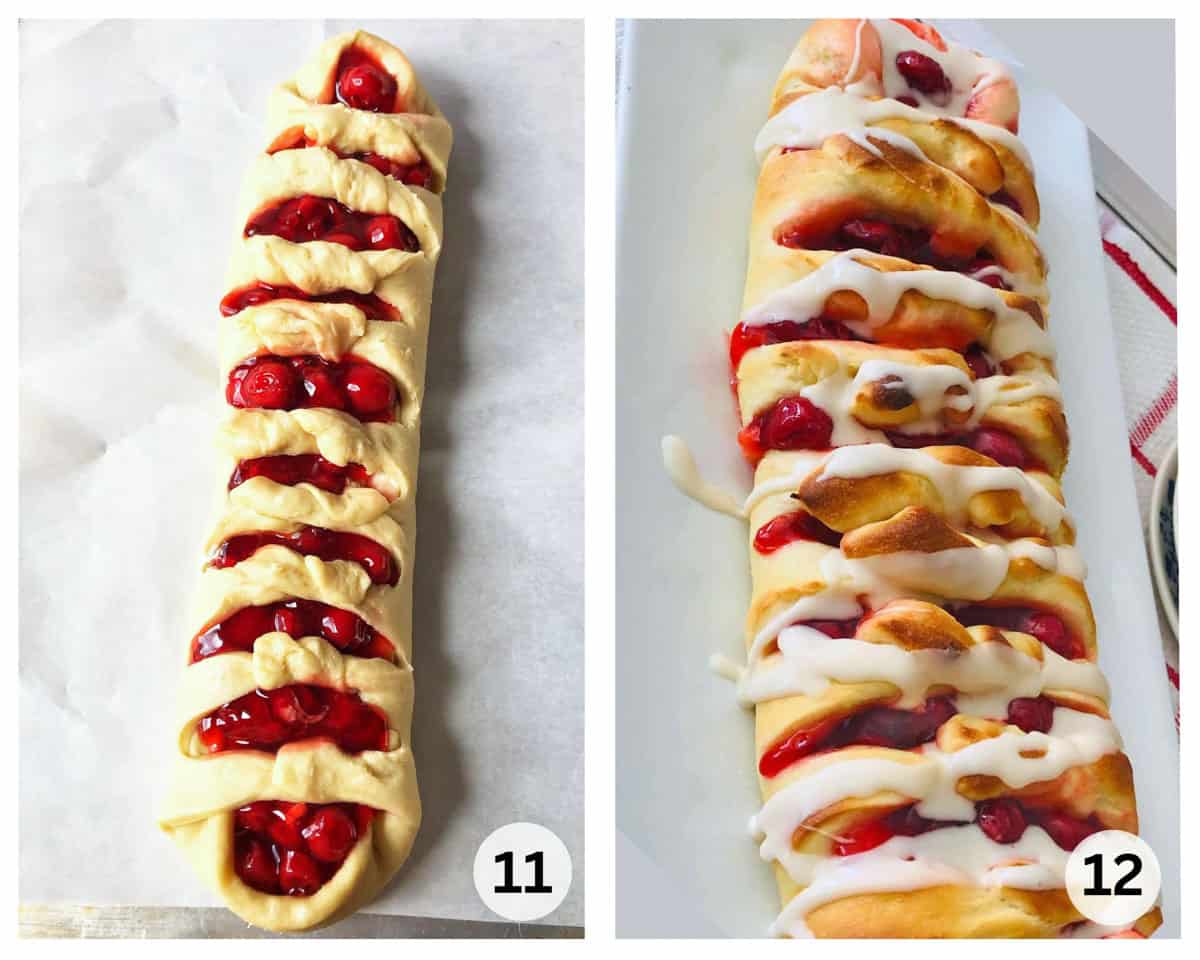
- Tuck top and bottom of dough up over filling. Bring top right and left tabs of dough to middle and overlap them about an inch, then twist together.
Repeat this motion until all tabs are joined. (This braiding method allows filling to show through and makes a beautiful presentation. Place cherry braid on a greased baking sheet or parchment paper. Let braid rise about 45 minutes or until nearly double in size. Lightly brush with melted butter. Bake at 400 degrees 10-12 minutes until dough is lightly browned. Remove from oven and let cool.
- For the glaze: When cream cheese braid has cooled, mix glaze ingredients together and place in a pastry bag or sandwich bag with corner cut. Pipe on glaze in a zig-zag pattern across braid.
Filling Ideas
The dough recipe and instructions for this cream cheese braid are great with any savory or sweet filling that appeals to you! It’s a versatile recipe that’s good to have in your repertoire. Some of our favorite fillings include:
- broccoli, chicken and cheese
- mozzarella and pepperoni
- taco meat, cheese, tomatoes and green onions
- sliced apples, cream cheese, cinnamon and sugar
- almond paste and peach pie filling
- any fruit pie filling
Many variations are delicious served with a sauce or a glaze over the top.
Alternate Braiding
We love an open braid to show off the color, like our cherry cream cheese braid does. Some fillings work better with a closed braid. We like to make our recipe of chicken, broccoli and cheese with a closed braid to keep the chicken moist.
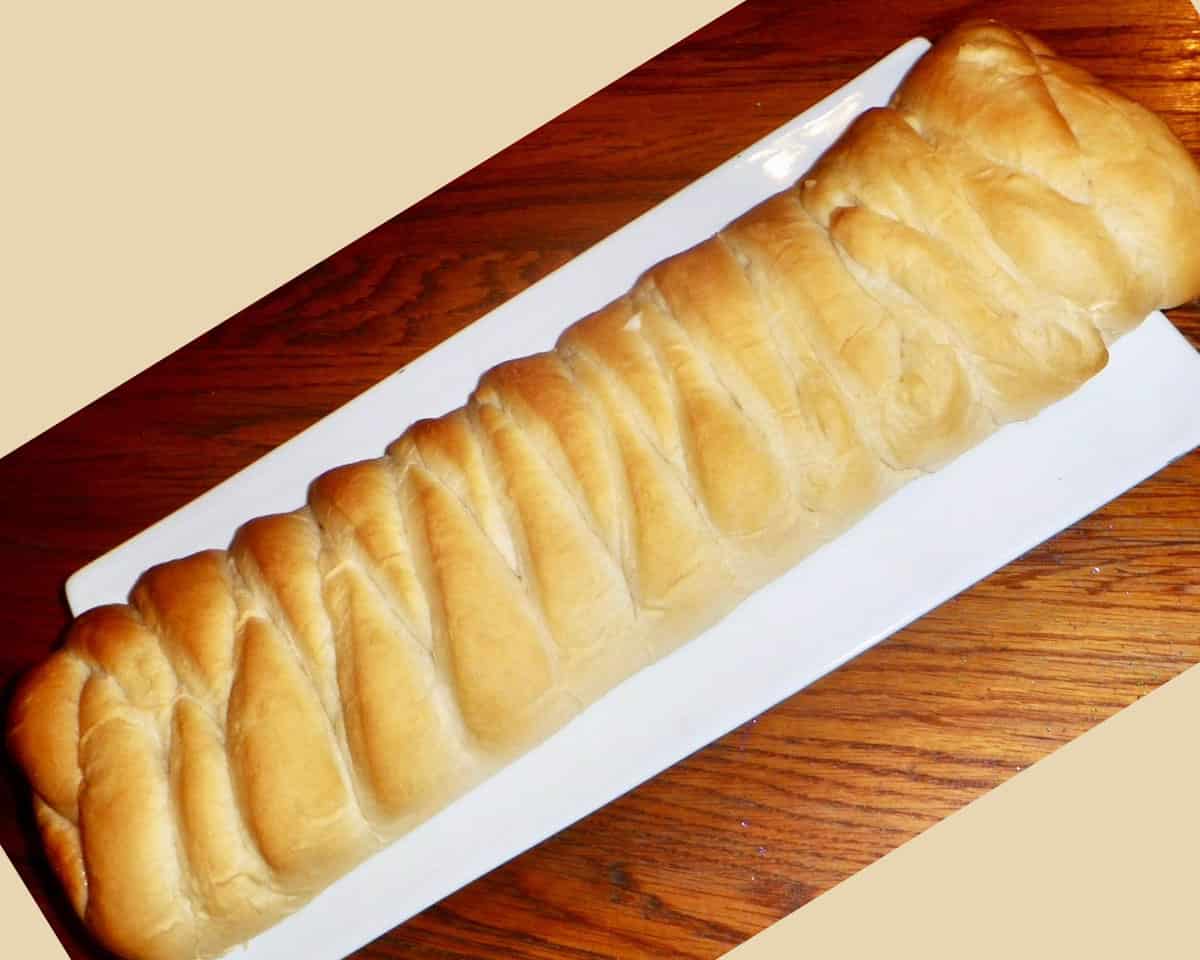
To do this: Fold the ends of the dough up, and over the top of the filling. Fold one strip across to the other side of the filling and pinch it down. Then take a strip from the opposite side and cross it over the top of the opposite strip and pinch down. Repeat until you have made a criss-cross (braid) pattern on the top of your dough and fillings.
Expert Tips
- Make Sure Yeast is Active. If your yeast is old it may not get bubbly when you mix it with sugar and milk. Look to see that your yeast is bubbly or foamy and active before proceeding. We'd hate for you to waste your ingredients on a dough that won’t rise.
- Don’t underheat or overheat milk. If your milk is too hot it can kill the yeast, if it is not warm then the yeast may not activate.
- Spoon and Level Flour.Too much flour can make these rolls dry. Stir the flour up (it compacts) and spoon and level the flour before using. We have a guide on how to measure flour if you need to reference it.
- Use Room Temperature Butter. It's easier to get smooth dough, and creamy, cream cheese filling too.
- Try speed rise method. To speed dough rising, heat oven to 200 degrees then turn it off. Wet, then ring out a clean cloth and place it over bowl of dough. Place dough in oven on top of a hot pad. Close oven. (Make sure oven is off.) The dough should double in bulk in about half the time it would take on the counter.
Frequently Asked Questions (FAQs)
Yes. You should grease the pan you plan on baking the cherry braid on with cooking spray or shortening.
Be careful not to add too much flour or over bake the cherry braid. Both of these will make your pastry dry.
Most bakers will tell you bread flour is the way to go! Bread flour has a higher protein content which will give you more structure in your baked goods, giving a fluffier and better texture to your braid.
You can make this cherry cream cheese braid using a store-bought crescent sheet, or package of crescent rolls. Lightly roll the crescent roll dough to press seams together, then use the rectangle as you would in the recipe.

Serving and Storage
- Serve cherry cream cheese Danish warm or at room temperature. Re-heat a slice of the cherry braid in the oven, or in the microwave for about 10 seconds.
- Store the cherry Danish wrapped tightly in plastic wrap to prevent it from drying out, in the refrigerator for up to four days.
- To freeze, after the cherry cheese Danish is baked, cool completely. Wrap tightly in plastic wrap and place in an airtight container or a freezer bag. Use within 3 months. When you’re ready to eat, thaw completely, then warm a slice in the microwave about 10 seconds to make soft and gooey.
- To freeze before baking, place cherry cream cheese Danish on a flat sheet in the freezer. Once frozen, wrap the cream cheese braid tightly in plastic wrap and place in an airtight container in the freezer up to three months. When ready to eat, let thaw and rise, then bake according to recipe.

Cherry Cream Cheese Danish
Ingredients
For Dough
- 3 Tablespoons warm water
- 1 Tablespoon dry yeast
- ½ cup warm milk
- ¼ cup butter + 1 Tablespoon melted butter to brush onto pastry before baking.
- ¼ cup granulated sugar
- 2 eggs well beaten
- ¾ teaspoon salt
- 2 ½ cups flour + 2 Tablespoons if needed
For Cream Cheese Filling
- ¾ cup cream cheese
- ¼ cup powdered sugar
- 1 ½ Tablespoons butter
- 1 teaspoon Vanilla
For Cherry Filling
- 2 cups canned cherry pie filling approx. 16 ounces
For Glaze
- 1 ½ cups powdered sugar
- 3 Tablespoons milk
- 1 teaspoons vanilla
Instructions
Dough
- Add yeast to 3 Tablespoons warm water (110 degrees – hotter water will kill yeast.) Let it bubble up to activate and soften yeast.
- Melt butter in milk by placing ¼ cup butter in ½ cup milk in glass measuring cup or microwave safe bowl and microwaving for 30 seconds or until melted; then let cool.
- In a large mixing bowl: Add yeast, sugar, beaten eggs, and salt. Stir gently. Add cooled milk/butter. Add 1 ¾ cups flour and beat well for 5 minutes. Add the remaining flour; mix until a soft dough forms.
- Place dough in greased bowl. Cover and allow to rise in warm place until double in bulk. After it has risen, punch dough down.
Form Braid:
- To form braid, roll dough into a long rectangle about 18-inches by 8-inches.
- Carefully mark dough lengthwise in thirds.
- Beat together ingredients for cream cheese filling until softened and blended. Then spread cream cheese filling down middle third of dough. Make sure to leave an inch clear at top and bottom of dough.
- Spread cherry pie filling down middle third of dough over cream cheese mixture. Leave an inch clear at top and bottom of dough.
- Using a sharp knife, cut slash marks about 2-inches long and 1-inch wide down each side of dough (see picture).
- Tuck top and bottom of dough up over filling. Bring top right and left tabs of dough to middle and overlap them about an inch, then twist together. Repeat this motion until all tabs are joined. (This braiding method allows filling to show through and makes a beautiful presentation.)
- Place braid on a greased baking sheet or parchment paper. Let braid rise about 45 minutes or until nearly double in size.
- Bake at 400 degrees Fahrenheit 10-15 minutes until dough is lightly browned. Remove from oven and let cool.
- When braid has cooled, mix glaze ingredients together and place in a pastry bag or sandwich bag with corner cut. Pipe on glaze in a zig-zag pattern across braid.
Notes
- Make Sure Yeast is Active. If your yeast is old it may not get bubbly when you mix it with sugar and milk. Look to see that your yeast is bubbly or foamy and active before proceeding. We'd hate for you to waste your ingredients on a dough that won’t rise.
- Don’t underheat or overheat milk. If your milk is too hot it can kill the yeast, if it is not warm then the yeast may not activate.
- Spoon and Level Flour.Too much flour can make these rolls dry. Stir the flour up (it compacts) and spoon and level the flour before using. We have a guide on how to measure flour if you need to reference it.
- Use Room Temperature Butter. It's easier to get smooth dough, and creamy, stiff cream cheese filling too.
- Try the speed rise method. To speed dough rising, heat oven to 200 degrees then turn it off. Wet, then ring out a clean cloth and place it over bowl of dough. Place dough in oven on top of a hot pad. Close oven. (Make sure oven is off.) The dough should double in bulk in about half the time it would take on the counter.





MIDGE
LOVED IT, I WILL MAKE IT APPLE PIE FILLING AND ADD FRESH APPLES TOO. YOU CA DO SO MUCH WITH THE DOUGH, THANKS FOR A GOOD RECIPE THAT I DID NOT HAVE TO ADD TO.
Kit
Hi there,
I was wondering if these freeze well after or before being baked?
Thanks
In Fine Taste
Hi Kit! Sorry for the late response, some how I missed the notification of your comment.
If you want to freeze this braid, I would make and assemble it, but don't bake it, and then freeze it. It should freeze well for up to 3 months. Then, when you are ready to bake it, let it thaw and rise again before popping it into the oven. Let us know if you try it, we'd love to see and hear what you thought!
- Dianna
Kaya
This was absolutely sinful! It was so GOOD!! My husband loved it. My kids would’ve loved it had I not put cherries in it, but their loss. My only complaint was the dough was good but a tad salty (I used table salt). Maybe half tsp to a tsp less would’ve been perfect. I could taste it, but it wasn’t gross—just slightly too much. But overall, it was delicious and addicting. Saving the recipe for sure!